Roll Formed Metal
Metal panels and studs are shaped from metal coils using a roll forming machine. Tracking both the coil inventory using product classified as Lots - Linked Costs and product codes for multiple length metal panels.
EBMS can also be interface with roll form controllers to communicate orders to the roll forming equipment. Review Interface Rollforming Controllers for configuration and communication steps.
Configure Coil Product
Complete the following inventory product settings for each coil size and color:
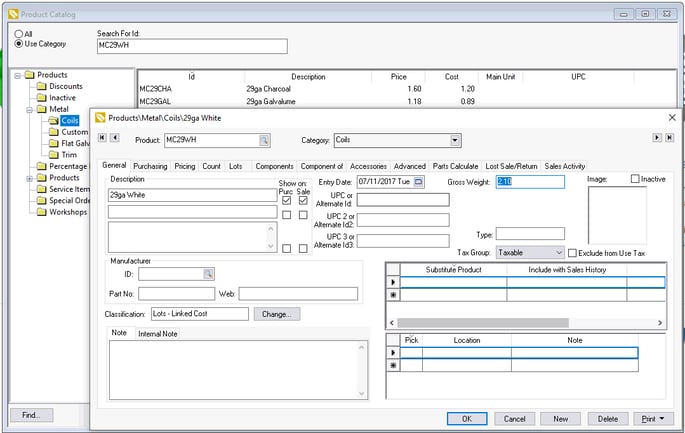
- Create an inventory product classified as Lots - Linked Cost for each coil size and color.
-
Enter the product weights to generate weights for finished product. Review Calculating Total Weight for Shipping for information on setting weight within product records.
-
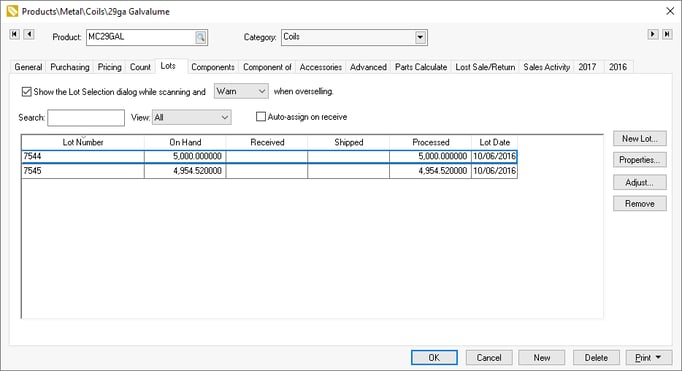
Set the following settings with the product record Lots tab:
-
Enable the Show the Lot Selection dialog while scanning and Warn/Block when overselling option to open the Lots dialog when scanning coil stock product.
-
Enable the Auto-assign on receive option to set lots based on the coil description rather than a serial number. Disable this option if coil barcodes are scanned while coil is used. Review the Scanning the Lot Number using a barcode section within Assigning Lot Numbers to a Sale or Items Consumed.
-
The coil lot number can be assigned by the user when the coil is purchased. The lot can be set by the system by enabling the Auto-assign on receive option. This option should only be used if the coil is uniquely described using the lot description rather than a unique lot number.
-
-
Enable the Replace Key Words in Item Detail within the Parts Calculate tab if the size is included in the description. Review Inventory Settings for Products Using Component Formulas for formatting details and examples.
Review Creating Inventory Lots for instructions on creating lot product.
Configure Metal Panel Product
Create product items for metal panels that are formed and sold to the customer using the following options:
-
Stock panels classified as Track Count products: A separate product item must be created for each color of panel. Note that the same product item can be used no matter the length of the product. Review Instant Manufacturing Batch from Sales Order for steps to manufacture stock panels.
-
Made to Order panels classified as No Count products: A single item can be used for multiple lengths and different colors. These items deduct the coil using an invoice materials list which effectively reduces coil stock when the customer is invoiced.
Complete the following steps:
-
Create the metal panel products classified as either Track Count or No Count. Review Entering New Products for steps to create new inventory items.
-
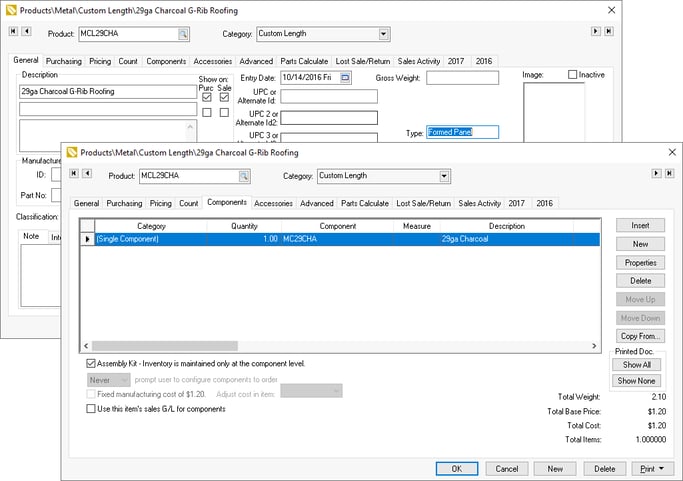
Enter Formed Panel in the Type entry within the product record General tab as shown above.
-
Add the metal coil product within the product record Component tab that is used to create metal panels. Review Adding Components to Create an Assembly Kit for steps to add the metal coil components to the metal panel items.
-
Configure the settings for the multiple length panels in the product record Parts Calculate tab. Review Component Formula Tools Overview for details on this option.
Selling Multi-length Metal Panels
Quote and Price Metal by the Linear Foot. Are you still using spreadsheets and calculators to price and sell metal packages? Eliminate complex inventory codes and calculations for each possible length and let EBMS do the hard work. Tools to price and sell by linear feet and inch are included in Point-of-Sale. Simply enter the type and dimensions of the metal to easily produce accurate quotes.
Complete the following steps to enter a multi-length panel:
- Open a sales order. Open a new sales order by going to Sales > New Sales Order in the EBMS header menu or clicking the plus side next to Invoices & SO's on the main page. Open an existing sales order by clicking into Sales > Invoices & SO's and filtering by the Sales Order status.
-
Enter the optional color code if no count panels are being entered. Note that color-specific product codes must be entered for all Track Count stock product.
-
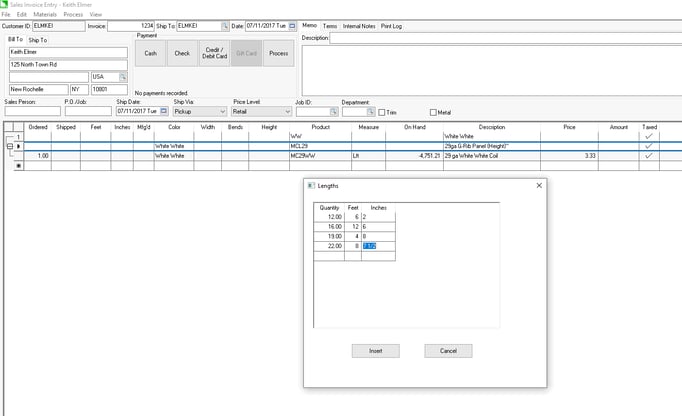
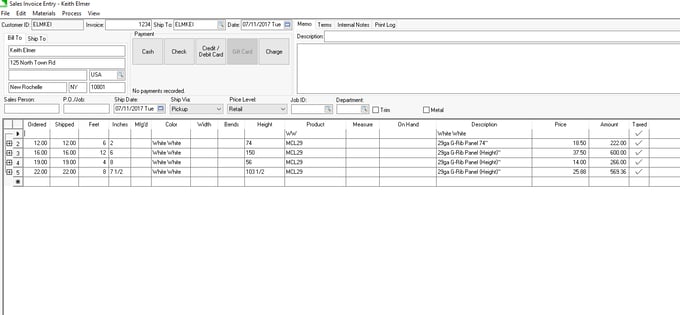
Enter the metal panel product code. The multiple panel dialog will open if A) the product record General tab > Type setting contains Formed Panel and the feet and inches setting are not populated for the item. This multiple panel dialog gives the user the ability to enter multiple lengths at once all with the same profile. See image above for a dialog example.
-
Click Next to create multiple sales order lines that contain metal panels.
-
The metal panel dimensions of individual panels can be changed by changing dimension settings. Review Component Formula Tools Overview for more information on this powerful tool to calculate variable length components.
Assigning Coil
All metal coil should be classified using the Lots setting as explained at the beginning of this section. The lot setting will open the following dialog to select the coil lot used for this order.
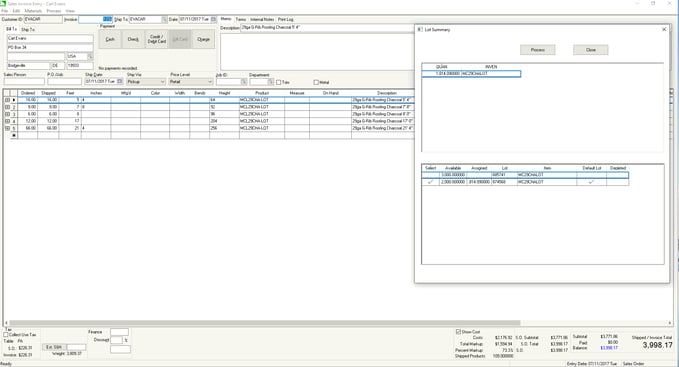
The top pane will list the products listed on the sales order.
The bottom pane shows the available lots. Click the correct lot by clicking Select on the left side.
Enable the Depleted line option to indicate to the system that the balance of the lot has been used. An inventory adjustment will be created when this coil is processed to remove any coil inventory balance. Review Adjusting Inventory Count and Value for information on the inventory and financial transactions created by an inventory adjustment.
NOTE: This feature is a packaged script that may require a separate installation. Contact your Koble Systems account manager for steps to add a packaged script.