Set Up Advanced Metal Tools
The proper configuration of the metal tools can make order entry, metal forming, pricing, and inventory management of metal products efficient and more accurate. The proper configuration allows the user to quickly compile an order with common color or sizes.
Product and Kit Setup
Complete the following steps to configure:
-
Open a product from the Inventory > Product Catalog from the main EBMS menu. Double-click on an item from the list to open the product record.
-
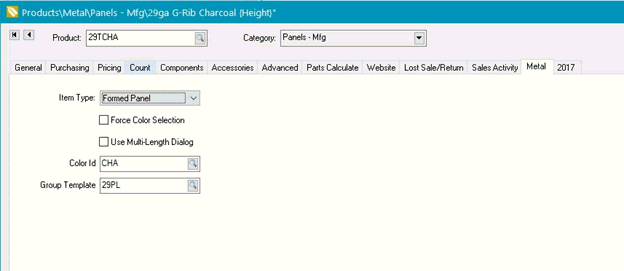
Click on the product record Metal tab. (Note: This tab may not be displayed unless the optional Metal Supply module is installed.)

-
Select one of the following Item Types:
-
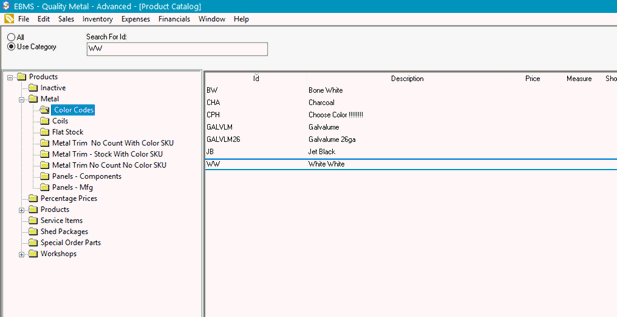
Color Code: This item is a place holder on a sales order or material list and is used to assign a color to all the following items. These items do not have a Color ID assigned, nor a group.
-
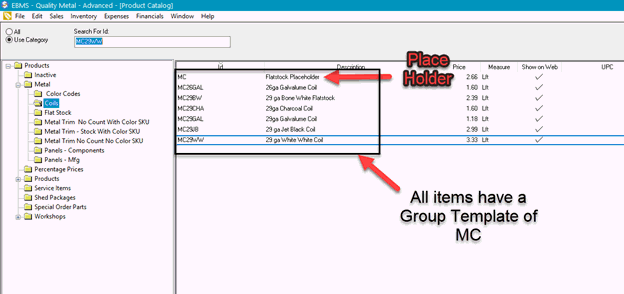
Coil Stock: This identifies coil stock that is used in the product of roll formed metal.
-
Trim Profile: This setting identifies metal panel product. This item can be classified as Track Count or No Count.
-
Package: This item is used as a materials list header that contains a list of metal products. This kit has the ability to calculate sheet lengths from dimension entered on the sales document and can assign colors to items while going through a wizard.
-
-
Enable Force Color Selection for products that do not have a single color identified within the product. This option forces the user to select a color for the components or to select the proper track count item in a materials list.
-
Enable Use Multi-Length Dialog to open the Multi-length dialog when entering an item on a sales order. Packages do not trigger the dialog. The prompt to Configure Components on the product record Components tab is set to Never when this option is enabled.
-
Set the appropriate Color ID item. This value is used in conjunction with the group Template, to determine the proper replacement Product if a color changes, either in a package, or on a sales order – this value is the Product ID of the color of this item, used to populate the color column on the sales order

-
Enter the Group Template product item: This value is common across a group of items, typically a generic code that is used as a place holder for group. For example, in the case of coils, a product (MC) is used as a component of colorless trim profiles and colorless formed metal panels until a color is selected.

Set Up Custom Trim Profile
Custom Profiles should be set up in such a way that the pricing is determined by its dimensions and components, to accurately price the item. This works in conjunction with the VarioDesk Software to aid in designing and pricing the custom trim.
Creating a profile that is totally custom and is not just a modification of a standard profile (like door jamb in variable width return).
-
General tab: No Count Classification, a description that reflects its dimensions (optional) “Custom Trim {Width}" Width x {Dem} Bends” will replace the placeholders with actual dimensions.
-
Pricing tab: Price level to be set to “From Component Pricing” Cost will calculate from component cost, and base is not used.
-
Components tab:
-
Enter the coil ID as a component (we are using the coil UOM as Sqft in the example), with a qty of 1.
-
If a bend's value is included in the cost of the custom trim (recommended), add a component of a No Count item for BENDS, with the selling price as the price per bend.
-
Other costs (such as overhead, Slitting, etc.) could also be added.
-
Turn on the Assembly Kit option at the bottom of the screen.
-
-
Parts Calculate tab:
-
if you have a default length for this trim, enter it in inches in the Default Height Field
-
If you wish to have the description reflect the dimensions, turn on the Replace Key Words in Item Detail – note that this will prevent you from changing the description to a user-defined description – it will overwrite the description with the dimensions.
-
-
Setting the formulas for the components in Components tab.
-
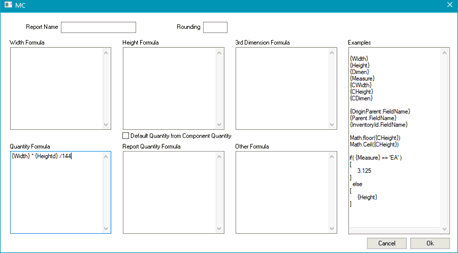
Coil: Right-click on the detail line that contains the coil or coil placeholder and select View Calculation Formula.
-
Quantity Formula: {Width} * {Heightd} /144 which calculates the quantity in sqft, assuming all dimensions are in inches.

-
Bends: Right-click on the detail line that contains the bends placeholder and select View Calculation Formula.
-
Quantity Formula: Enter {Dimen} which holds the number of bends per piece.
-
Review Setup Packages with Metal Components for setup instructions to create a kit of metal items.