Returning a Rental Item
This section explains the steps required when a customer returns rental equipment. The rental equipment must be checked back in after the equipment is returned and an invoice created. Complete the following steps to return rental equipment and invoice the customer:
-
Open the customer list by selecting Sales > Customers from the main EBMS menu.
-
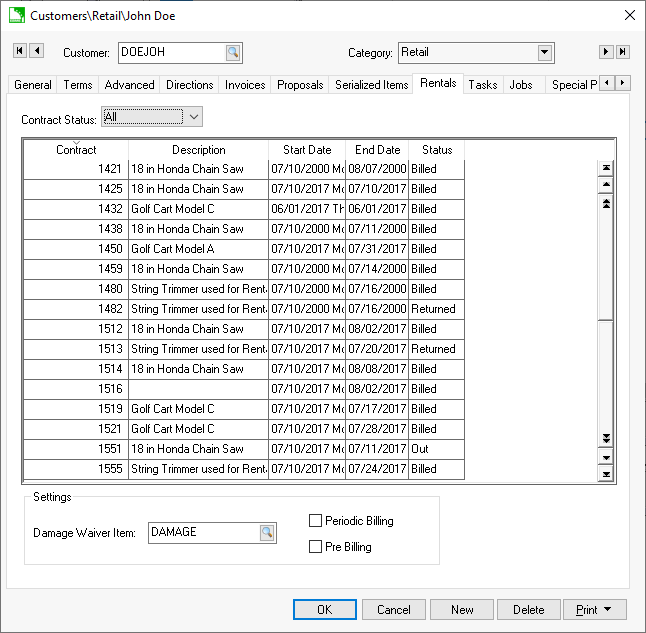
Double-click on the ID for the customer returning the equipment to open their record and click on the Rentals tab.
-
Contracts can be queried for the current customer by changing the Contract Status options. Select the All option to view all contracts or the Out option to only show contracts that are currently out. Double-click on the contract with a status of Out to process a return on an existing contract.
-
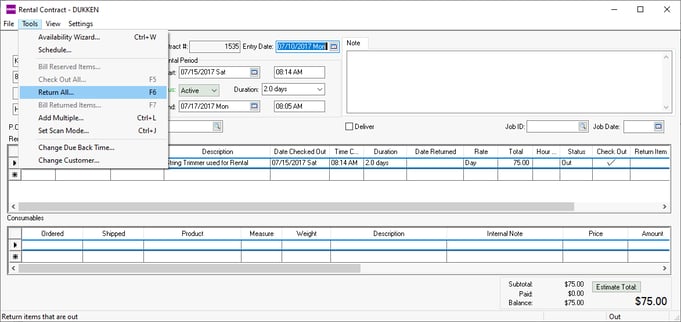
Select Tools > Return All from the contract menu (F7 as a shortcut) to return all items. Review the Returning and Billing Individual items instructions later in the section for details on returning items individually rather than the entire contract.
-
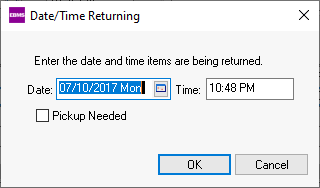
Enable Pickup Needed if rental equipment requires a pickup. Review Managing Rental Deliveries for more details on managing the delivery or pick up of equipment.
-
Enter the Date and Time the equipment was returned. These entries will determine the amount of time of the rental. The entries will default to today's date and time. Click OK to continue.
-
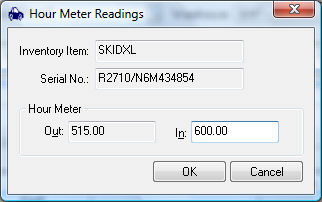
Enter any returning hour meter or micrometer meter readings if they appear. The hour meter and micrometer reading dialogs will only appear if there is a value in the Max Hours or Max Micrometer columns within the pricing tab of the rental item. Review Micrometer and Hour Meter Maximums for more details on pricing and setup for hour meter or micrometer settings on a piece of equipment.
-
Review the total. Notice that the process many change the Time Quantity and Total price if the rental period does not equal the Due Back settings.
-
Select Tools > Bill Return Items from the rental contract menu to invoice the rental.

Review Billing a Rental for more details on billing.
Review Scanning Serialized Rental Equipment for instructions to return rental items using barcodes.
The rental return process can be reversed by disabling the Return Item option for each item.
Returning and Billing Individual Items
Rental items can be returned and billed individually rather than the entire contract. For example, a user may return the trimmer before the chain saw although both were rented on the same contract.
Enable the option within the Return Item column of the rental item that is being returned as shown below. Notice that the Return Item option on the 2nd line has not been checked.
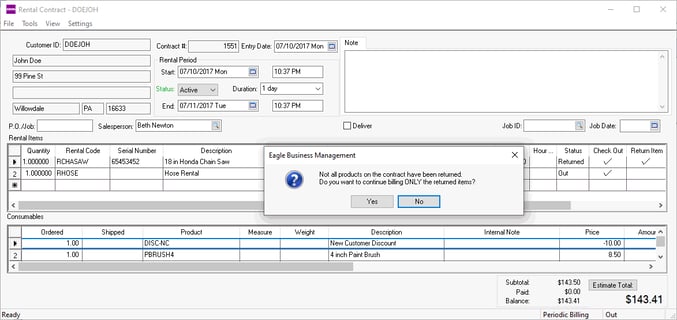
Select Tools > Bill Returned Items from the rental contract menu to bill the returned items to a customer. The message shown above will be displayed. Select the No option to continue billing without returning the remainder of the items before billing. Review the Billing a Rental section for more details on the billing process.
The sales order created from the rental return of the first item can be processed. All additional items returned from the same rental contract will be appended to the same sales order unless the invoice is processed. The following dialog will appear if the user processed the sales invoice before all rental items were returned within the same rental contract: "The invoice attached to the contract has been processed. The new sales order is [sales order ID]. Create?"

Click on the Yes button to create a second invoice for the additional rental items returned.
Review the Processing a Sales Invoice section within the sales manual for more details on processing the sales invoice.
Review Billing a Rental to a Job for more details on applying rental costs to a job rather than billing a customer.
Review Continuing Rental Segment to create multiple rental fee segments within the contract.