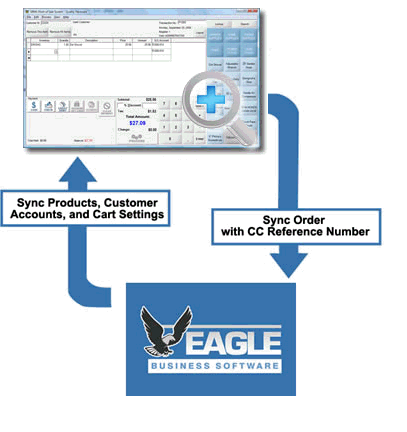
The Synchronization tool is an EBMS enhancement that allows the Xpress POS to operate independently of the main EBMS database or server. The Xpress POS can operate on a POS machine as a standalone software and update sales and order details when the network is established.
The Sync tool is useful in the following situations:
-
The Xpress POS station is needed in a remote location without a current network to the EBMS software: This scenario is common for a portable POS at an event, temporary location, or a trade show.
-
POS is needed at a secondary location that does not have high-speed network connections to the main location.
-
A high-speed POS solution is needed that will operate efficiently regardless of performances issues on the internal data network. The Sync tool allows a user to operate a POS station even if the local area network is down or is experiencing performance issues.
The Sync tool (POS Synchronization Service) must be installed from the EBMS installation utility as shown below:
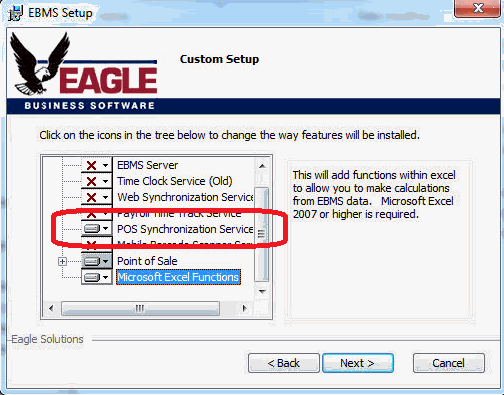
Complete EBMS setup wizard to install the Sync tool. Review the Initial Installation section for instructions on adding features during setup.
Client Options
Right-click on the EBMS Synchronization icon found on the computer task bar tray as shown below:
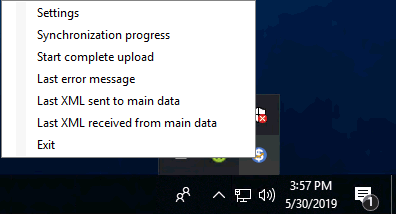
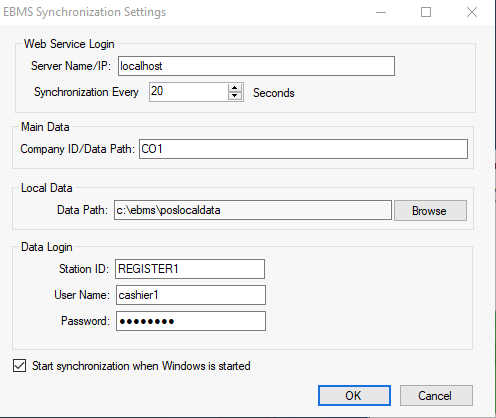
Click on the Settings option to open the following dialog:
-
Set the location of the main EBMS data by setting the Server Name/IP setting and the Company ID/Data Path settings. Review these technical settings with IT staff or EBMS support personnel.
-
Configure the Synchronization timing. This option will cause the Sync tool to attempt a connection based on the timing settings.
-
Set the Data Path of the local Xpress POS data on the local POS station.
-
Set the following Data Login settings to allow access to local data and Sync to the main server:
-
The Station ID must reflect the Point of Sale station profile ID as set up in EBMS. See Configure POS Station Profiles for setup instructions.
-
Enter the EBMS login User Name and Password. See Creating Users and Assigning Rights for details on creating EBMS usernames and passwords.
-
Enable the Start synchronization... option so that the sync tool runs when a POS station is started.
-
Click OK to save the client settings
The following tools can be accessed from the client's task bar tray:
- Synchronization Progress: Select this option to review the status or progress of the Sync tool.
- Start Complete Upload: Use this option to push all information to the server. This step will verify that all data has been communicated to EBMS and that all data on the client is current.
EBMS Server Options
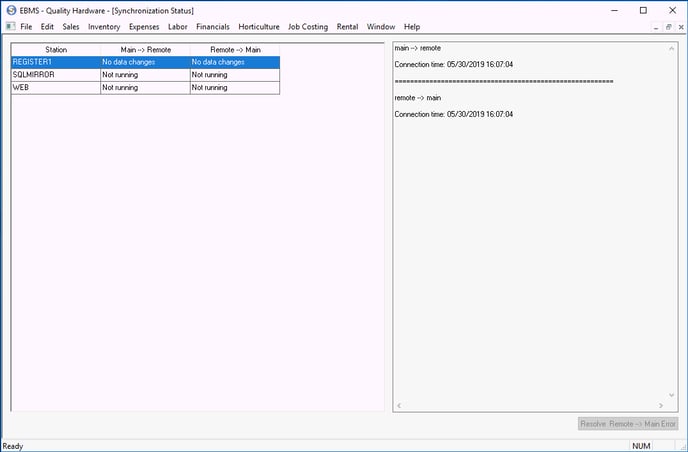
The status of the synchronization of each remote station can be viewed by selecting File > Synchronization Status from the main EBMS menu as shown below:
WARNING: It is important that sales invoices created by Xpress POS and synchronized to EBMS are not altered or deleted in the main EBMS data until the synchronization process is complete.
Notice that the status of changes pushed to the client (Main -> Remote) and the changes pushed from the client to EBMS (Remote -> Main) are shown. Additional information is shown on the log pane for each station that is highlighted.