- EBMS Knowledge Base
- Inventory
- Serialized Items | Purchasing or Manufacturing an Item
-
Client Resources
-
EBMS Main Documentation
- Introduction
- Getting Started
- Getting Started | Initial Installation
- Getting Started | Company Setup
- Quick User Guide | Financial Staff | Accountant
- Quick User Guide | Financial Staff | Accountant | Accountants Journal
- Quick User Guide | Sales Staff
- Quick User Guide | General Staff
- Features
- Reports
- Security
- Server Manager
- Technical
- Technical | Data Import and Export Utility
- Technical | SQL Mirror
- Automotive
- Automotive | Parts Catalog
- Automotive | Pricing
- Automotive | Point of Sale
- Automotive | Product Application
- Automotive | Keystone Interface
- Metal Supply
- Fuel Sales
- Horticulture
- Horticulture | Farm Setup
- Horticulture | Processing Payroll
- Horticulture | Managing the Farm
-
Sales
- Introduction
- Customers
- Customers | Miscellaneous Customers
- Proposals
- Proposals | Processing Proposals
- Proposals | Sets and Templates
- MyProposals
- MyOrders
- Sales Orders
- Invoices
- Materials Lists
- Sales and Use Tax
- Sales and Use Tax | TaxJar
- CRM
- CRM | Auto Send
- Recurring Billing
- Credits
- Customer Payments
- Payment Card Processing
- Payment Card Processing | Gift Cards
- Payment Card Processing | Loyalty Cards
- Payment Card Processing | Verifone Gateway
- Freight and Shipping Tools
- General Ledger Transactions
- Point of Sale
- Point of Sale | Point of Sale Hardware
- Point of Sale | Xpress POS System
- Point of Sale | Advanced Tools
- Signature Capture
- Salesperson Commissions
-
Inventory
- Product Catalog
- Product Catalog | Using Product Codes for No Count Items
- Product Pricing
- Product Pricing | Special Pricing
- Tracking Counts
- Unit of Measure
- Purchasing
- Special Orders and Drop Shipped Items
- Receiving Product
- Barcodes
- MyInventory and Scanner
- Components (BOM) and Accessories
- Components (BOM) and Accessories | Component Formula Tool
- Made-to-Order Kitting
- Configure-to-Order Kitting
- Multiple Inventory Locations
- Multiple Inventory Locations | Creating Locations
- Multiple Inventory Locations | Using Multiple Locations
- Multiple Inventory Locations | Product Catalog Sync
- Multi-Vendor Catalog
- Serialized Items
- Serialized Items | Purchasing or Manufacturing an Item
- Serialized Items | Selling and/or Associating an item with a customer
- Lots
- Product Attributes
- Product Attributes | Selling and Purchasing Items with Attributes
- Product Attributes | Custom Attributes
- Mobile Scanner (Legacy)
-
Labor
- Getting Started
- Workers
- Taxes and Deductions
- Work Codes
- Time and Attendance
- Time and Attendance | Time Track App
- Processing Payroll
- Closing the Payroll Year
- Processing Payroll - Advanced
- Salaried Pay
- Piecework Pay
- Direct Deposit
- 3rd Party Payroll Service
- Subcontract Workers
- Flag Pay
- Prevailing Wages
- MyDispatch
- MyTasks
- MyTime
- MyTime | Communications
- MyTime | Setup
- Tasks
- Tasks | Getting Started
- Tasks | Creating Tasks
- Tasks | Scheduling Tasks
- Tasks | Customizing Task Views
- Tasks | Managing Tasks
-
Financials
- Introduction
- Fiscal Year
- Chart of Accounts
- Budget
- Financial Reporting
- Transactions and Journals
- Transactions and Journals | Journals
- Account Reconciliation
- 1099
- Departments and Profit Centers
- Fund Accounts
- Bank Accounts
- Bank Feed
- Vendors
- Vendors | Miscellaneous Vendors
- Purchase Orders
- Expense Invoices
- Vendor Payments
- AP Transactions
- Landed Cost
- Fixed Assets and Depreciation
- Fixed Assets and Depreciation | Fixed Assets
- Fixed Assets and Depreciation | Fixed Assets | Adding Assets
- Fixed Assets and Depreciation | Processing Depreciation
- Fixed Assets and Depreciation | Disposing Assets
- MyJobs
-
E-commerce
-
Rental
-
Job Costing
-
Manufacturing
Viewing or Changing Serialized Items from the Inventory Item
The details of each serialized item can be reviewed from the product record. Open a product record that has a Classification of Serialized Item. Click on the product record's Serial Numbers tab to view all specific serial numbers associated with that product, as shown below:
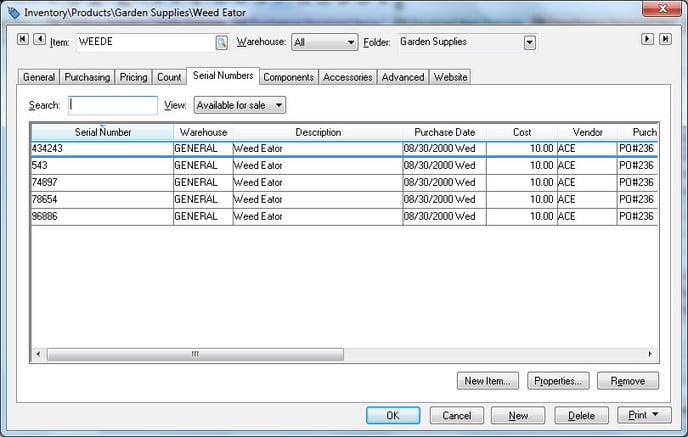
A specific serial number can be located by entering a serial number into the Search entry. To list only serialized items with a specific status, select one of the following options from the View option:
-
Available for Sale: A serialized item has been entered into a purchase order or invoice, but has not been selected within a sales order.
-
Reserved: A serialized item has been selected within a sales order, but the sales invoice has not been processed.
-
Sold: A serialized item has been selected within a sales invoice and the invoice has been processed. The serialized item will show within the Serialized Items tab of the customer record. Review the Viewing or Adding Items within the Customer Window section for more details on the Serialized Item tab.
-
Service Only: The serialized item was not purchased from the user but was manually entered to record service history or other information. Review the Viewing or Adding Items within the Customer Window section for more details on adding serialized items from the customer window.
-
Not Sold
-
Processed Items
Adding a serialized item
An inventory item can manually be added within the inventory item window. It is recommended that items are entered into the system using a purchase order if serialized items were purchased or using the manufacturing window if items were manufactured.
From the product record of an inventory item classified as Serialized Item, go to the Serial Numbers tab. The New Item button on the right side of the page should only be used to make adjustments to the serialized item list.
Click New Item to manually add a serial number to the list and the following window will open:

Enter the product's Serial Number and make any necessary Description changes. Enable the View serialized item when wizard is finished option to enter any additional details into the serialized item record.
Click Next to continue.

The following page reads: "This new serialized item must be put into the inventory assets in general ledger. Select the date for the transaction and the amount to be put in the asset account."
The system will create an inventory transaction if the Inventory Method is set to Perpetual. (To check on this setting, go to Inventory > Options and check whether the Inventory Method is set to Perpetual or Periodic.) The transaction date will be copied for the Date entry and the inventory value shown in the Cost entry will be added to the inventory asset value.
Click Finish to complete the addition process and a new serial number will be added to the product's Serial Numbers tab.
Deleting a Serialized Item
A serial number can be deleted if the item has been destroyed. Use a sales order or the manufacturing screen if the item was sold or used to manufacture another item.
From the product record Serial Numbers tab, select the serial number to be removed and click the Remove button on the right-hand side of the page to delete the serialized item. The following dialog will open if an inventory asset adjustment must be made:
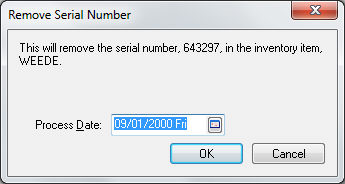
Select a G/L transaction Process Date and click the OK button to complete the deletion.
The New Item and Remove buttons should not be used to correct or change a serial number. To edit a serialized item, highlight the serial number line, click the Properties button to open the item, and then right-click on the serial number and select Change ID from the context menu.