- EBMS Knowledge Base
- E-commerce
- Site Administration
-
Client Resources
-
EBMS Main Documentation
-
Sales
- Customers
- Proposals
- Proposal Sets and Templates
- Sales Orders
- Sales Invoices
- Materials Lists
- Sales and Use Tax
- TaxJar
- Recurring Billing
- Customer Credits
- Customer Payments
- Card Processing and Koble Payments
- Gift Cards and Loyalty Cards
- Verifone Gateway and Point Devices
- Freight and Shipping
- General Ledger Transactions for Sales
- Point of Sale and XPress POS
- Point of Sale Hardware
- Salesperson Commissions
-
Inventory
- Product Catalog
- Using Product Codes for No Count Items
- Product Pricing
- Special Pricing
- Tracking Inventory Counts
- Unit of Measure (UOM)
- Purchasing Stock
- Special Orders and Drop Shipped Items
- Receiving Product
- Barcodes and Inventory Scanners
- Components, Accessories, and Bill of Materials
- Component Formula Tool
- Made to Order Kitting (MTO)
- Configure to Order Kitting (CTO)
- Multiple Locations: Warehouses, Divisions, Departments
- Sync Product Catalogs between Companies
- Vendor Catalogs
- Serialized Items
- Lots
- Product Attributes
-
Expenses
-
Labor
-
Financials
-
Tasks and Work Orders
-
Job Costing
-
Manufacturing
-
Rental
-
Apps
-
E-commerce
-
EBMS Automotive
-
EBMS Horticulture
-
EBMS Metal Supply
-
EBMS Fuel Sales
Google Analytics Setup
Google Analytics is a web analytics service offered by Google that Complete the following steps to setup Google Analytics to track and report website traffic on the ecommerce website.
Part One: Setup Project, Account and API Credentials
- Go to Google Developers Console: https://console.cloud.google.com/
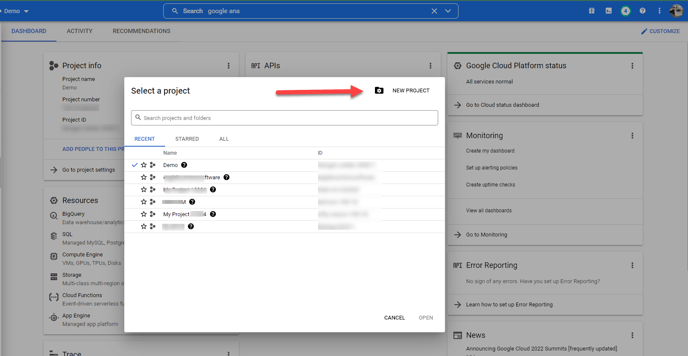
- Click New Project to open the Google Analytics API.
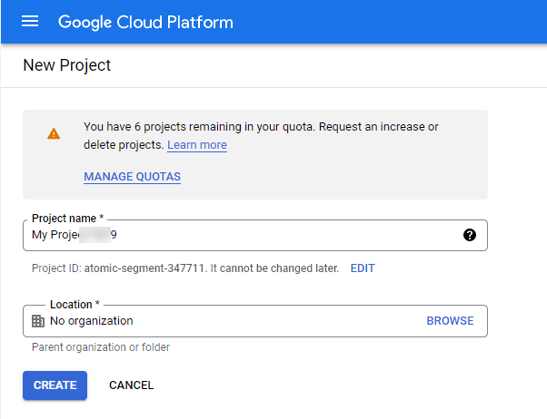
- Enter the product name and click Create.
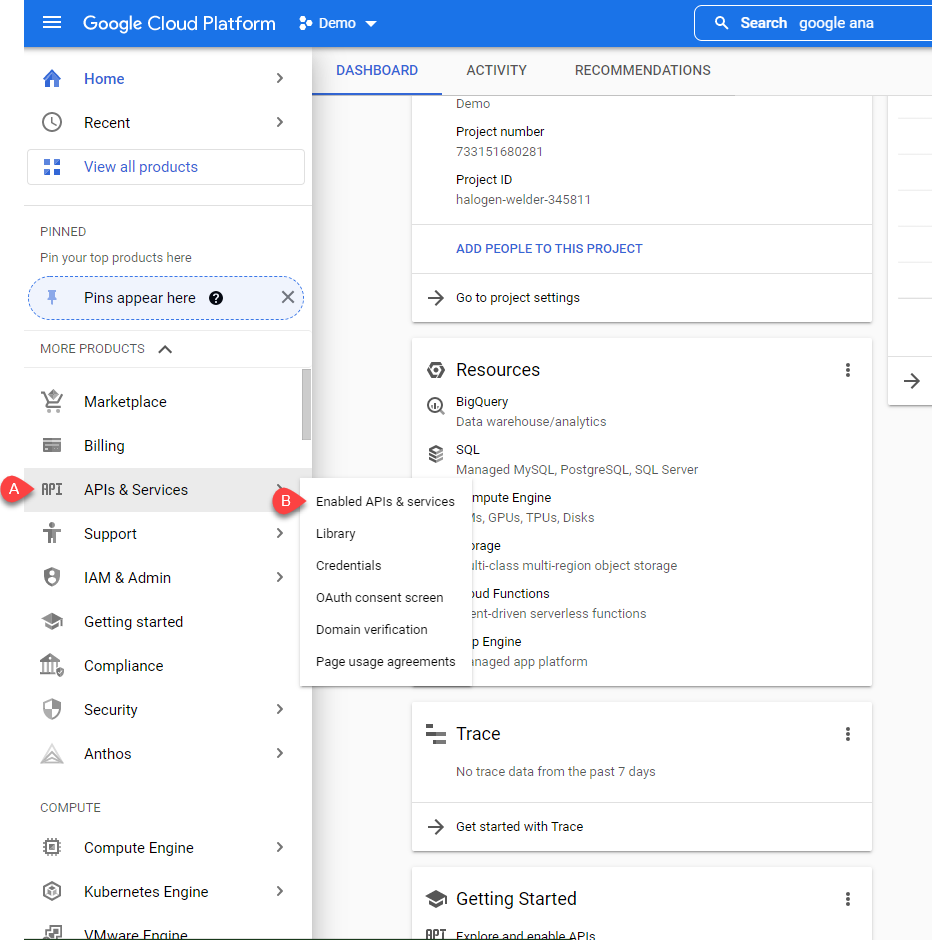
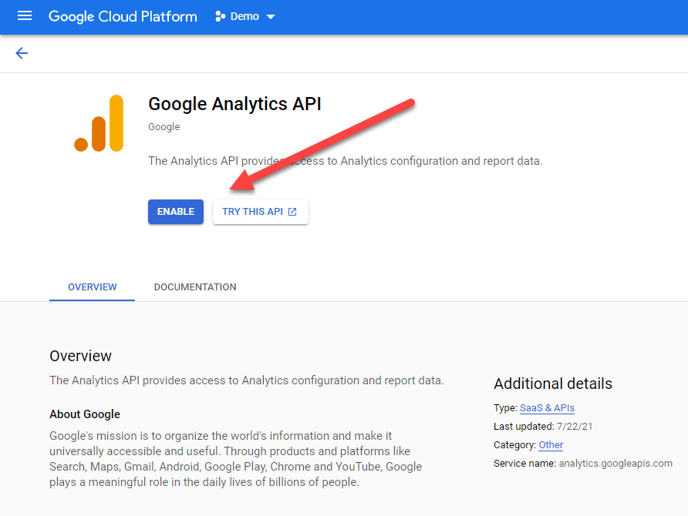
- Select APIs & Services and Enable Google Analytics API by clicking the Enable button.
-
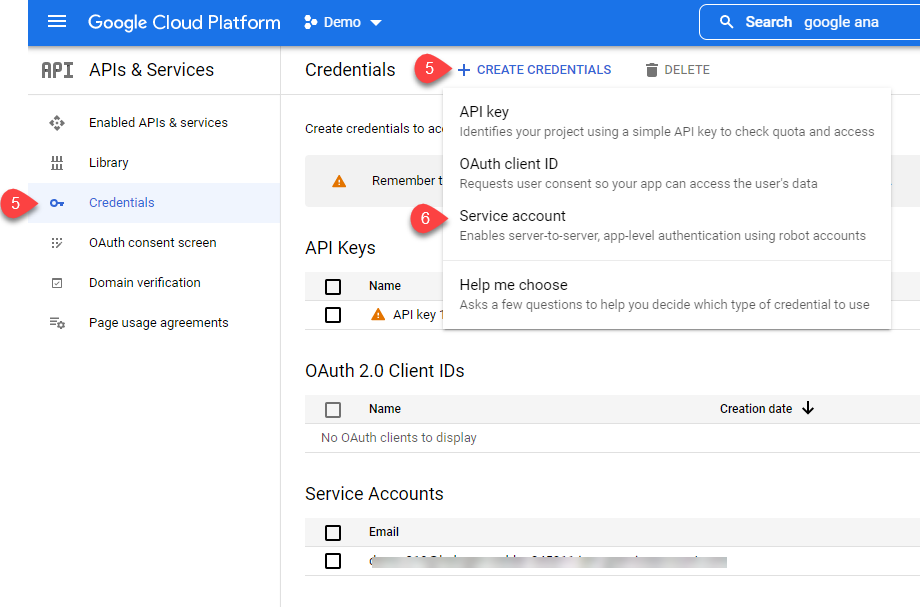
Click on Credentials the side bar and select Create Credentials
-
Select Service account to open the following dialog:
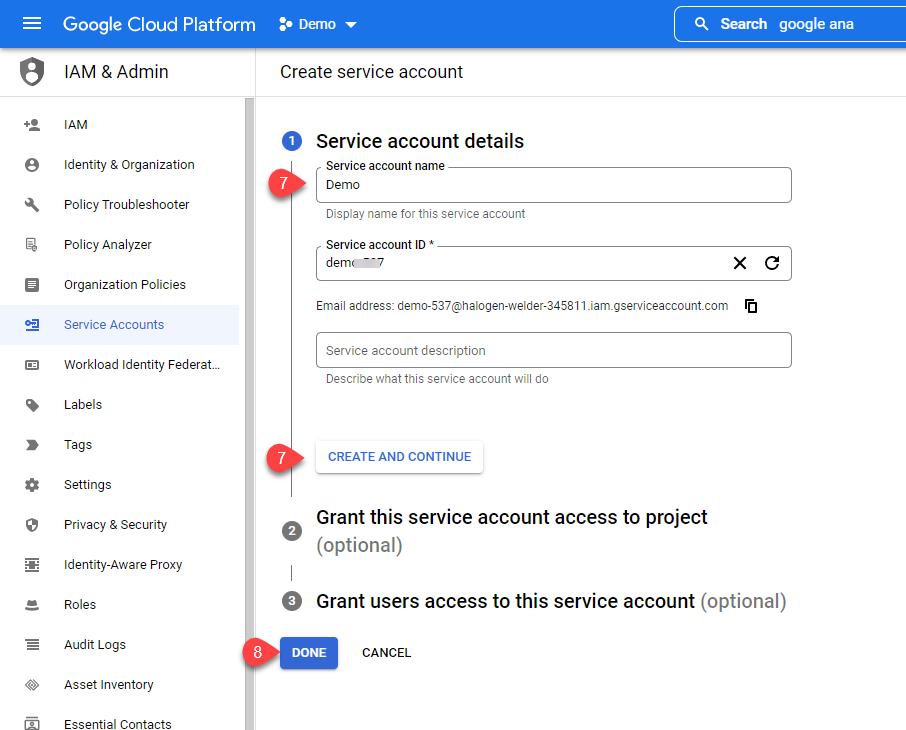
- Enter a Service account name and click Create and continue.
-
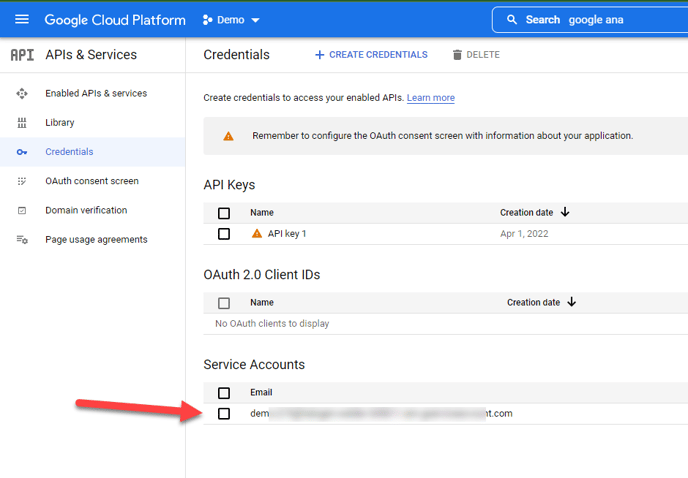
Click Done and click on created Service Account:
-
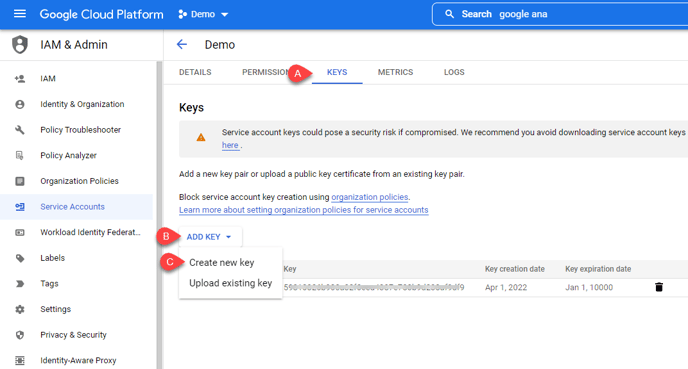
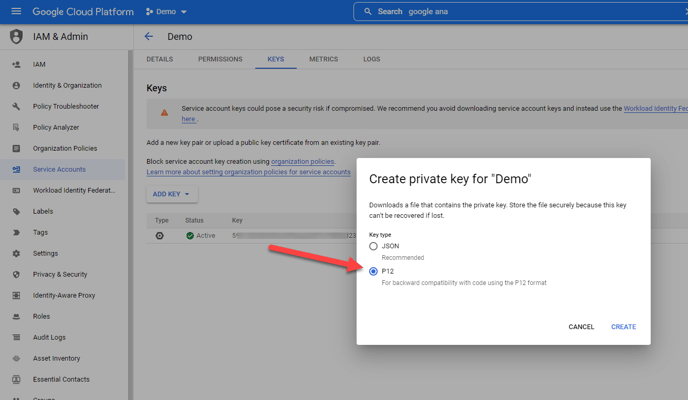
Click Keys tab, click Add Key, and click Create new key.
-
Select P12 and click create to download the key.
-
Do NOT CHANGE the password. Use the default “notasecret”. Downloaded key should be uploaded to the website's CMS settings.
-
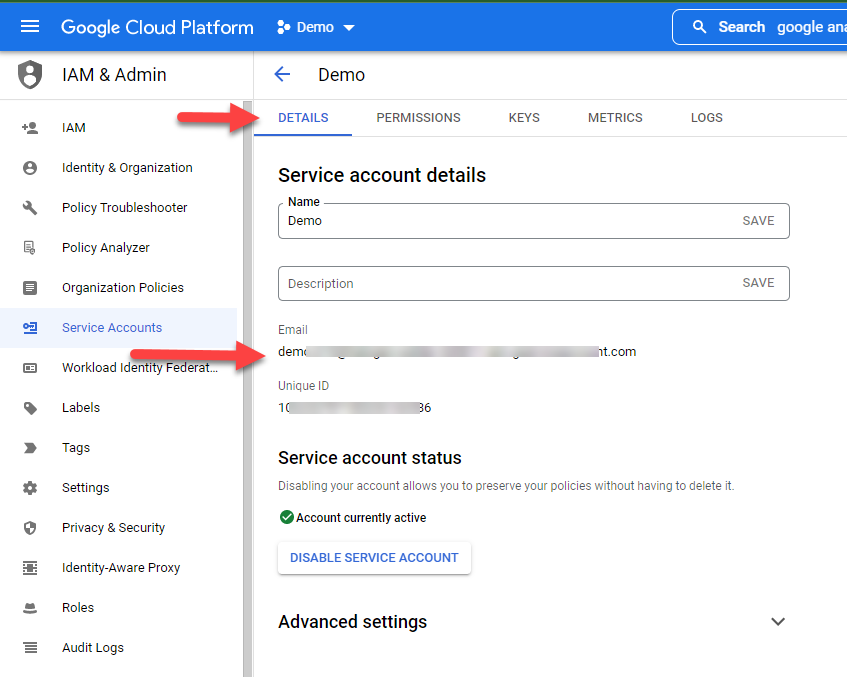
Identify the auto generated email on the Details tab.
-
Copy the newly generated email address and continue with Part Two.
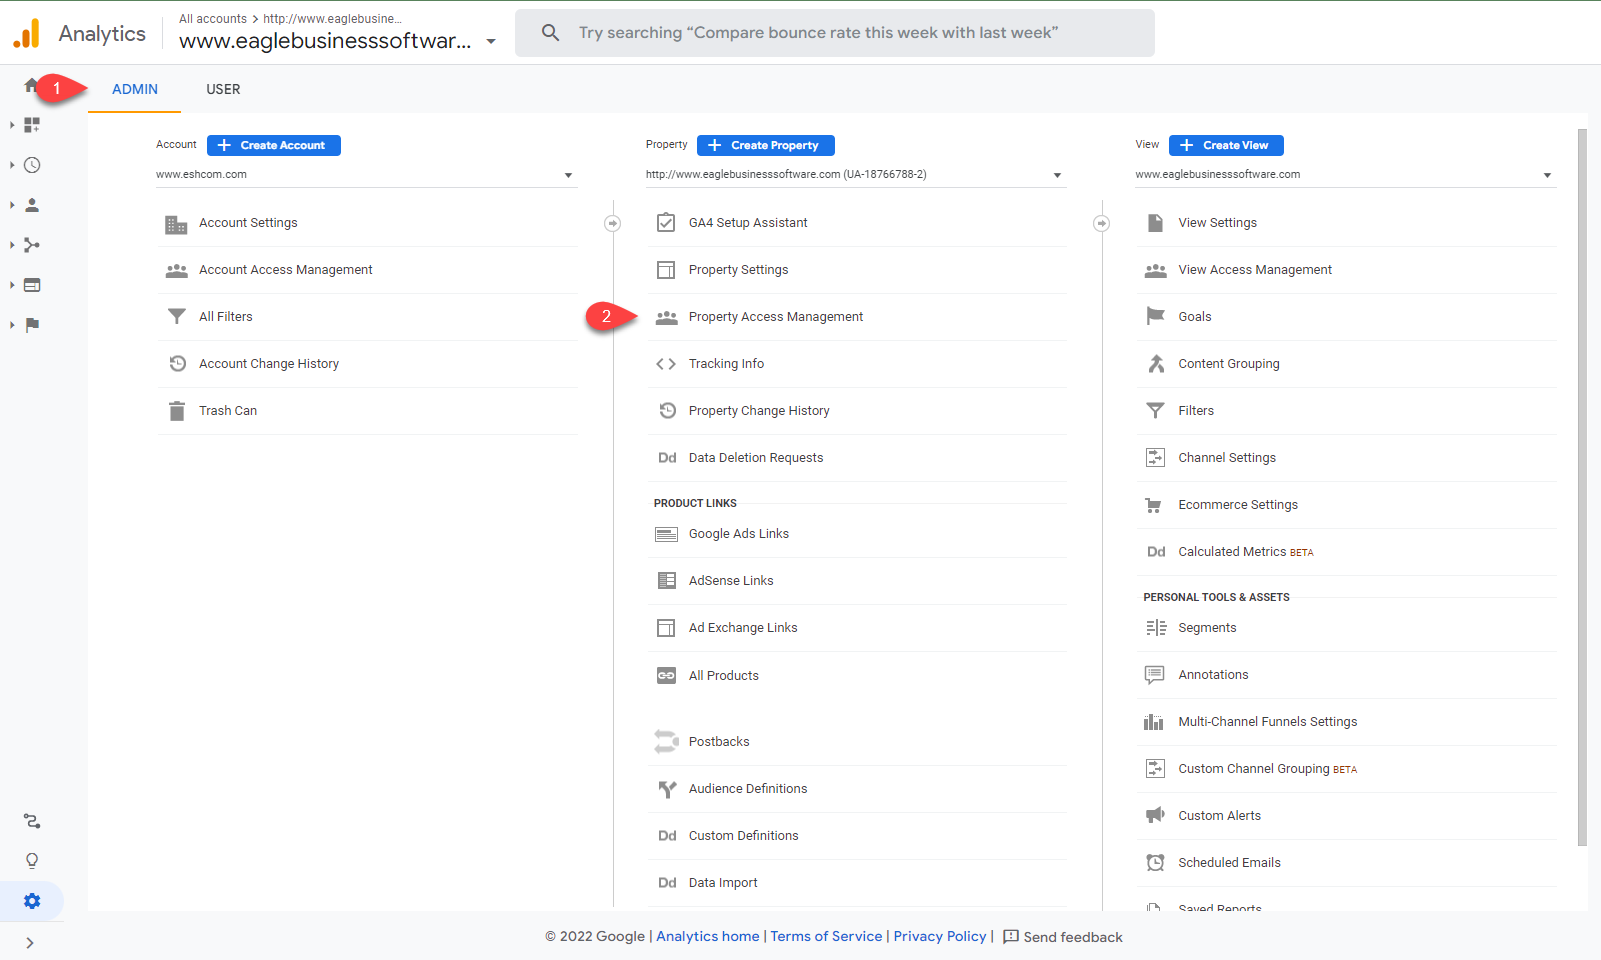
Part Two: Setup in Google Analytics
-
Navigate to the Admin section of the Google Analytics dashboard
-
Click Property Access Management
-
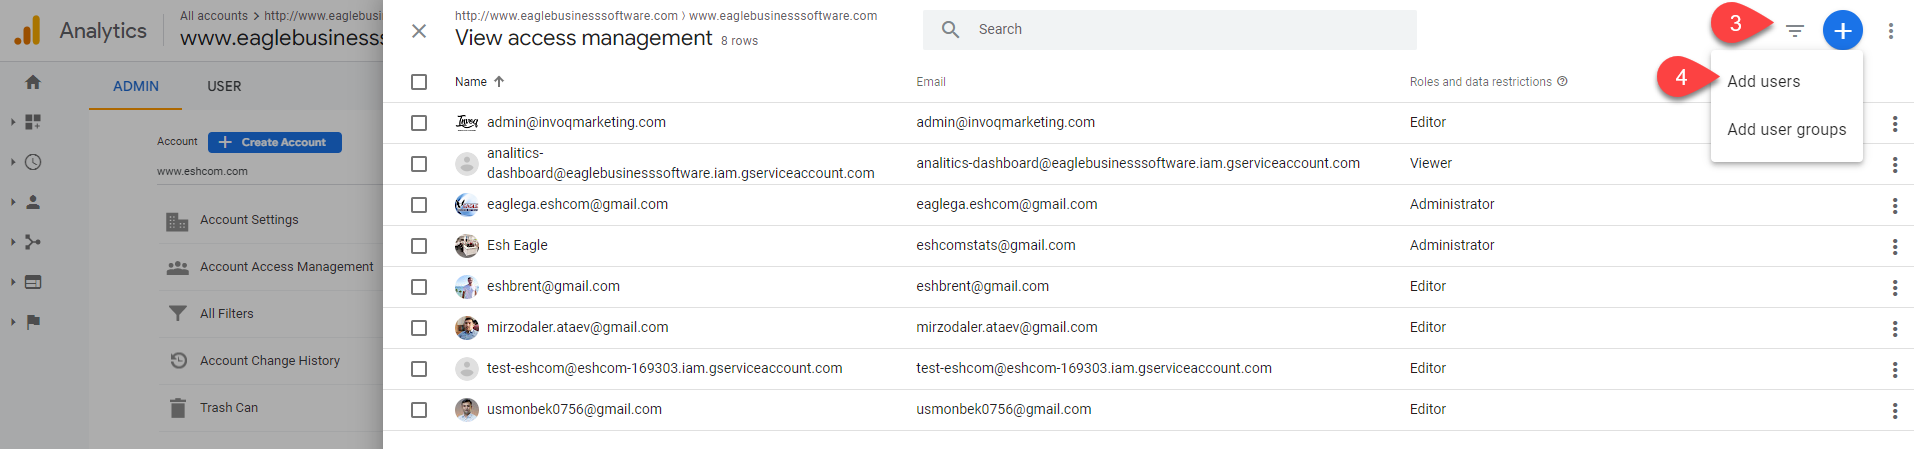
Add a new user by clicking '+'
-
Click Add user
-
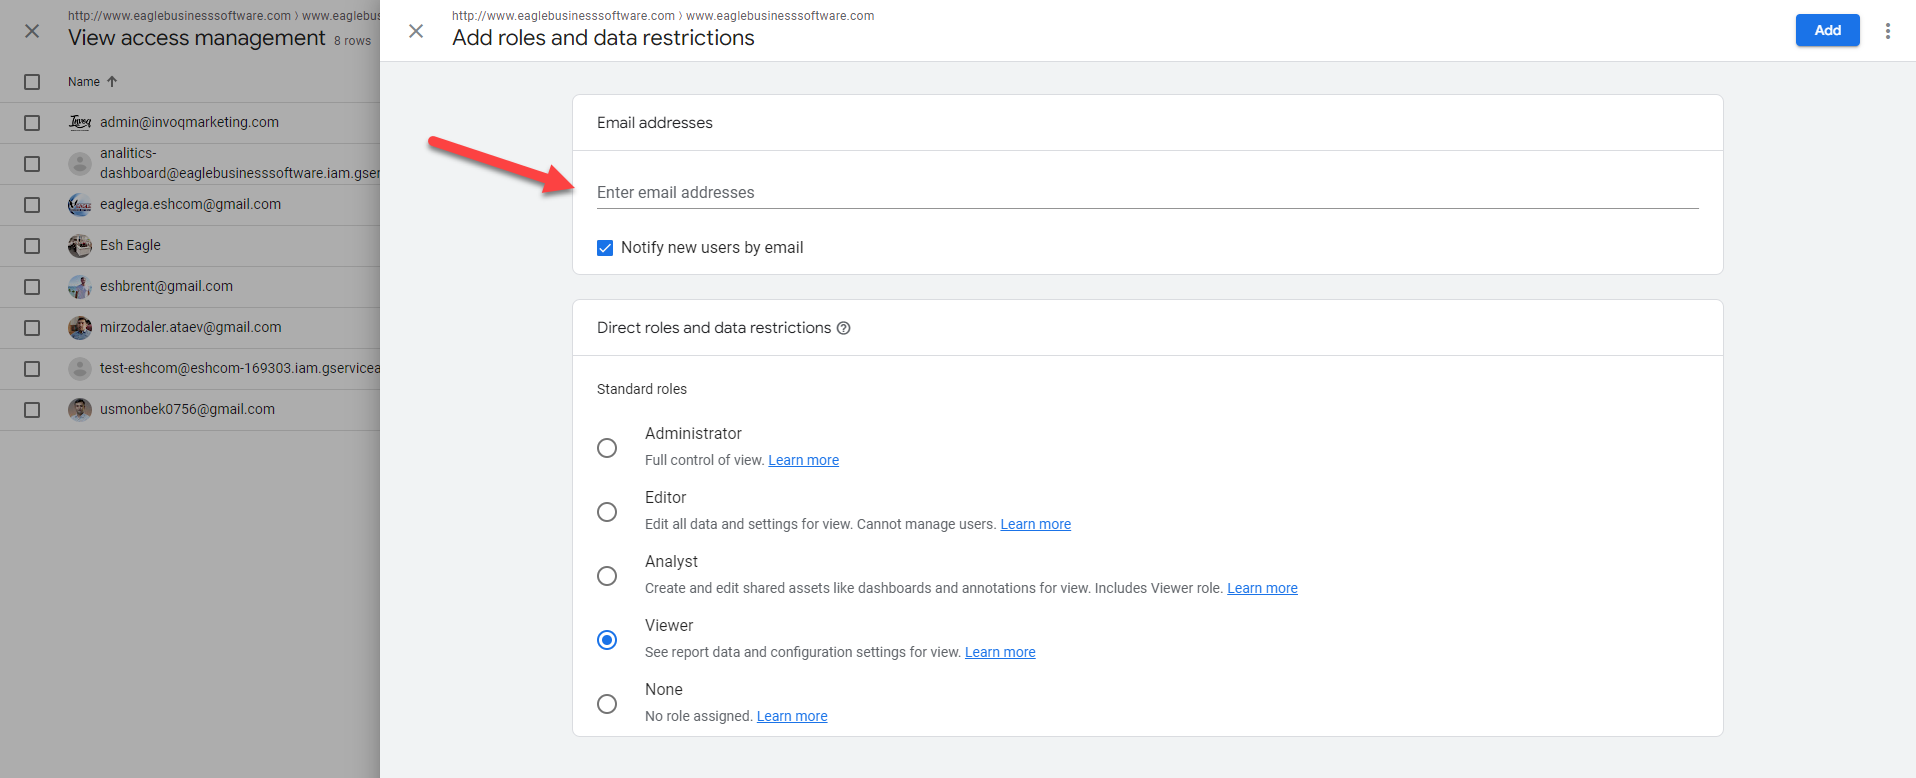
Enter generated email copied at the end of Part One into the Add roles and data restrictions window.
-
Save settings