Google Analytics is a web analytics service offered by Google to track and report website traffic on an E-commerce website.
Part One: Setup Project, Account and API Credentials
- Go to Google Developers Console: https://console.cloud.google.com/
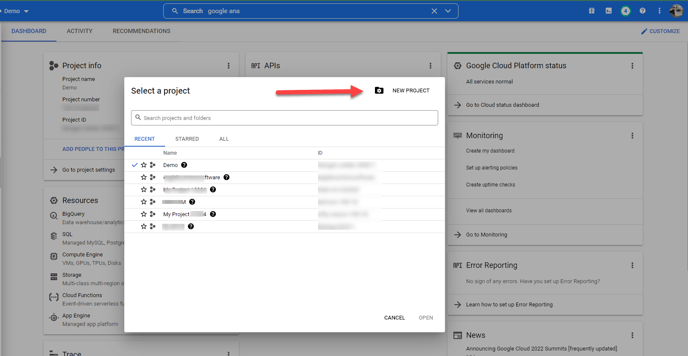
- Click New Project to open the Google Analytics API.
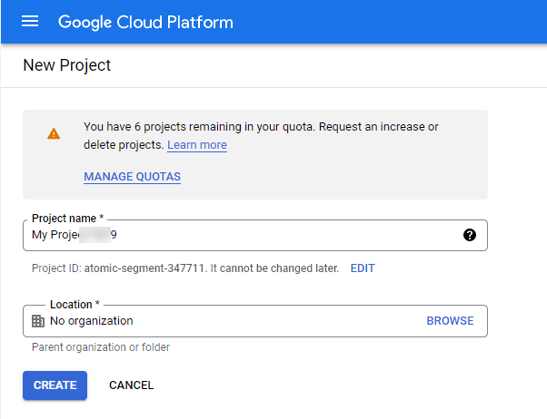
- Enter the product name and click Create.
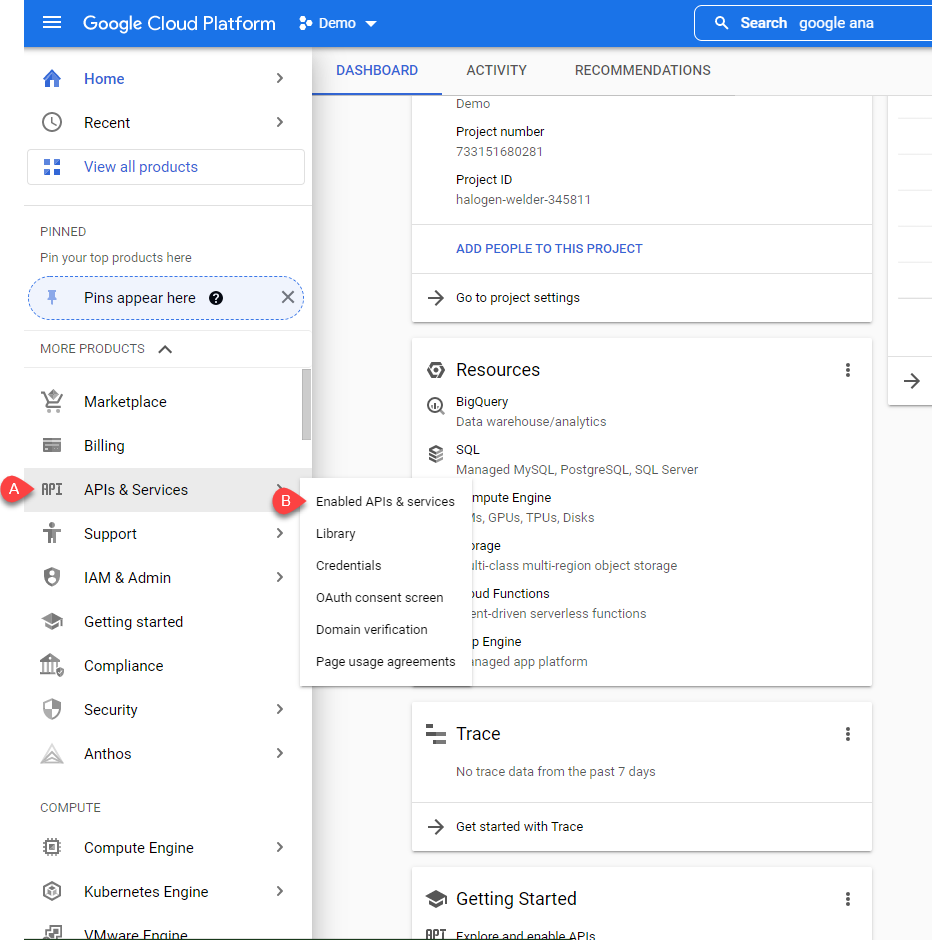
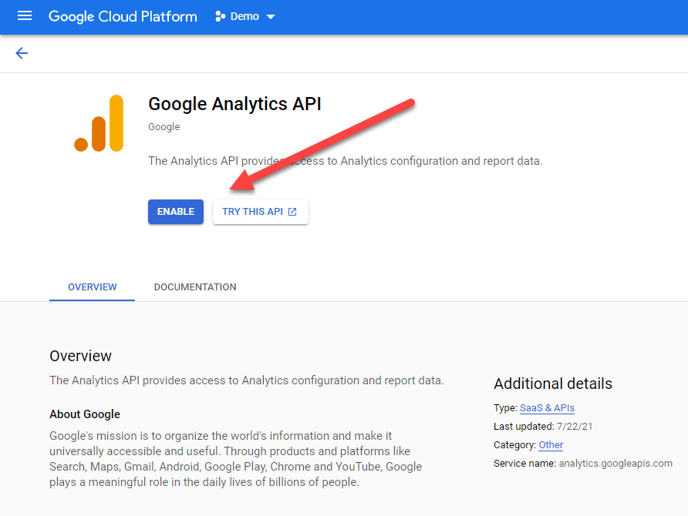
- Select APIs & Services and Enable Google Analytics API by clicking the Enable button.
-
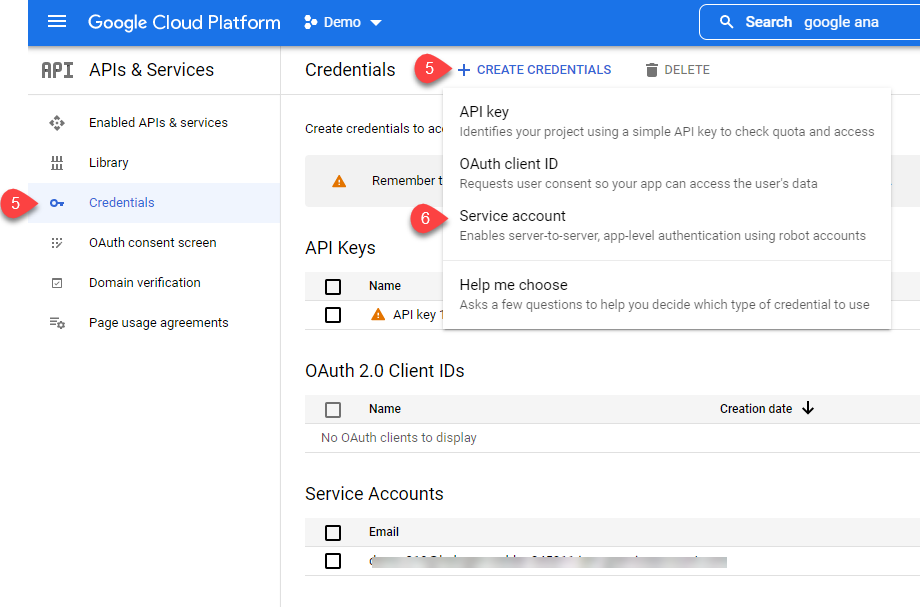
Click on Credentials the side bar and select Create Credentials
-
Select Service account to open the following dialog:
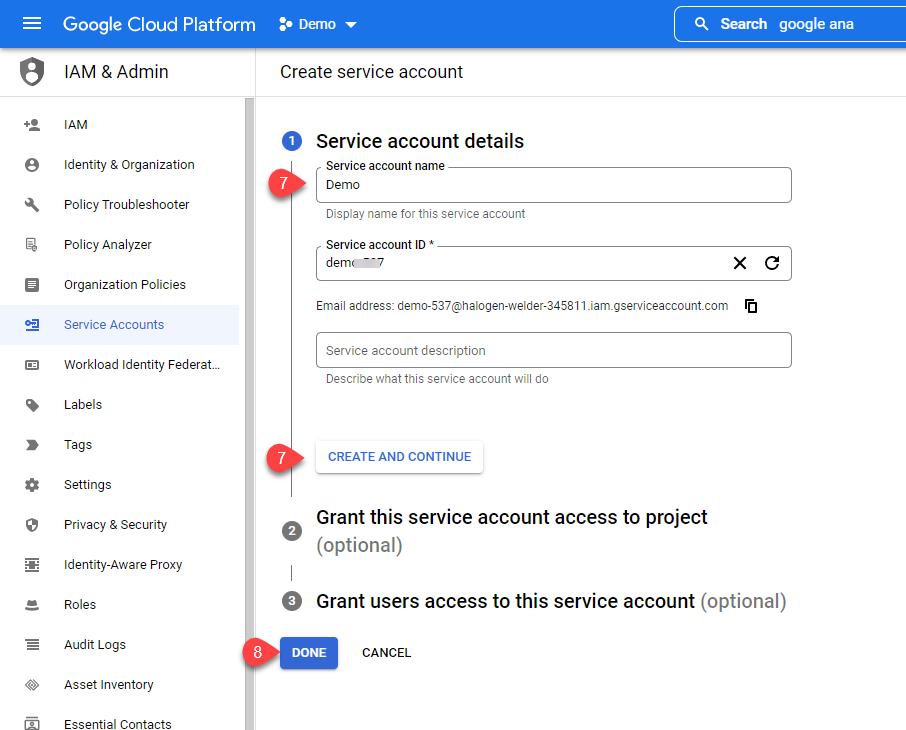
- Enter a Service account name and click Create and continue.
-
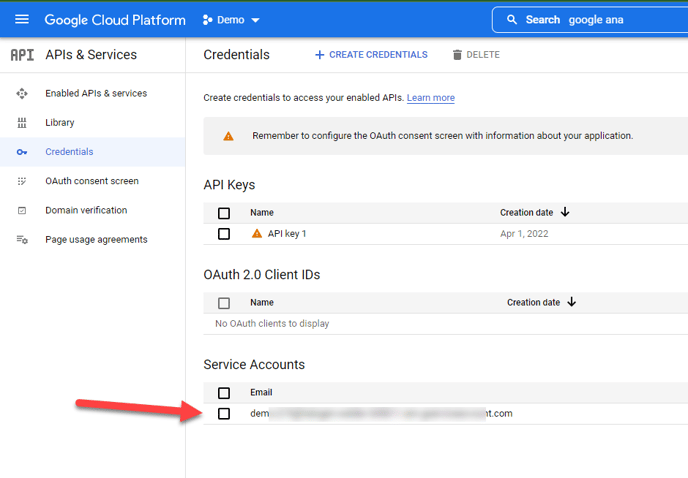
Click Done and click on created Service Account:
-
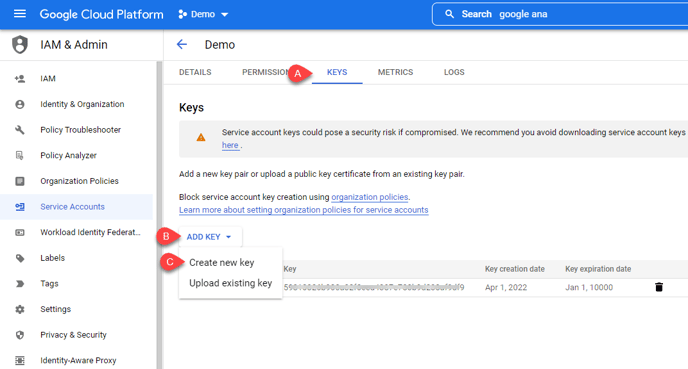
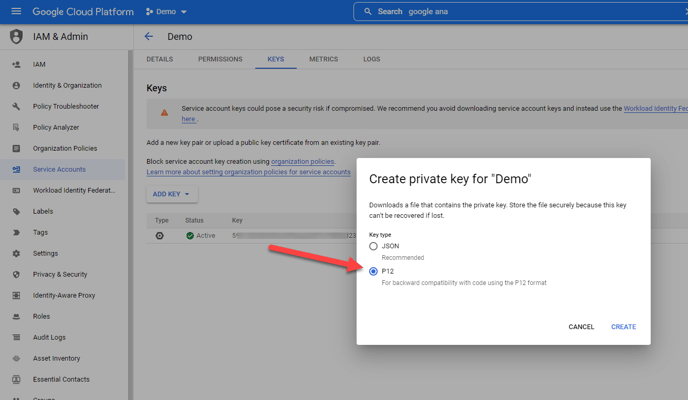
Click Keys tab, click Add Key, and click Create new key.
-
Select P12 and click create to download the key.
-
Do NOT CHANGE the password. Use the default “notasecret”. Downloaded key should be uploaded to the website's CMS settings.
-
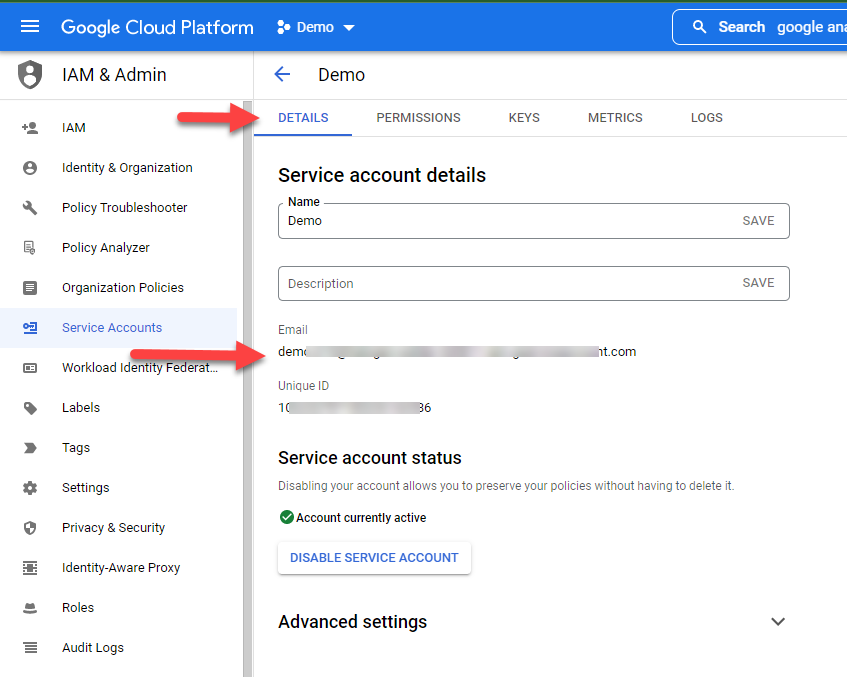
Identify the auto generated email on the Details tab.
-
Copy the newly generated email address and continue with Part Two.
Part Two: Setup in Google Analytics
-
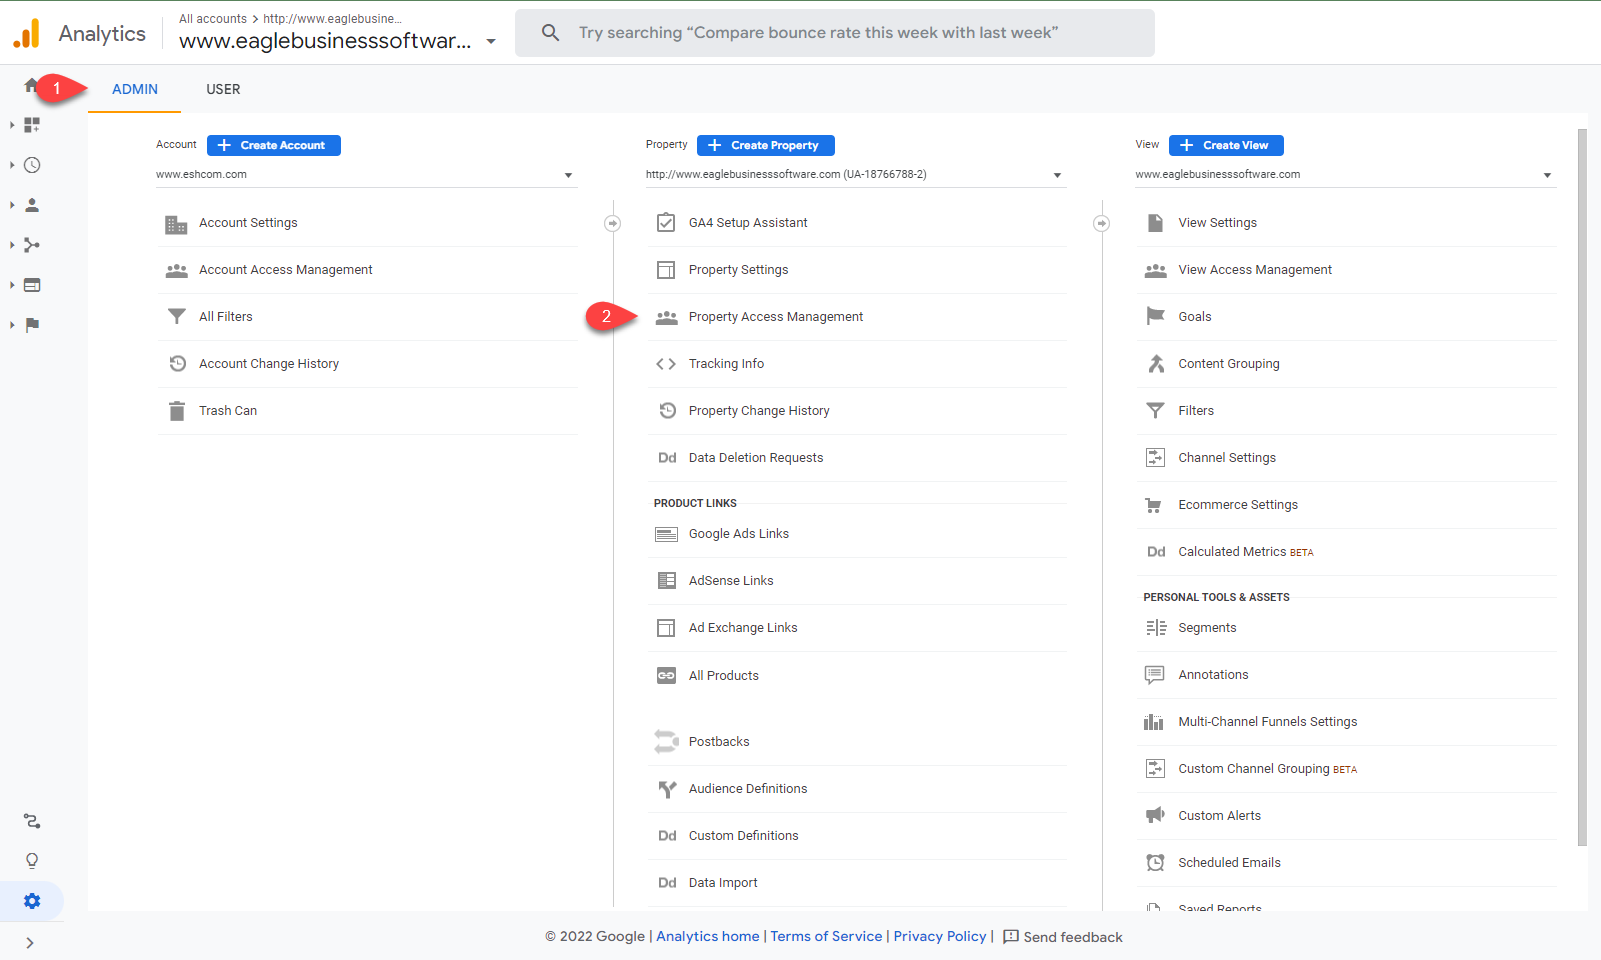
Navigate to the Admin section of the Google Analytics dashboard.
-
Click Property Access Management.
-
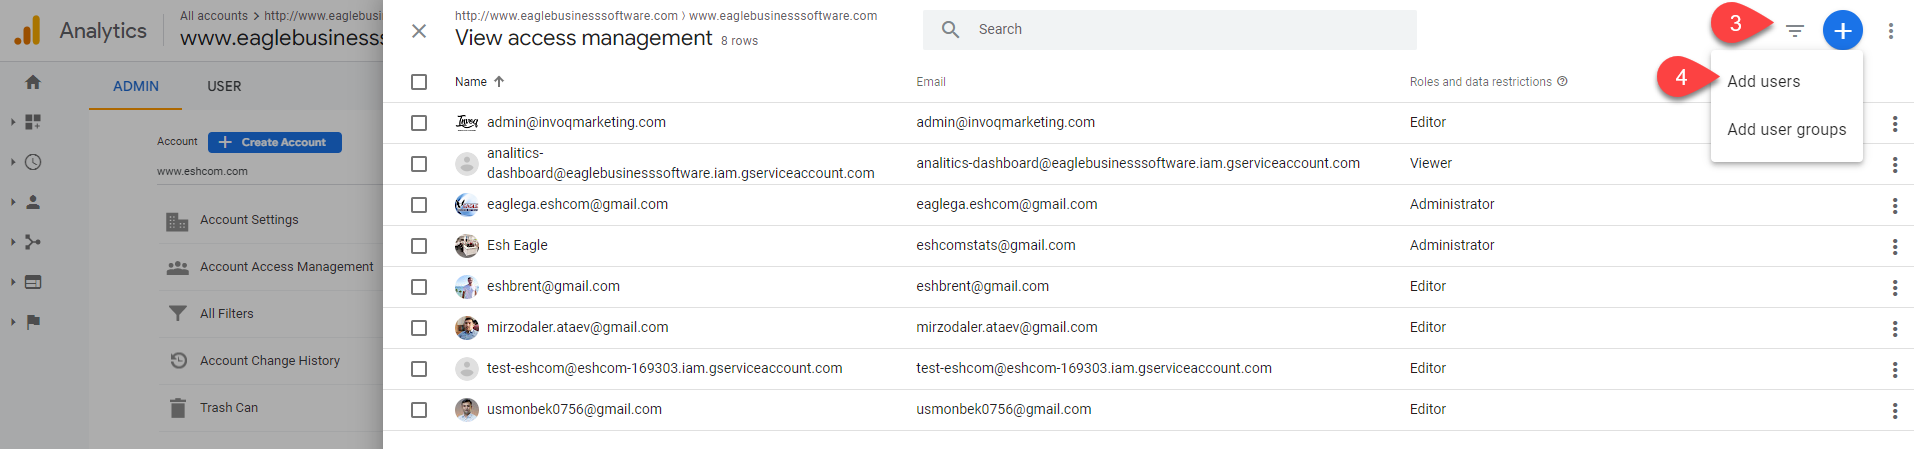
Add a new user by clicking '+'
-
Click Add user.
-
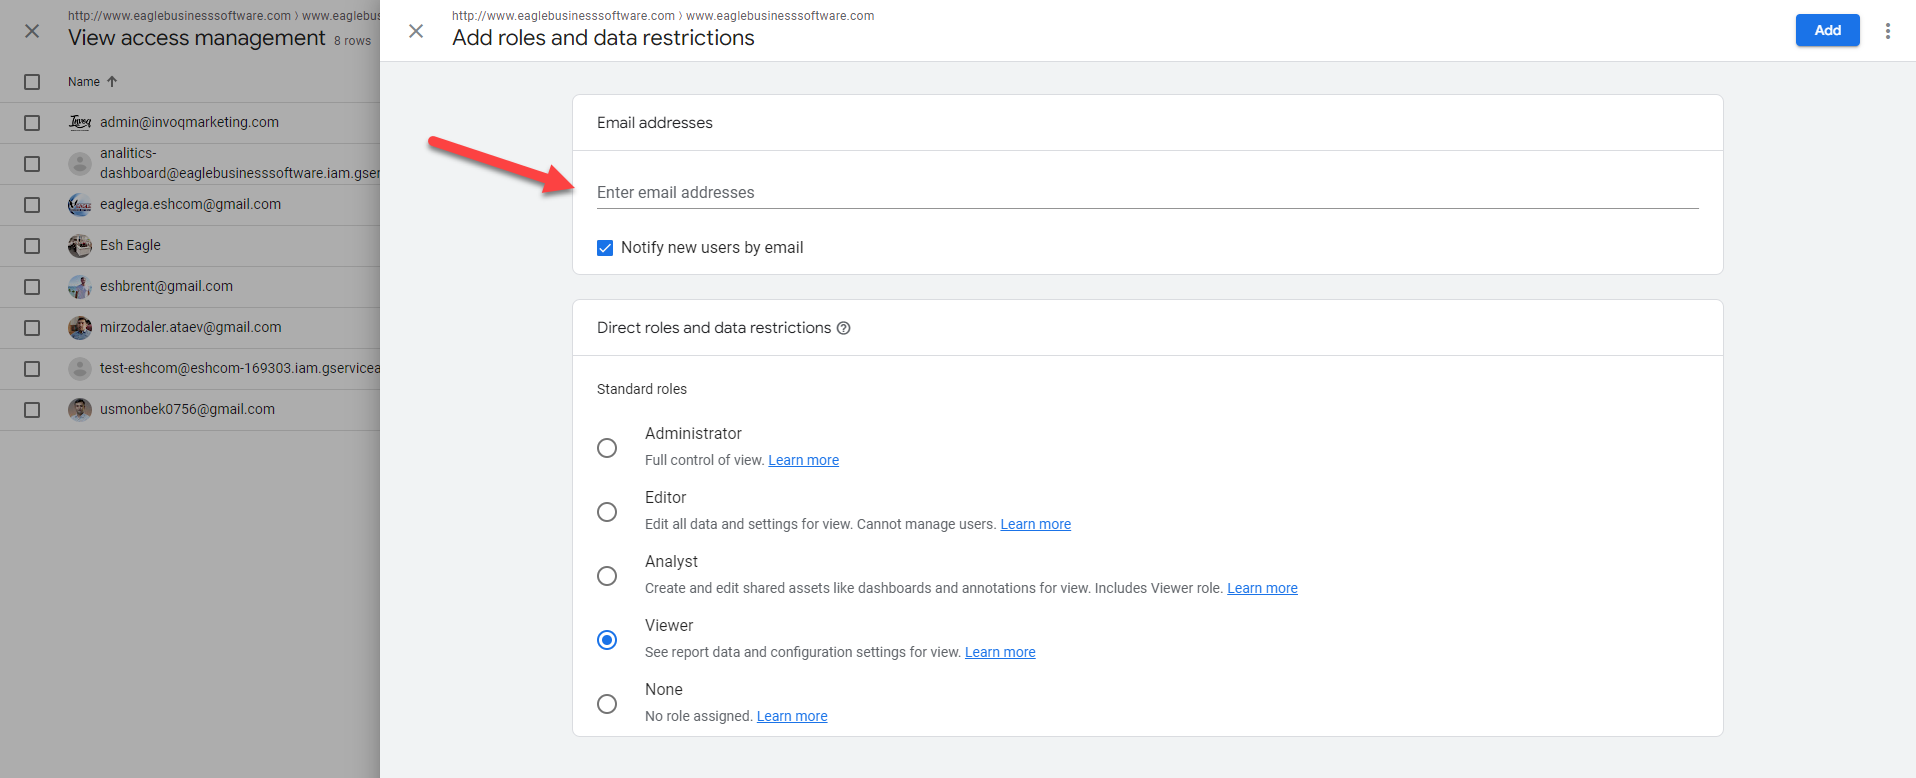
Enter generated email copied at the end of Part One into the Add roles and data restrictions window.
-
Save settings.