The EBMS system contains a feature to add a separate core charge to select inventory items. The same core item is used when the customer returns or trades in cores. The core inventory item is used to add core charges, credit a customer for returns, or track the number of cores in stock.
A core inventory item code must be created and then attached to the item that contains a core. Complete the following section if the excise tax inventory item does not exist.
Creating a core inventory item
-
Open the inventory list by selecting Inventory > Product Catalog from the main EBMS menu.
-
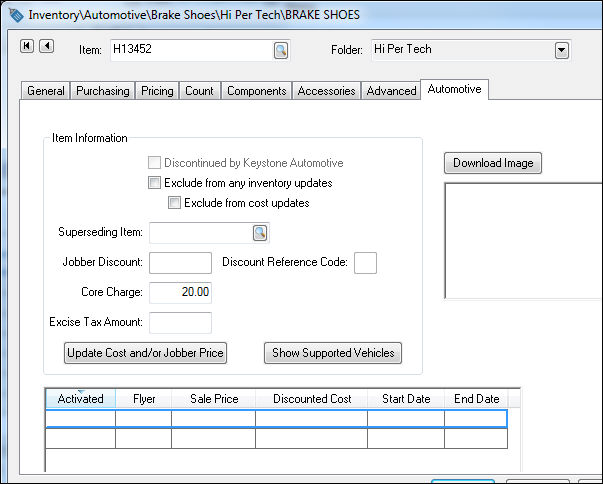
Double-click on the product ID to select the item that needs a core charge and go to the product record Automotive tab.
-
Enter the Core Charge as show below:
-
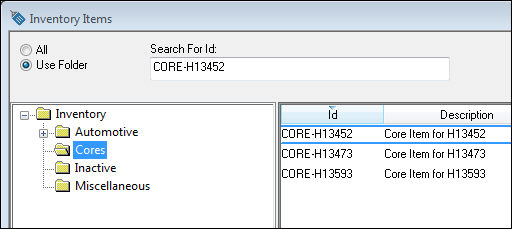
A Core Item will automatically be created in the Inventory > Cores inventory added to the front of the parent items ID (Example: CORE-H13452) as shown below:
Setting the Core Folder Defaults
It is important that the correct defaults are set for the folder where the Core for an item is created. This way all cores are created with correct formulas. The system should come pre-configured with the following settings.
-
Open Inventory > Options > Product Categories tab.
-
Select the Cores folder and click Edit Defaults.
-
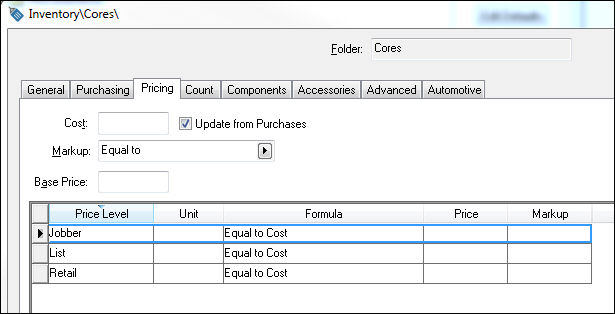
Select the Cores folder default Pricing tab as shown below:
-
Set the following properties for the Pricing tab:
-
Markup (between Cost and Base) = Equal to
-
Formula (for all Price Levels) = Equal to Cost
-
-
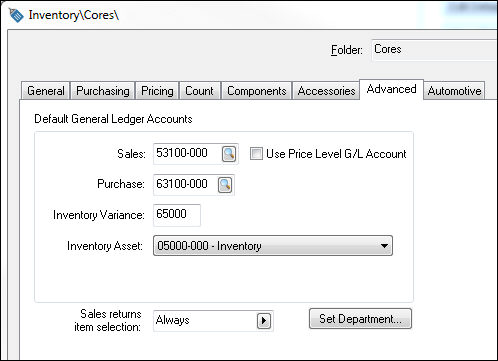
Select the Cores folder default Advanced tab as shown below:
-
Set the following folder properties for the Cores folder default Advanced tab:
-
Set Sales and Purchase General Ledger accounts to track the Core sales and purchases separately from normal sales.
-
Set the Sales returns item selection to the desired attribute.
-
The Core Item will be added on the following line when the main item is added to an invoice or to a job transfer. The Core item cannot be deleted without first deleting the main item. If the core is being exchanged at the time of purchase, a negative detail line will need to be added for the Core item.