Entering an Invoice with a Miscellaneous Vendor
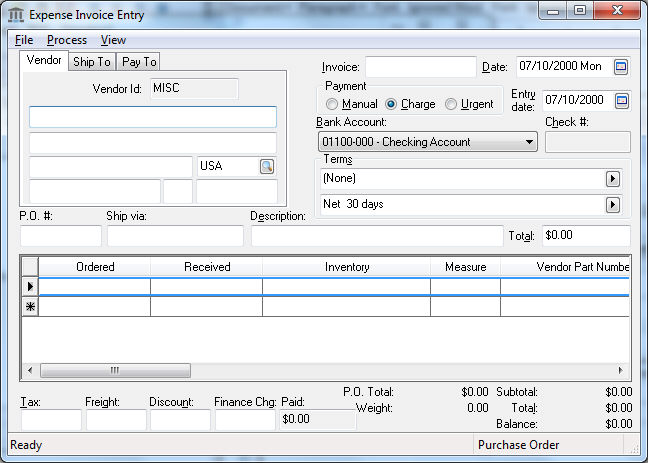
Test the miscellaneous vendor by opening a new purchase order. Go to Expenses > Invoices and P.O.'s in the header menu and click the New button or click the plus sign (+) next to Invoices & PO's on the main EBMS menu to create a new purchase order.
Select MISC as the Vendor ID.

Since the miscellaneous vendor does not have name and address information entered in the vendor window, the Invoice window allows the user to enter a name and address for that particular invoice. The vendor information will then be copied to the Pay To tab, which will be printed on the Vendor Payment check.
Proceed with the remainder of the invoice in the same manner you enter a standard invoice. Review the Entering a New Vendor Invoice section for more details on invoice entry.