Associating multiple inventory items to a common inventory count can be accomplished using the component option within EBMS, as described below. Associating items should only be used if multiple item IDs are required for the same item. The following methods or dealing with multiple pricing, multiple vendor part numbers, or replacement or substitute items is far superior to use the associated items option. Review the options described below before implementing the associated item option:
-
Do not confuse Associated items with substitute or replacement parts. Review the substitute items section for more details.
-
Use the unit of measure option within EBMS to create multiple prices for a single item or create multiple Units of Measure (UOM), rather than associated items. Review the multiple Unit of Measure section for instructions on the UOM option.
-
Do not use the associated item method to record multiple vendor part numbers. A list of vendor part numbers can be added to the product record Purchasing tab. Review the multiple vendor part numbers for more details.
Create Associated Part Number
Complete the following steps to associate the secondary or duplicate part number with the inventory item that tracks the count or items on hand:
Create an inventory item that is classified as Track Count or another perpetual inventory classification. This track count item will be identified as the main item for this documentation. See Entering New Products for more details on creating a track count item.
Create a second inventory item that will be associated with the first main item described in Step 1. This item must be classified as No Count. Review the Inventory Classifications for more details on inventory classifications.
Launch the new inventory item wizard by going to Inventory > New Product in the EBMS menu or clicking the plus sign (+) next to Inventory > Product Catalog on the main page. Complete the following steps:

-
From the Select Type page, highlight the desired category folder and click Next. (In the example above, the Garden Supplies has been selected as the category to put the new product into.) Review Adding and Deleting Product Categories for more details.
-
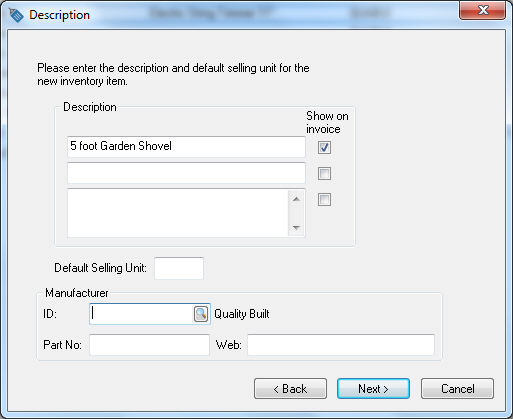
On the Description page, enter a Description for the associated item. Note that the description must be entered for the associated item and cannot be copied from the main item. Press Next to continue.
-
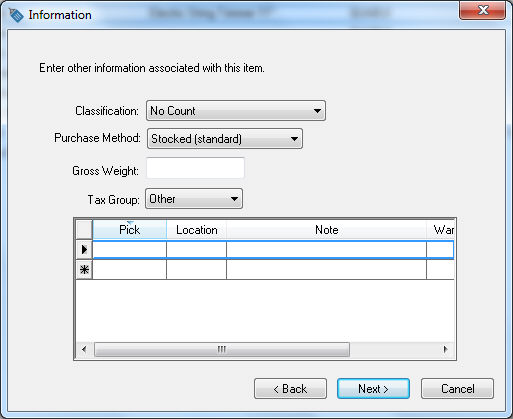
On the Information page, the Classification of the associated item MUST be set to No Count since the inventory is not maintained in this item but the main item. The Purchase Method and Gross Weight do not apply on the associated item record. Click Next to continue.
-
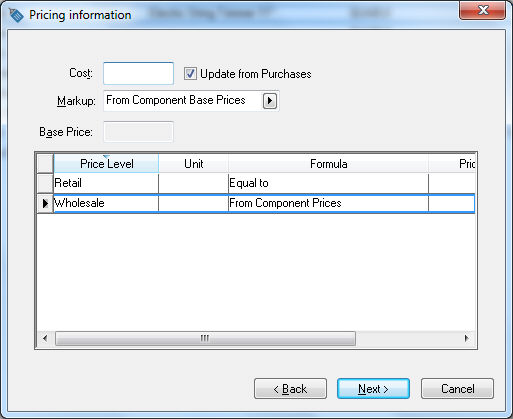
On the Pricing Information page, the Cost amount can be ignored since the cost is copied from the main item. The Markup setting can be set to From Component Base Prices as shown above if the associated item's Base Price should equal the price of the main item. The Formula for price levels can be calculated from the Cost, calculated from the Base Price, or using the price Formula for each price level. Review the pricing options in the Price Formulas section of the documentation. Click Next to continue.
-
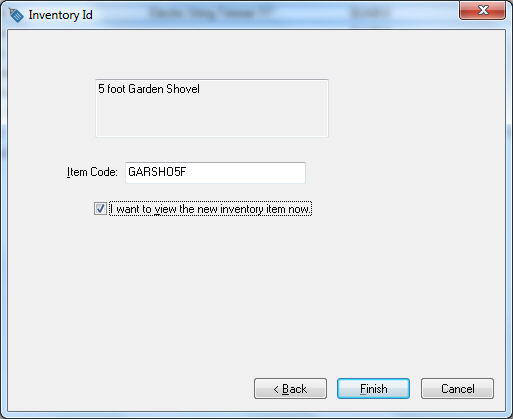
On the Inventory Id page, enter an Item Code for the associated item. Note that this code must be unique and cannot be the same as the main item. Enable the I want to view the new inventory item now option so that we can associate the item immediately. Click Finish to open the inventory record as shown below:
-
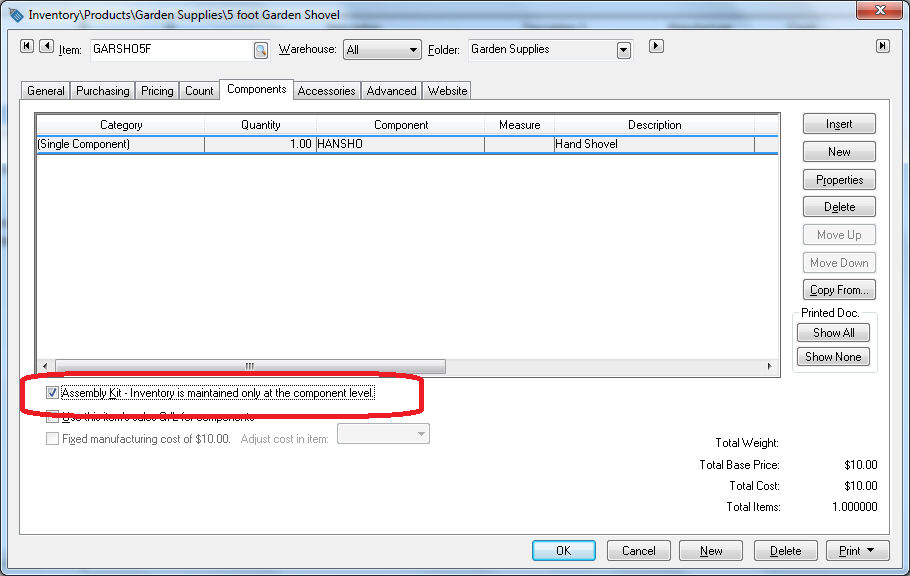
On the opened item record, click on the Components tab to add the associated item.
-
Click on the New button on the right side of the Components tab to associate the main item and add the item to the component list.
-
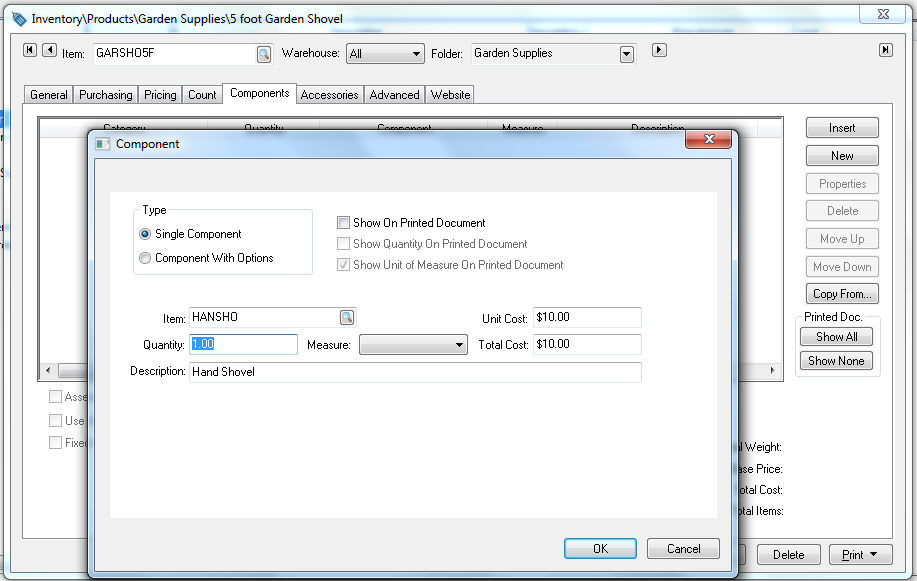
Select the Single Component Type in the Type section.
-
Enter the main item ID into the Item entry.
-
Disable the Show On Printed Document option to hide the main item.
-
The Quantity should be done if the associating is one-to-one. Chance the Quantity if the association or secondary part number is a different unit-of-measure. Review the Unit of Measure section for more details on using the unit of measure option instead of associated items. The recommended association of items will set the Quantity to 1 and the unit of Measure to the main unit of measure setting on the main item. Click OK to save the component and return to the Component list.
-
Enable the Assembly Kit option highlighted above. Save the associated item by clicking the OK button.
-
Enter Associated Part Number
Open a sales invoice and enter the associated item into the sales order, as shown below: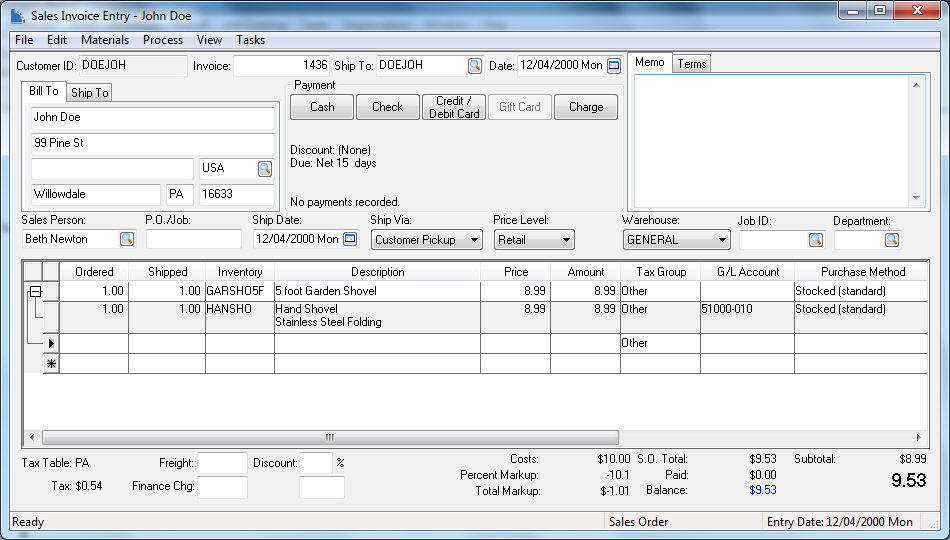
Note that the main item is hidden under the associated item.
Review the following sections for more ways to associate items or process multiple units of measure:
-
Substitute Items or replacement parts, review substitute items section
-
Multiple units of measure without multiple SKU numbers, review the multiple unit-of-measure section.
-
Multiple vendor part numbers, review the multiple vendor part numbers section for more details.