Lost Sales
The lost sale feature within the EBMS software is a tool to conveniently record each time a sale is lost, the information regarding the lost sale, and the reason for losing the sale. This tool is very valuable when a large variety of parts or other inventory items are being sold. For example: the number of lost sales for a special order item may prompt a user to stock a specific part.
This tool records and summarizes lost sales information to assist users in making informed inventory decisions such as stock levels and pricing.
The feature is conveniently located on the quote and sales order screens so that the product information such as customer, quantity, and pricing can be copied to the lost sale log file. The Lost Sale log information detail and summary can be viewed by selecting product record's Lost Sale/Return tab.
Configure Lost Sale Reason List
The user-defined Lost Sale Reason list can be set by selecting Inventory > Options > Lost Sale/Return tab from the main EBMS menu as shown below:
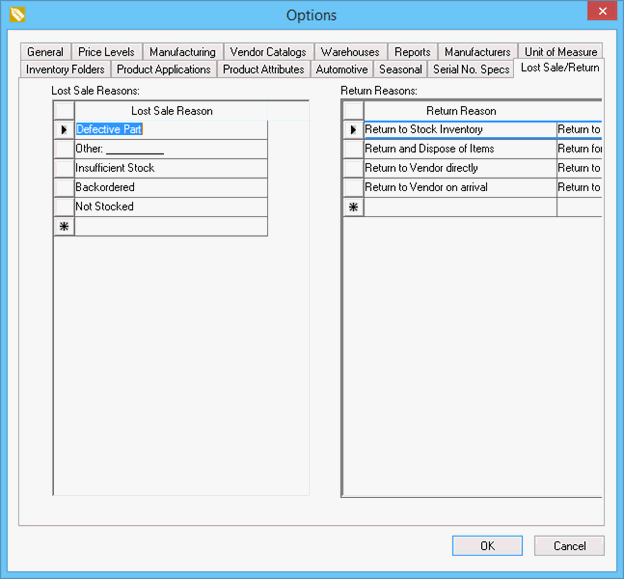
Lost Sale Reason can be added or edited from this list. Right-click and select Delete Row to delete a reason. Note that a Lost Sale Reason cannot be deleted after it is used within an inventory item.
Review the Product Return Reasons section for more details on the Return Reasons list shown on this dialog.
Click on the OK button to save the Lost Sale Reason list.
Recording Lost Sale Events
A lost sale can be recorded by right-clicking on the Product ID anywhere within EBMS. This includes the Product Catalog, inventory record, or anywhere an Inventory item entry is located. Open a sales order dialog by selecting Sales > Invoices and SO's from the main EBMS page and select a sales order, as shown below:
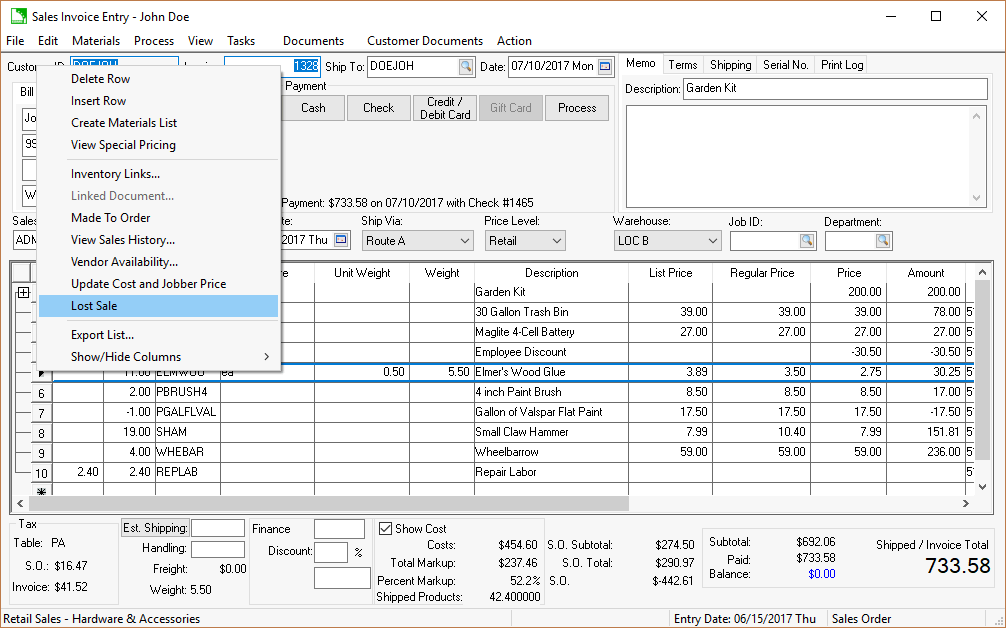
Right-click on the sales order line that contains the sale that will be lost if the inventory item exists on the sales order or quote. Click Lost Sale in the context menu. The Lost Sale log process described below should be completed before the item is deleted from the sales order or quote.
A lost sale log record can also be created without adding the item to the sales document by clicking into Inventory > Product Catalog, right-clicking on the inventory item, and selecting Lost Sale from the context menu as shown below:
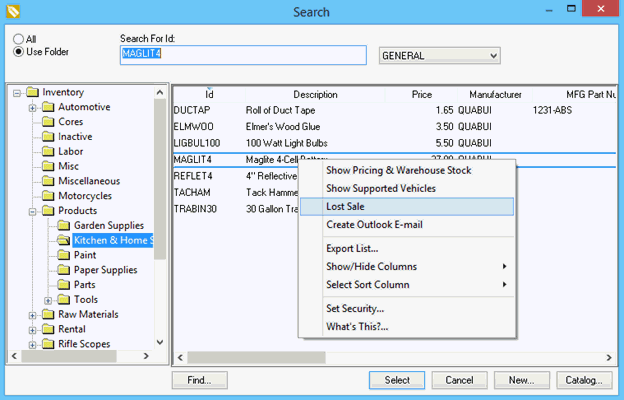
Complete the following steps to record the Lost Sale event:
- Select the Lost Sale option from the right-click context menu to open the following dialog:
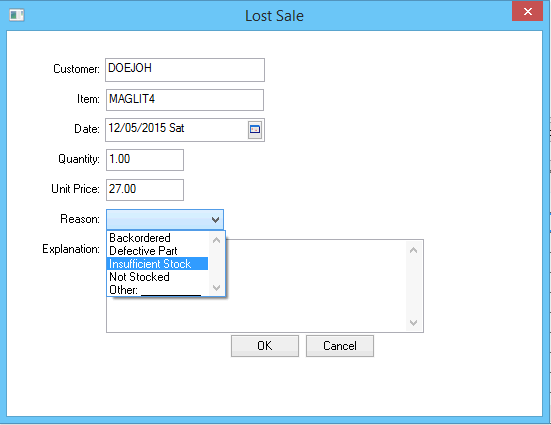
- Enter the optional Customer ID to identify the customer that rejected the potential sale. This ID is copied from the sales order or proposal if the Lost Sale dialog was launched by clicking on the document detail line.
- Enter the Date of the lost sale. This Date is used for reporting purposes when summarizing reasons by month or year within the Lost Sale log located on the Lost Sale/Return tab of the inventory item record.
- Enter the Quantity of the customer's interest. The required Quantity entry is used to calculate the number of Lost Sales per month or per year.
- The Unit Price is an optional entry for reference purposes. Select one of the user-defined Reason settings which are set up in the Inventory > Options > Lost Sales/Return tab.
- Enter an optional Explanation note and click on the OK button to record.
Viewing the Lost Sale Log
The results of the lost sale can be reviewed from the Lost Sale/Returns tab of the inventory item or by launching a Lost Sale report. Open a product record and click on the Lost Sale/Returns tab to open the following dialog:
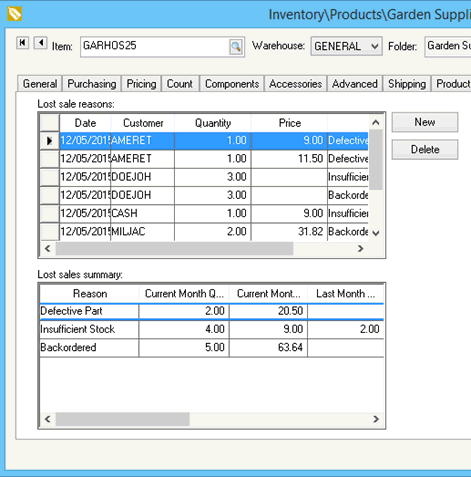
The top pane within this dialog lists the detailed Lost sale reasons log. Click on the log columns to sort details based on log Date, Customer, Quantity, or Reason columns.
The bottom pane is a Lost sales summary and displays a summary of the Lost Sale Reasons for the Current Month, Last Month, or the Last Year.
This pane also lists the reason the item was returned. Review the Return Reasons section for more details on setting return reasons.