MyInventory Stock Management
Select the Scanner app within MyEBMS and select Stock management as shown below:
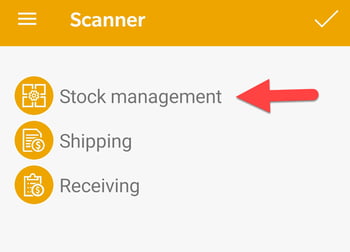
The Stock Management option is used to view stock information, adjust counts, print labels, and change stock locations. The scanner is used to quickly load an item so that user can change product information or print labels. The scanner tool can increase the efficiency of counting the stock level of a batch of products.
Scan the product barcode using the scanner or camera to show the following project information:
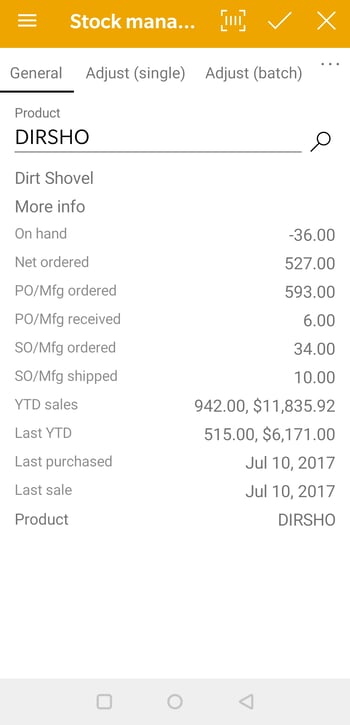
The various product counts are shown on this page. Review Item Count for details on these EBMS values.
Select any of the following options to manage stock.
-
Adjust (single): Select this option to make an adjustment to an inventory item effective immediately.
-
Adjust (batch): This option allows a reference number to be entered which can later be viewed in EBMS.
-
Set Location: This option will show the existing location of the item allowing the user to add, change, or remove locations.
-
Print Labels: This will give the option of entering a quantity to print. The label report must first be selected in EBMS in Scanner > Options. The user would press enter on the keypad to print the labels.
Review the following sections for more details on each of these functions
Adjust (single)
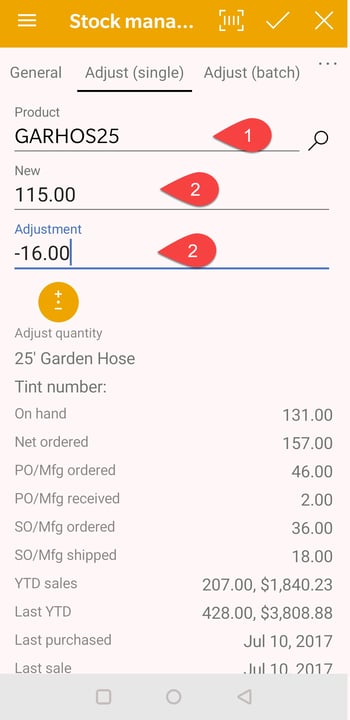
Select this option to make an adjustment to an inventory item effective immediately. Change the quantity to the correct number and press Enter on the scanner keypad.
-
Scan or enter the product barcode: This barcode can be either a UPC code or barcode printed within a product label. Review Entering Barcodes for product barcode entry procedures.
-
Edit either the New count or the Adjustment count to affect the other: Review Adjusting Inventory Count and Value for the equivalent steps within EBMS including additional details.
-
Tap the Adjust quantity icon
 to process the count adjustment.
Adjust (batch)
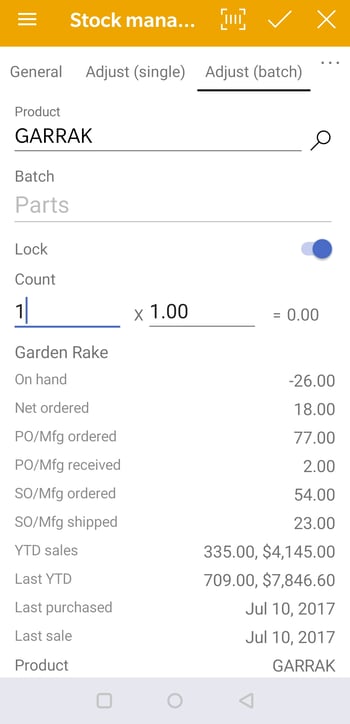
This option allows a reference number to be entered which can later be viewed in EBMS. Select Inventory > Adjust Counts from the EBMS header menu, to apply the adjustments to multiple items at one time. When in this mode the quantity changes are not made until the adjustments are processed in EBMS.
- Select the batch that is being used to adjust stock counts. This batch must be created within EBMS before using the MyInventory scanner to record counts. Review Adjusting Inventory Counts as a Batch for instructions to create an adjusting batch and other batch adjustments tools.
- Enable the Lock option to force all counts in the selected batch.
- Scan the item or enter the Product ID to add this count to the batch file. The stock count adjustment is measured using the main unit of measure and is calculated by multiplying the quantity Count X quantity per unit of measure. Adjust either the quantity or the unit of measure multiplier to record the proper stock amount. Review Unit of Measure Overview for more details on the Main Unit or the unit of measure multipliers.
Set Location
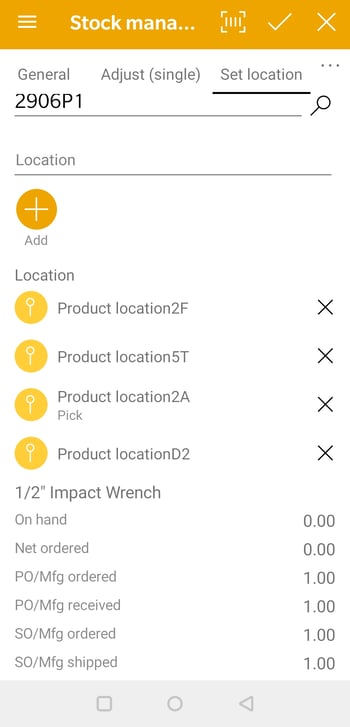
This option will show the existing location of the item allowing the following changes to the location settings:
-
Add a location: Enter a new Location setting by tapping the plus sign icon
 to add a new location for this item.
 -
Remove a location: Tap the exit icon
 to delete.
 -
Change locations: Tap a location to change the Location ID, add or change a Note, and Make this pick location.
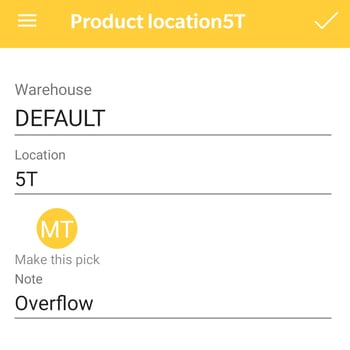
Print Labels
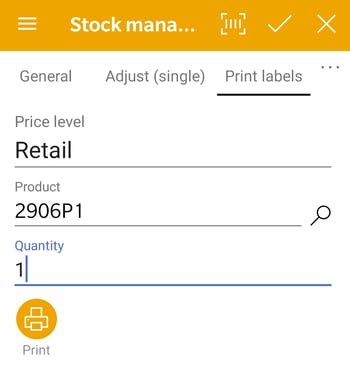
This option is used to print labels or other forms configured within EBMS. Review Configuring the MyInventory Scanner in EBMS for instructions to enable pricing and setup the print form.
Complete the following steps to print labels:
-
Verify the Price level: Review Default Pricing and Price Levels for price level setup and configuration within EBMS.
-
Enter the Quantity labels.
-
Tap the printer icon
 to print labels.
Order Product
The option gives the user the ability to enter a quantity to order.
UPC Associate
This will show the existing UPC/Alternate ID number if one exists. If a barcode number is scanned or entered the item will be updated with this new information.