Graphics files can be inserted into the E-commerce and inventory records of EBMS individually or using a bulk image utility. Review the following documentation for details on the following graphics tools:
- Inserting individual E-commerce graphics
- Importing and exporting a list using a bulk graphics utility
- Inserting individual inventory graphics
Pictures and graphics files are inserted directly into the inventory item or folder. The recommended graphics file types are as follows:
-
.JPEG - recommended file type for photos
-
.PNG - Ideal for graphics and line art.
-
.GIF - recommended for animated graphics but cannot be used to print graphics within an EBMS report.
Other file types can be used but are not recommended because of file size, performance considerations, or Crystal report restrictions.
Inserting Individual E-commerce Graphics
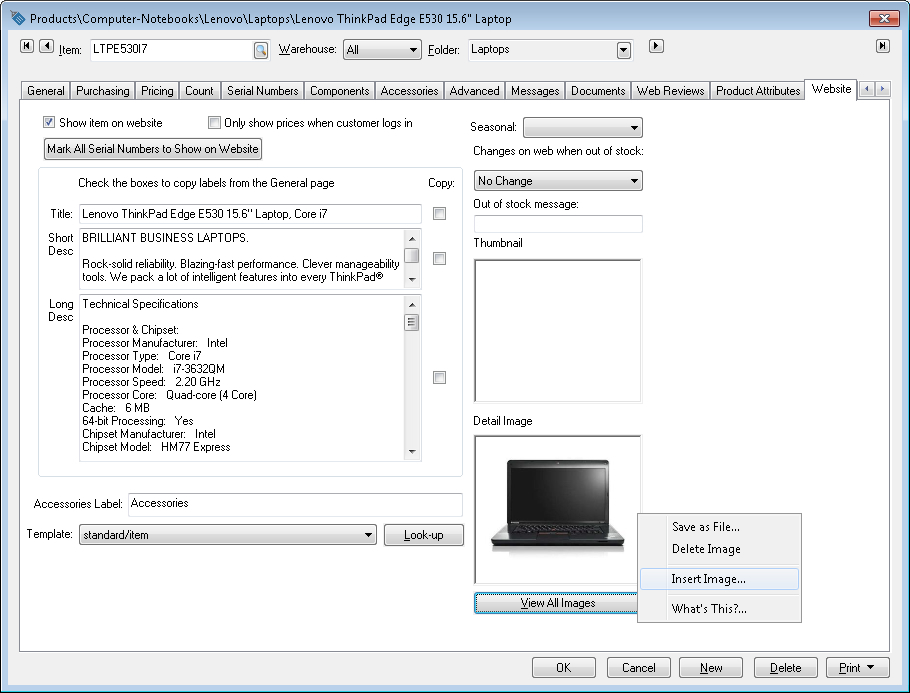
The website tab of the folder or item contains two different types of graphics, the Thumbnail and the Detail Image. See the Website tab example below.
The Thumbnail image is an optional setting that will be created by the system using the Primary Detail Image if the Thumbnail image if blank. Insert a Thumbnail image if a reduced size of the Primary Detail Image is not sufficient. The recommended size for a thumbnail image is up to 20 kb; over 100kb produces errors and will not allow upload.
The Detail Image(s) may require image editing and re-sizing. The Detail Image setting within a group folder template may differ from the Detail Image within the inventory item.
-
-
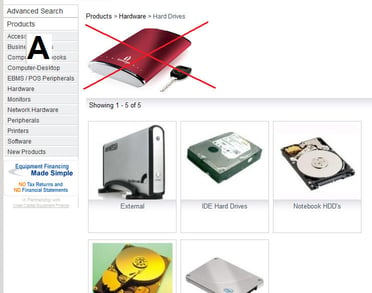
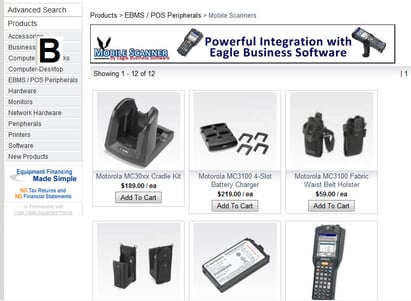
Inventory Folder - The Detail Image(s) that are shown within the group templates are not re-sized so the image must be edited to the proper size to show properly within the folder group web page. The Detail Image entry may be kept blank in situations where a graphics on the top of the template is not desired. Example, you may wish to remove the header image that is crossed out in the example A shown below. The Detail Image may consist of a banner graphics that is sized to fit the width of the folder template but is limited in height. See the example B show below. A separate Thumbnail image will be needed if the Detail Image consists of a banner. Review the Product Group Website Template Settings section for more details.
-
Recommended size: up to 200 kb; over 250kb produces error and will not allow to upload.
-
Up to twelve detail images can be inserted for a single folder. A small photo gallery will be used to display images.
-
example:
-
example:
-
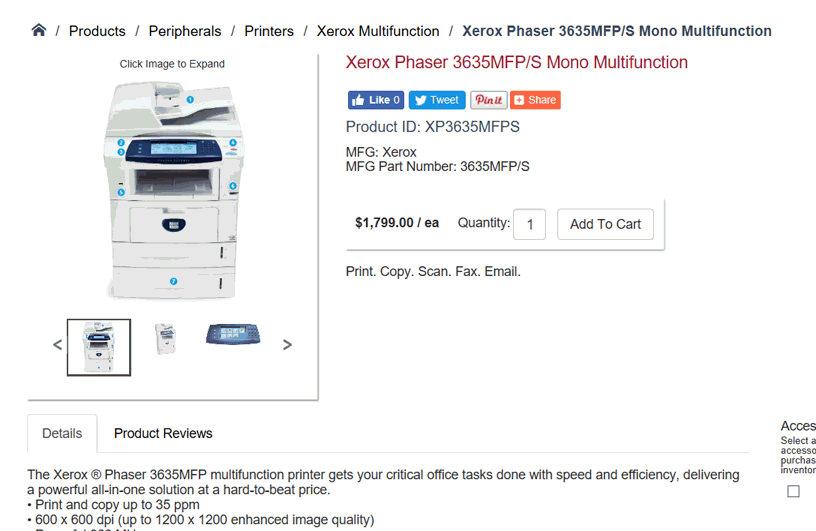
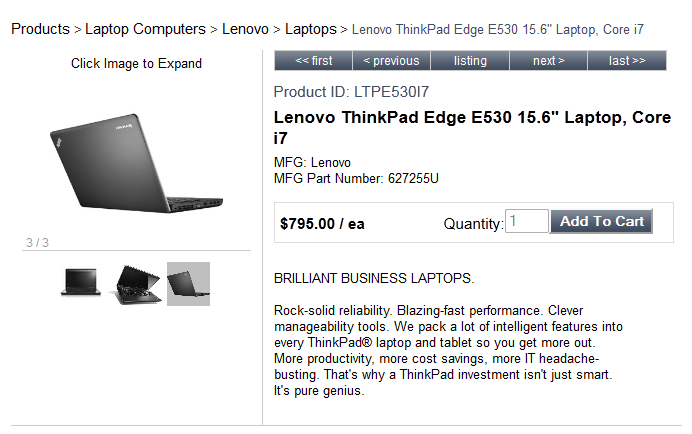
Inventory Item: The Detail Image is the primary image used within the item details template. This image is re-sized to a standard viewing size on the item page as shown below. The Detail Image can be viewed using the original size by clicking on the Enlarge Image located below the image. The recommended size for inventory item detail images is up to 200 kb; over 400kb produces error and will not allow to upload.
-
Image Summary:
-
-
| Description | Recommended Dimensions | Recommended File Size | |
| Product Detail | Insert up to 12 items per item in product record Website tab | 600px x 600px (min 200px x 200px and max 1000px x 1000px) | Less than 200kb (max 400kb) |
| Product Thumbnail | Automatically created from the Product Detail Image. Only insert a thumbnail image if the reduced size of the Primary Detail Image is not satisfactory. | 200px x 200px | Less than 20kb (max 100kb) |
| Folder Detail | Insert up to 12 banner images per folder in Folder > Properties > Website tab | 600px x 100px | Less than 200kb (max 250kb) |
| Folder Thumbnail | Insert one thumbnail image per folder in Folder > Properties > Website tab | 200px x 200px | Less than 20kb (max 100kb) |
Importing or Exporting a List Using a Bulk Graphics Utility
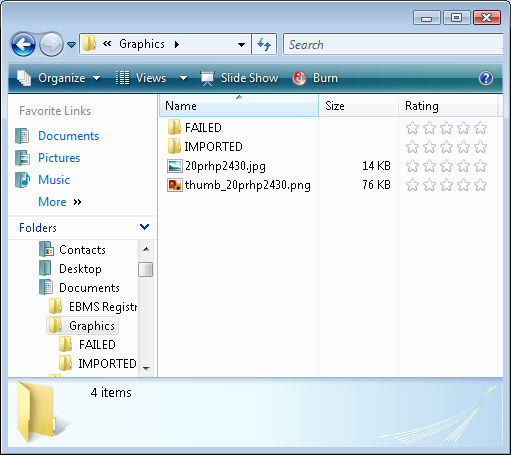
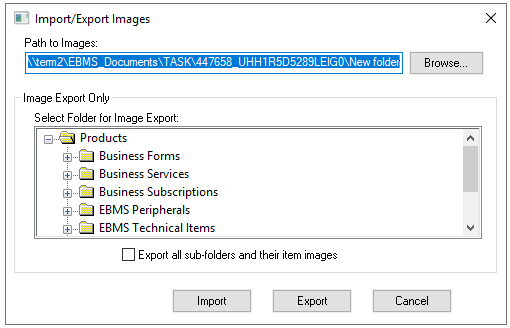
A utility can be launched to import or export a list of graphics file within a specified file folder. For example, the local machine below contains a folder directory labeled Graphics. All graphics files within this folder can be inserted into the inventory records of EBMS by using the following steps.
-
Create a common file folder to place graphics as shown below:
-
Place edited graphics files within the folder using the inventory ID as the file name. This will cause the file to be inserted within the Primary Detail Image field of the website tab in the inventory item. Prefix the file name with thumb_ if the image is to be inserted into the Thumbnail image.
Multiple images can be included by being appended with _2, _3, _4, _5, _6, _7, _8, _9, _10, _11, _12. Example: 20prhp2430_2.jpg.
Graphics for serial numbers must include the inventory ID and the serial number as the file name. Example: ITEMID_SERIALNUMBER.jpg. Thumb and multiple images following the same conventions as mentioned earlier. Example: Thumb_ITEMID_SERIALNUMBER.jpg or ITEMID_SERIALNUMBER_1.jpg
Naming conventions for the import are not case sensitive. -
Launch from the main EBMS menu to open the following dialog:
-
Enter the file Path to Images. Use the Browse button to locate the graphics file that was created to temporarily store the graphics.
-
Click on the Import button to launch the import process. The process will move any graphics that were successfully inserted into an inventory item to the designed subdirectory and move any graphics that failed to be properly inserted into the FAILED subdirectory. These two subdirectories are created by the utility and may wish to be emptied if the backup graphics are not needed. Note that any graphics within the folder will overwrite any images that are already stored within the website tab of the inventory item.
-
Complete the following steps to export graphics
-
Select a product folder for image export.
-
Enable Export all sub-folders and their item images to include all sub-folder products.
-
Click the Export button.
Inserting Images into Inventory Items
Use the following steps to insert a graphics individually into the Website tab of the product.
-
Open the Website tab as shown below:
-
Right-click on the Thumbnail or Detail Image graphics outline and select Insert Object as shown below:
-
The Detail image will be shown on your item detail page and may be re-sized to fit the item template.
-
The Thumbnail image will be shown on your item listing pages and will be the exact dimensions of the image inserted. EBMS will automatically re-size the Primary Detail Image to create a thumbnail if the thumbnail field is left blank.
-
Click on the Insert Image menu option to insert the graphics a file at a time.
-
Click on View All Images to add multiple images to the item. The website will display a simple gallery with all images as seen below. A total of 12 images can be inserted for a single item or folder.
Review Listing Products on the Website for more details entered into the website tab of an inventory item.
Review Importing and Exporting Inventory Images for details on inserting graphics into the General tab.