Configuring SQL Mirror
Enabling External Services
The External Services setting within the EBMS Server Manager program must be turned on for the SQL Mirror updates to the flow.
Check the box for Enable external services and SQL Mirror for any company or companies for which there is an SQL mirror.

Configuring the SQL Server Connection String
EBMS needs to access the SQL database to perform both the Complete Upload and the continuous export. This SQL Server Connection string consists of the user and database information as created in the Configuring the SQL Server section. Complete the following steps to configure the connection string:
-
Select File > System Options > Connection String from the main EBMS menu.
- Click the "New..." button to create a new connection string

- Give your String an ID
-
Enter the following into the Connection String entry: server=[server name\instance];Initial Catalog=[database name];Persist Security Info=False;User ID=[username];Password=[password];MultipleActiveResultSets=False;Encrypt=True;TrustServerCertificate=True;
- Replace the text in placeholder brackets [ ] with the appropriate values. Example: server=<SQLServer>;Persist Security Info=False;User=<ebms_user>;Password=<ebms>;Initial Catalog=<EBMSMirror>;
-
Verify that the Connection String works by connecting to the SQL database using Excel (or a similar program) from another computer. The Connection String should work within EBMS if the setting works from Excel.
- Set a timeout & check the box for "Enable as report data source" if you want to use this for printing reports
- Click "OK"
- Then go to the SQL Mirror tab

-
Select your connection String from the drop down
- Check the box for "Log" if you want to enable logging of the SQL Mirror activity
- Click the "Table List..." button to select tables to mirror.
- You can apply filters to the tables from here as well. More details on this can be found below.
- Click "OK" once you have completed your selection.
- If you want to exclude any specific fields, click the "Field List..." button to add them. Details on this can be found below.
- Check the box for "Complete Upload"
- Click "OK" to close the System Options window.
-
- Your SQL Mirror should begin to sync. How long this takes may vary depending on the size of your data set and what tables, records, and fields you selected to sync.
Selecting Tables to Mirror
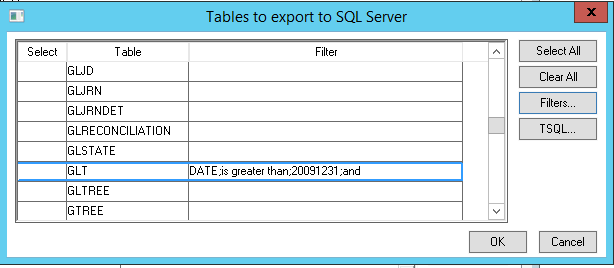
EBMS data tables must be individually selected as tables to mirror. Select by choosing Table List on the File > System Options > SQL Mirror dialog. In the Tables to export to SQL Server dialog, select those tables that are to be mirrored.

Each table can be filtered to reduce size using an Advanced Query. Visit the Set Query Options section for instructions on these settings.

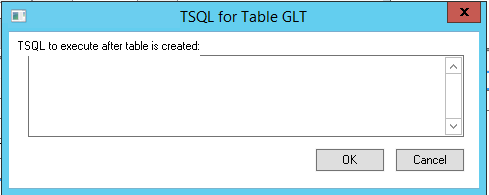
T-SQL statements may be configured in EBMS, if desired, and executed within the SQL database after the table has been created there. This is an advanced feature for which an understanding of SQL is critical.
Note: A Complete Upload is required after each change to the table list.
The following tables cannot be mirrored.
| EBMS Table | Reason for Exclusion |
| DBFIELD | Encrypted |
| DBSESSIONS | Changes very frequently |
| LOGS | System data |
| USERS | Encrypted |
| VER | System data |
| WHATTHIS | System data |
| ARSMSHIPINFO | Incompatible with sync technology due to ODBC integration with UPS WorldShip and Fedex Ship Manager |
| DBEXCHG | Would be a circular reference |
| Temporary transaction file (such as ARGLTRAN) | Not implemented |
| Custom message | Not implemented |
Excluding Fields
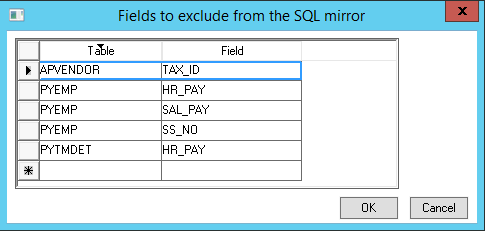
Certain tables may have sensitive information that should not be exported. Choose the table and fields to exclude in the Fields to exclude from the SQL Mirror dialog. Access this dialog by choosing Field List on the File > System Options > SQL Mirror dialog.

Note: A Complete Upload is required after each change to the field list. Review Upload files for steps to complete this necessary final configuration step.