A check may need to be voided for various reasons:
-
The check amount was wrong.
-
The check was made out to the wrong vendor.
-
The payment was processed in error.
-
The check was returned by the bank and cannot be deposited again.
It is not necessary to void a check to change an invoice if the total payment remains the same. Whatever the reason, the steps to void a payment are the same. Select one of the following options to void a check:
Select by Vendor and Invoice
Locate the invoice that was paid with the check you wish to void. Review the Viewing Vendor Invoices section for details in locating an invoice.
-
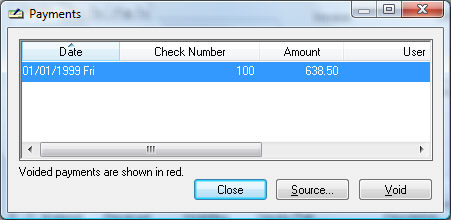
Open an existing invoice and select Payments from the View menu in the invoice header and the following list will appear:
-
Click on the check that you wish to void and click the Void button.
-
A wizard message will confirm the check number that is being voided. Click Next to continue.
-
The original process date will default as the Process Date. Continue with the default date unless the transaction month has already been closed. Click on the Finish button to complete void process. If more than one invoice was paid with the check that is being voided, a message will display the number of different invoices paid.
Select by Check Number
Complete the following steps to void a check by the check number:
- Open Expenses > Bank Accounts.
-
Select the desired bank account and click Reconcile to open the Account Reconciliation window. (This action will prompt the user to post expense transactions to the general ledger, so the transactions are up to date for reconciliation.)
-
Click on the Checks (or Payments) tab as shown below:

-
Highlight the check that you wish to void. Scroll through the list using the scroll bar or down arrow button on the keyboard. You can sort the checks by check number by clicking on the Control Number column label.
-
Click on the Void button and a wizard message will confirm the check number that is being voided. Click Next to continue.
-
The original process date will default as the Process Date. Continue with the default date unless the transaction month has already been closed. Click on Finish button to complete the void process. If more than one invoice was paid with the check that is being voided, a message will display the number of different invoices paid.
Voiding a check will not void the invoice but only list it as outstanding. Review the Changing or Voiding Vendor Invoices section to void or delete an invoice.