The product attribute must be defined at the category folder level. Separate category folders must be created if the number of attributes or the attribute labels differ from each other. All items within a folder will have a common attribute list. Complete the following steps to define a set of product attributes for a folder:
-
Create an inventory folder for a group of items with common attributes by selecting from the main EBMS menu, as shown below. Review the Adding and Deleting Product Categories section for more details on creating new category folders.

Right-click on an existing folder and select Properties from the context menu if the folder already exists.
-
Click on the Product Attributes tab of the Category Properties window as shown below:

-
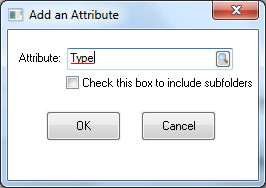
Click on the Add button to add a new attribute to the list or click the Insert button to insert an attribute into the list as shown below. Make sure the attribute name is clear and concise.
-
Enable the Check this box to include subfolders option if the subfolders should contain the same attribute. Click OK to save.
-
Repeat the steps above for each attribute as shown below:

-
Use the Move Up, Move Down buttons to reorder attributes. Click on the Reorder Subfolders to copy the reorder settings to subfolders.
-
The Default Inventory Item is an optional setting that is especially useful on the web. The default inventory item will default the attribute settings.
-
Click OK to save product attribute settings. Set other default values for the new folder.
The attribute value is set within each inventory item. Continue with the next section - Entering Item Attributes to set attribute values.