To set up Koble Payments devices, follow this step-by-step video or take the following steps:
- Set up the Virtual Terminal. Review Setting up Koble Payments in EBMS for instructions.
-
Set up the device account in EBMS:
-
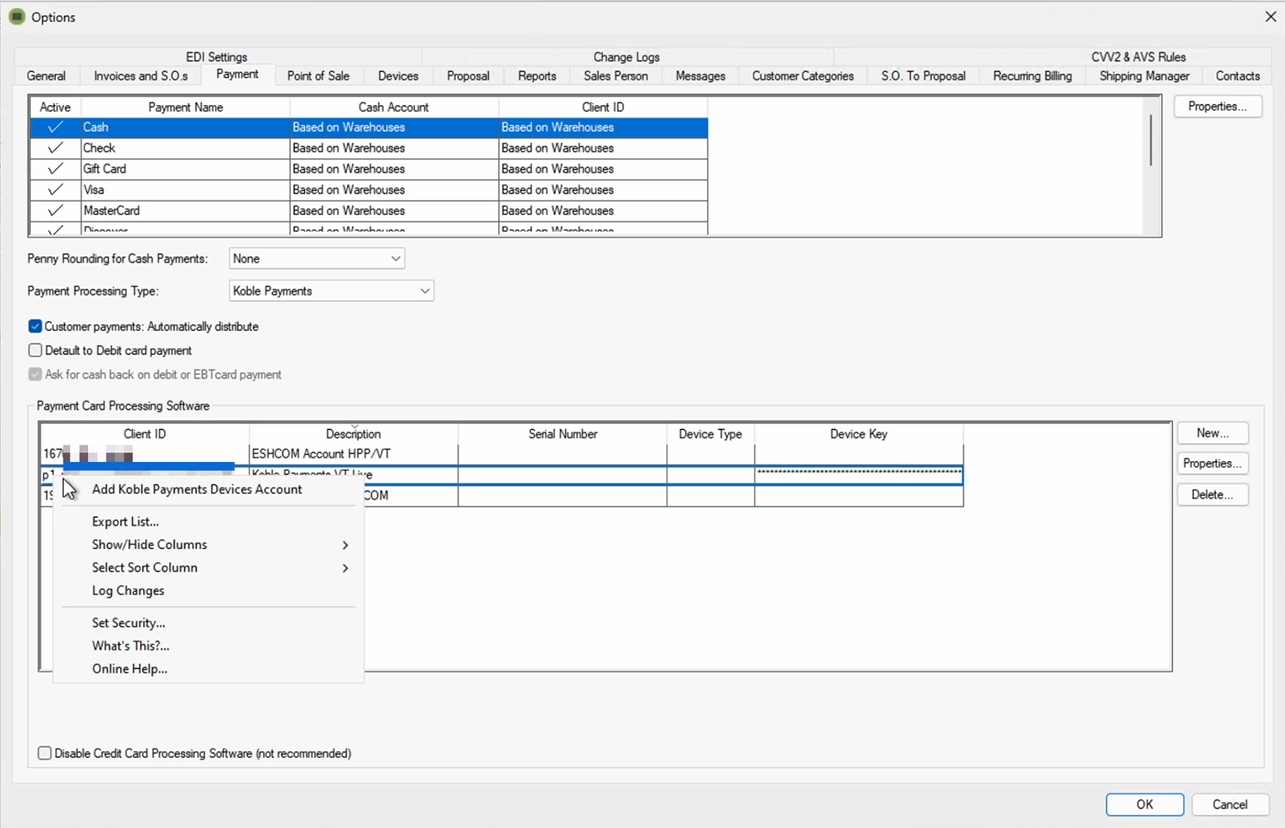
In EBMS, go to Sales > Options > Payment.
-
Right-click on the Virtual Terminal account and select Add Koble Payments Devices Account.
-
2-3 seconds later, the account should appear in the payment list.
-
-
Set up the devices:
-
Connect the device(s) to ethernet, then power.
-
Once the device has finished booting, it should show an Activation code on the screen. Wait to proceed until you see the activation code.
-
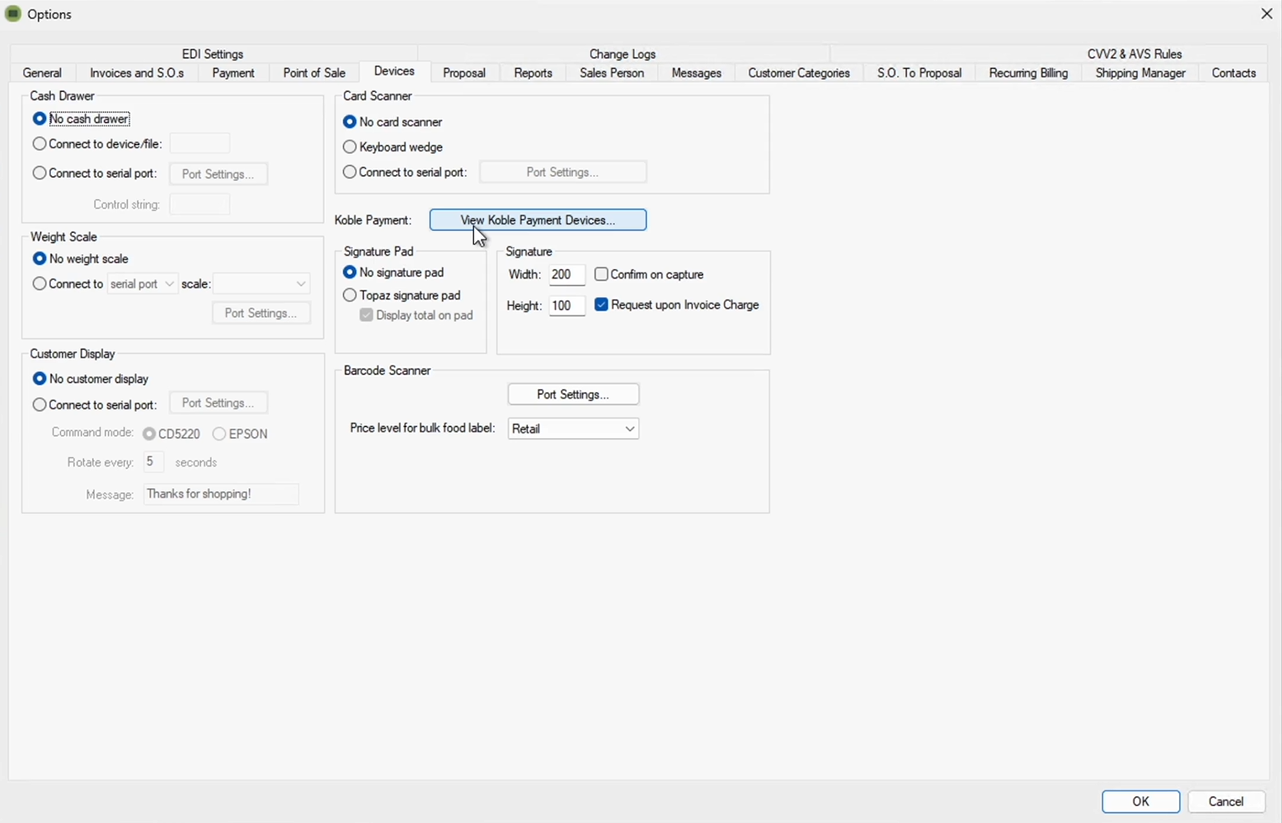
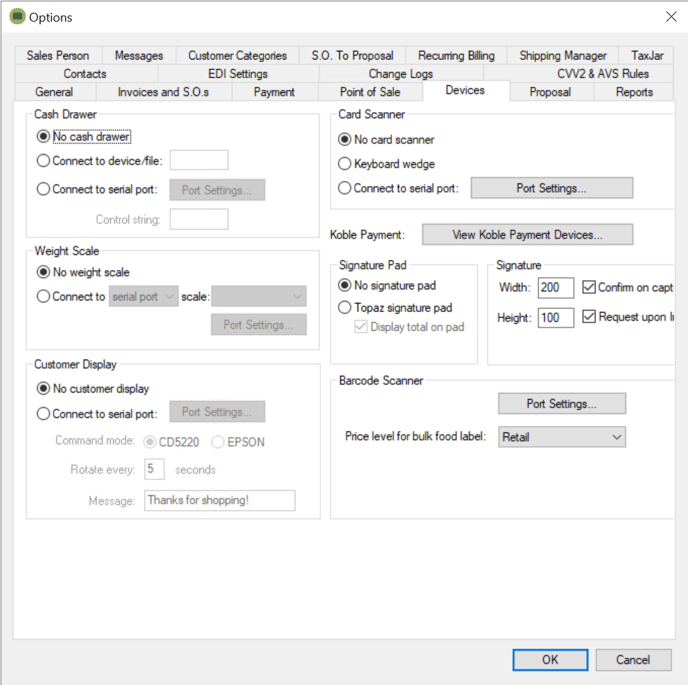
In EBMS, go to Sales > Options > Devices.
-
Click View Koble Payment Devices.
-
Click New to add a device.

-
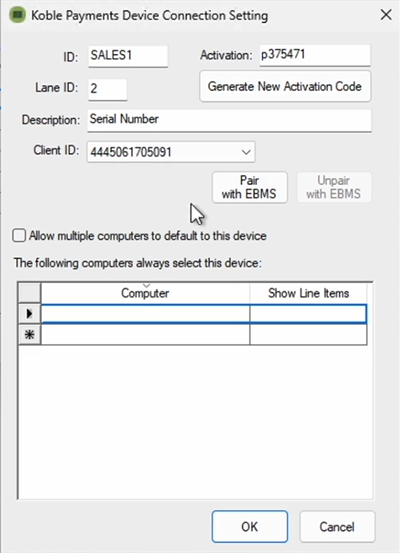
Enter the ID. This will be displayed everywhere in EBMS where a device is referenced and should indicate clearly which device is being referenced.
-
Verify that there is a number in the Lane ID field. This number will auto-increment as you add devices. This number is needed if you were to ever need to re-pair a device, and may sometimes be used in troubleshooting.
-
Enter the Activation code. This can be found on the device itself after it has been plugged in to the network and powered on.
-
If your device has been paired previously, you'll need to enter the correct Lane ID, and then click Generate New Activation Code. Then, copy the displayed activation code into the Activation field.
-
-
Enter a Description. It is recommended to put the device serial number here, but this can be any text that the user decides.
-
Select the Client ID. This should be the same Client ID that was set up in Step 2.c.
-
Most clients will have only one Client ID listed there to use.
-
-
Click Pair with EBMS. This will take a minute or two and the device will reboot during this time.
-
It is recommended to enable Allow multiple computers to default to this device if the device will be shared between multiple computers.
-
Click OK.
-
Repeat for each additional device.
-
-
Click OK.
- Test.
-
Gift cards can be processed within Koble Payments using the Valuetec processor. Complete the steps within Gift Cards > Overview to configure EBMS for valutec gift cards.
Defaulting a Computer to a Device
If desirable, a user can default a specific computer to a Point device. This enables the computer to automatically select the Koble Payments device instead of requiring the user to select it each time it is needed. A default setting of ‘No Device’ can also be set and is beneficial when the user never wishes to process payments. Review the following instructions for the steps to set the desired default.
A computer can be set to default to use a specific Koble Payments device in the Sales > Options > Devices tab.
- The Koble Payments device must be configured within EBMS prior to connecting it to a computer. If this has not been done previously, review and complete the steps outlined in the previous section.
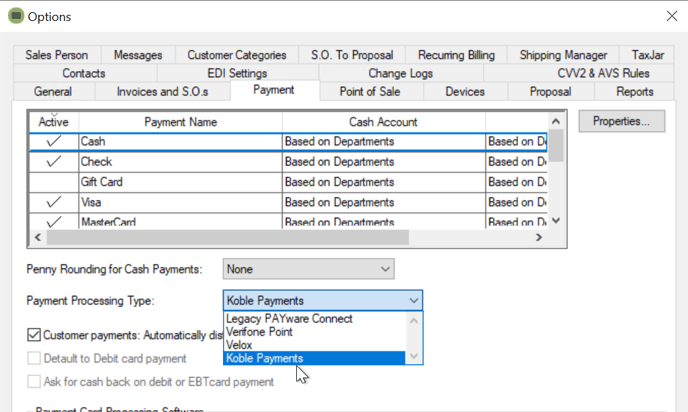
- On the main EBMS menu select Sales > Options and click on the Payment tab.
- Verify that Koble Payments is selected as the Payment Processing Type.
- Click on the Devices tab.
- Click View Koble Payment Devices.
- Select the Computers tab as shown below:
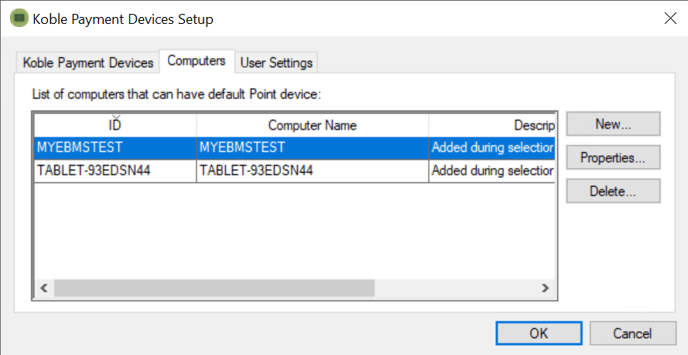
- If the computer is not listed, click the New button to display the Point Computer Properties entry dialog. If the computer is already in the list, skip to step 12 and continue.
- Enter an ID for the computer. The ID is a user-defined code to uniquely identify it.
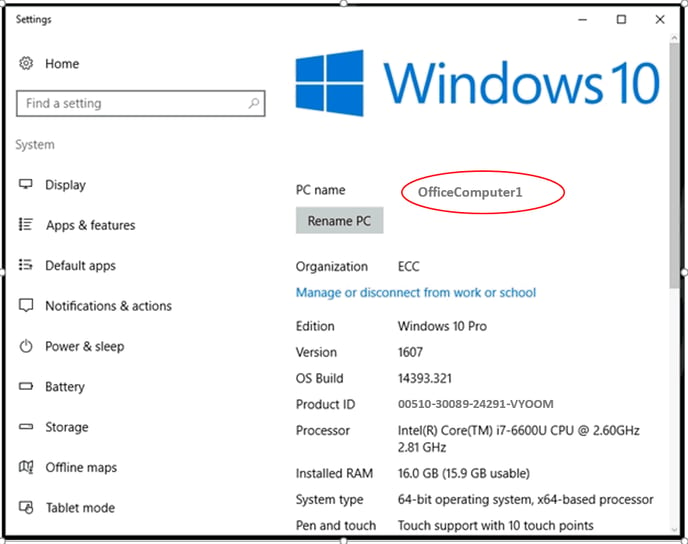
- Enter the Computer Name. This name can be found by accessing the computer system information and will be displayed on a screen similar to what is shown below:
- Enter a Description for the computer. This may include details such as the location, primary use within the company, or other identifying information.
- Click the OK button to save changes and return to the Koble Payment Devices Setup dialog.
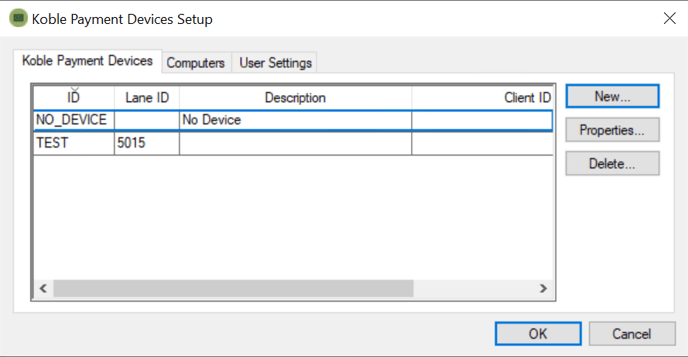
- Select the Koble Payment Devices tab as shown below:

- Find and select the Koble Payments device to be connected to the computer.
- Click the Properties button to open the Koble Payments Device Connection Setting dialog (as shown in the next step).
- At the bottom of the Koble Payments Device Connection Setting dialog is a table with a column heading titled Computer. Click on the first empty row to display a drop-down menu which contains a list of the available computers.
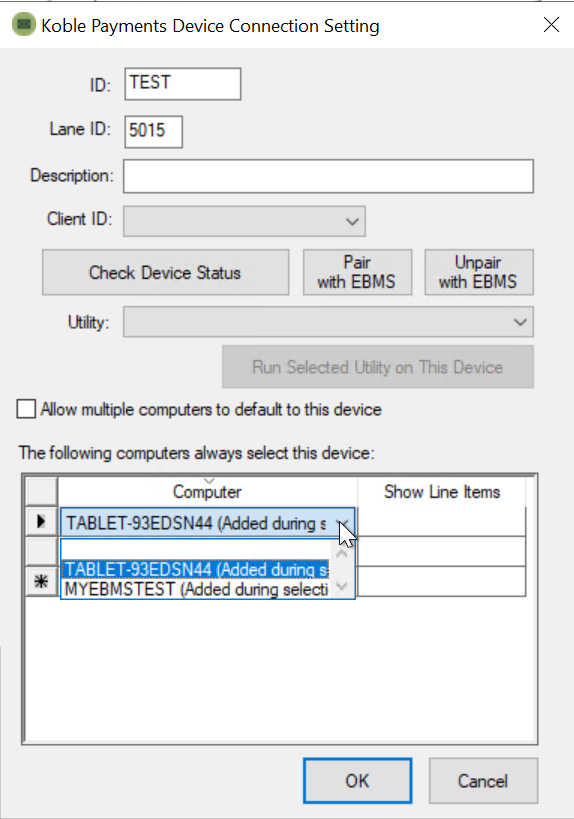
- Select the name of the computer to be defaulted to the Koble Payments device.
- Note that multiple computers can be set to default to one Koble Payments device. Repeat the previous step as needed to choose all the computers to be defaulted to this specific Koble Payments device.
- (Optional) Many retail users wish to show each item the customer is purchasing on the Koble Payments device. Enable this feature by clicking in the empty cell in the Show Line Items column that is beside each defaulted computer and selecting the checkbox that appears.
- Click the OK button to save changes.
Setting a Koble Payments device as the default for a computer in the ‘Device Selector’ dialog:
The Device Selector dialog can be accessed from a variety of screens within EBMS where a Point device may be needed to process a transaction or capture a signature. It can be used to set or change the default Point device for a computer very quickly and efficiently.
*Note that this dialog will automatically appear each session the Point device is used if the user has not permanently defaulted the computer to a specific Point device.
Listed below are two commonly used access points to the Device Selector dialog:
- From the main EBMS menu: Click Sales > Koble Payments Device To Use
- From the Sales Invoice Entry window: Click Edit > Koble Payments Device To Use
Complete the following steps to set a Koble Payments device as the default for a computer in the Device Selector dialog:
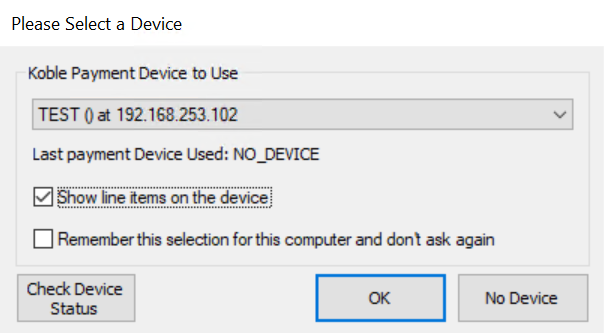
- From the drop-down menu select a Koble Payments device:
- Click on the check box to select Remember this selection for this computer and don’t ask again. If this field is missing, as shown below, the user has only ‘Basic Entry’ permissions set and will need to contact a manager to make this change.

- Click OK to save changes.
Review Payment Entry Dialog for more information on processing.
‘No Device’ as the default Koble Payments device:
In some instances, an EBMS user may never need to use a Koble Payments device and may wish to avoid the repetition of selecting a device. This would commonly take place in situations where a user works in a back office and merely accesses sales orders to update or make changes to a job in progress. EBMS provides for this circumstance by allowing the user to save the Koble Payments device default as ‘No Device.’
This action can be accomplished both in the Device Selector dialog or in the Sales > Options > Devices tab.
Complete the following steps to set the default Koble Payments device to ‘No Device’ in the Device Selector dialog:
- From the main EBMS menu select Sales > Koble Payments Device To Use to open the Device Selector dialog.
- Click on the check box to select Remember this selection for this computer and don't ask again - selecting this option will set the selected device as the computer's default device. If this field is missing, the user has only 'Basic Entry' permissions set and will need to contact a manager to make this change.
- Click on the No Device button. The dialog screen will close, and no default device will be saved.
Complete the following steps to set a computer's default Koble Payments device to 'No Device' within the Sales > Options > Device tab:
- On the main EBMS menu, select Sales > Options and click on the Devices tab.
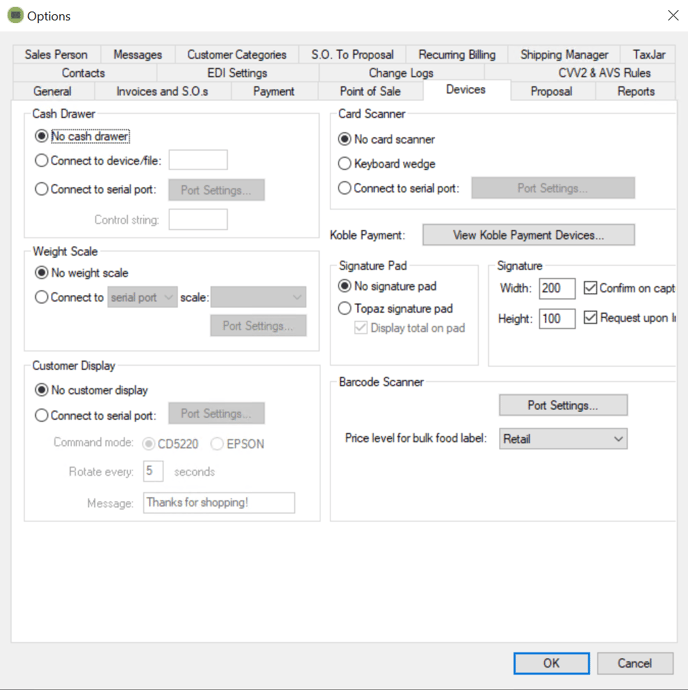
- Click the View Koble Payment Devices button to open the Koble Payment Devices Setup dialog shown below:
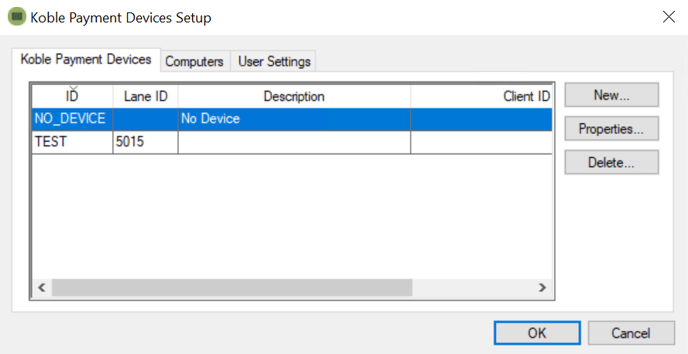
- Select NO_DEVICE from the list of available Point devices as shown above.
- Click on the Properties button to display the Koble Payments Device Connection Setting dialog.
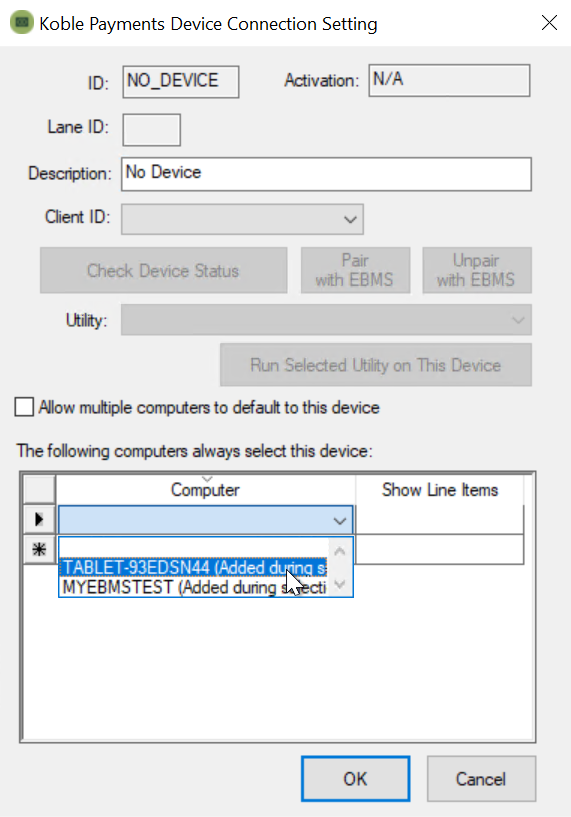
- Select the name of the computer to have NO_DEVICE as the default.
- Click OK to save changes.