It is important to plan the product groups before proceeding with this section. See the Planning Your Website section for more details. This section will explain the steps required to create web pages for each product group. The website page settings are set within the as shown below.

Click on a category folder group (example:Accessories) and click on the Properties button. Click on the Website tab as shown below:
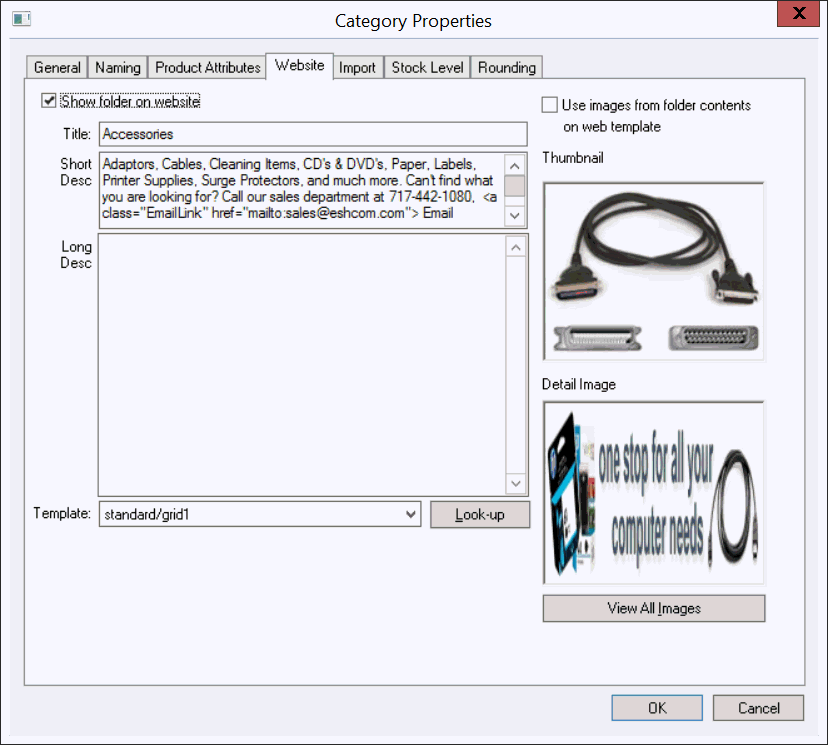
The Show folder on website option must be enabled to show this group on the website.
Important note: All parent folders must have the Show folder on website option enabled for the product group website to show. For example, the 3rd level folder page will not be displayed on the web if the 1st or 2nd level folder has the Show folder on website option disabled. This also includes the root folder labeled Products or Inventory. The root folder normally does not require any settings except that the Show folder on website option is enabled.
The Title is shown on the top of the web page. If this entry is blank the folder name is used as the title.
The Short Description is an optional description that is often displayed at the top of the product page. This description should be limited to a paragraph or a few sentences.
The Long Description may contain additional information and is not limited by the amount of data. This section may include multiple paragraphs or other product links. This description is also an optional entry. Review the Website Links and Associations section for more details on product links.
The Template dropdown option determines the appearance of the page. A number of template options are available within the EBMS software. Review the Product Group Website Template Settings section for a list of standard templates. Custom templates can also be added to display specific information or customize the web page arrangement.
Select the desired Template from the list on the left side of the dialog. Close the window to return to the Folder Properties Website tab.
The Thumbnail and Detail Image entries are graphics or photos that are displayed on the website and are arranged by the template. These images should depict the contents of the folder. The Thumbnail image will be created from the Detail Image if the Thumbnail is required and the Thumbnail is left blank. The Use images from folder contents on web templates displays item images instead of folder detail images.
For example, these steps were completed to create the following Accessories web page:
-
Go to Inventory > Options and click on the Product Categories tab.

-
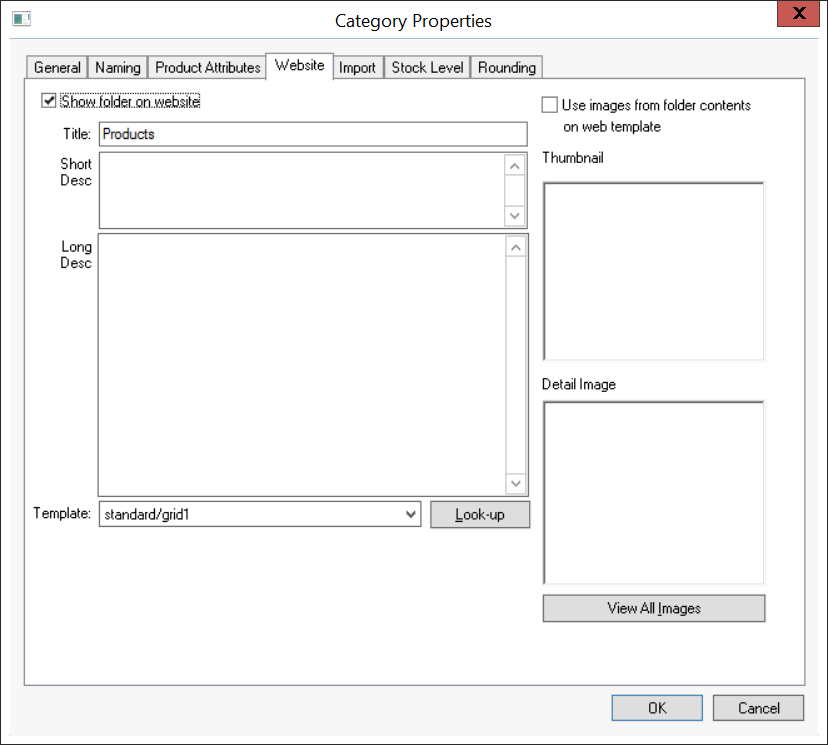
Click on the top-level root folder labeled Products or Inventory and click on the Properties button. Click on the Website tab to show the following dialog:
-
-
Enable the Show folder on website option since it is the root folder. This step is required so all sub-folders with the Show folder on website option enabled will be displayed on the web.
-
Set the Template to a template such as standard/grid1. This template will only be used if the products link is used on the website. Review the Product Group Website Template Settings section for more template options.
-
Enter a Short Description or Long Description only if general product notes are desired. No Thumbnail image is required on this dialog. The Detail Image is not used at this level unless a template such as the itemList is used. Review the Product Group Website Template Settings section for more information on group templates.
-
Click on the OK button to return to the Inventory Folder list.
-
-
-
Highlight the Accessories category folder, click on the Properties button, and click on the Website tab as shown below:

This dialog will require more information than the root folder.-
Enable the Show folder on website so the printer page is created.
-
The Title entry is blank, so the system will use the folder label Printers as the title.
-
The Short Description gives the page some more information about the printers. This description shows below the title Printers in the website page shown in the following page.
-
If a Long Description would be entered in this dialog, the description would be displayed below all the Icons.
-
The template standard/grid1 is selected so that the subgroups will be displayed with individual Thumbnails from the subfolders rather than the graphics within the printers dialog shown above. The thumbnails are displayed 3 wide and up to 4 rows long.
-
Click the OK button to return to the folder list.
-
-
Repeat steps for any sub-categories or folders within the selected folder. The Thumbnail images must be set within the individual subfolders. For example: Adapters, Cables, Cleaning Items, are all subfolders within Accessories. The thumbnails for this page could also be created by the system if the Detail Image within each subfolder is properly created. Review Inserting and Exporting Website Graphics for more details on inserting the Thumbnail or Detail Image graphics.
-
The following web page is created as a result of the settings described above.
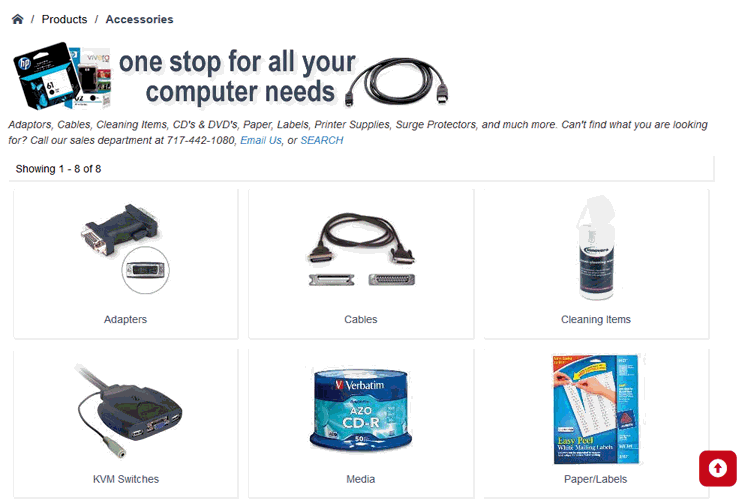
Page buttons will appear at the top and bottom of the web page if the number of product groups is greater than the space on the page. The appearance of the website can be configured using a variety of options. The flexibility of the EBMS E-commerce engine allows the user to personalize the shopping cart to match the site.
Continue with the Listing Products on the Website section for more details on adding items to the product groups.