EBMS gives managers the tools to set vendor defaults so that important standard settings are consistently set for each new account. Configuring accounting defaults in the Advanced tab, setting terms, standard messages, and other important configurations can save the manager a lot of time and make data entry consistent.
It is wise to set vendor folder defaults before entering new vendors. If you are not familiar with editing defaults, review Edit Defaults, Filter Down Data, and Globally Change Data for more details on these important default settings. To continue, select Expenses > Options > Vendor Categories and click on the root folder named Vendors and click the Edit Defaults button. The following window will appear: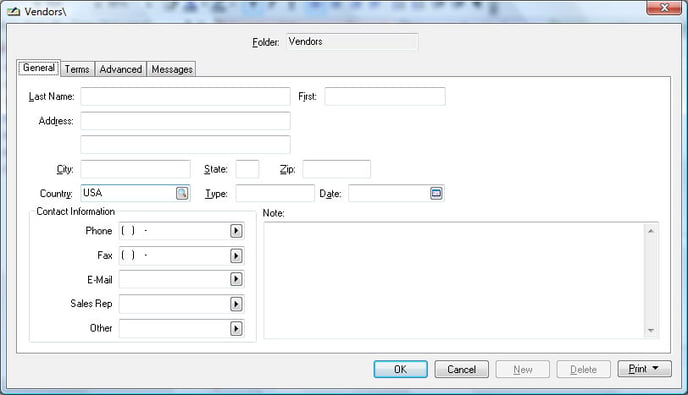
The Vendors window looks very similar to the vendor entry window but is used only to enter default values. Any data entered into any of the entry fields will be a default the next time a new vendor is entered in the main vendor entry window.
EXAMPLE: If you set the country entry field default to "USA," you will not need to enter this data when entering a new vendor.
General Tab
-
Set the Contact Information field labels to reflect the most common contact information obtained from vendors. Click on the right arrow button to the right of each of the five entry fields and select a variety of labels. For example, if most of the phone numbers in the system can be labeled as Billing Contact or Work Phone, choose the most common option to be the default label for Phone.
Terms Tab
-
Set the Lead Time __ days to a value greater than zero to create a default setting. Review Estimated Time of Arrival (ETA) Date for more on this inventory purchasing feature.
-
Set the Pay-From Account setting if a specific bank account is used for the current group of vendors.
Do not set default values of Terms, Pay-From Account, or other settings if they are not consistent for the current category of vendors. Remember, information entered on the Vendors page will automatically populate when a new vendor is entered into the system. Only set values that will help save time in the long run.
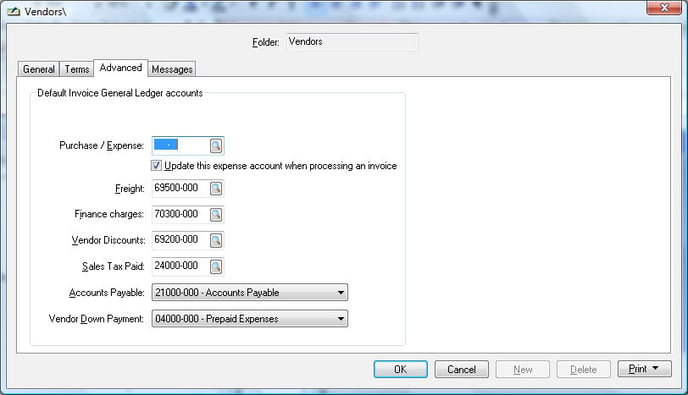
Advanced Tab
Many of the settings within the Advanced tab should be set before entering or importing vendors since these important settings are normally set by the accounting managers and should be consistent for an entire category of vendors.
-
Enable the Update this expense account when processing an invoice option to record the last general ledger expense account for each vendor each time an expense invoice is processed. Review the Vendor History section for more details on this setting.
-
Set the Freight general ledger code to an expense account used to record shipping expenses.
-
The Finance charges general ledger account should be set to an expense account used to record any finance charges paid to a vendor.
-
The Vendor Discounts general ledger account can be an income account or an offsetting cost of sales account that accumulates any discount earned on an expense invoice. Review the Discounts and Finance Charges section for more details.
-
Enter an expense general ledger account into the Sales Tax Paid entry field. Do not get this entry confused with the sales tax liability code. The Sales Tax Paid account is used to record sales tax paid to vendors and does not include sales tax paid to the state that has been collected from customers.
-
Set the Accounts Payable liability account that will be affected when vendor invoices are processed. Most companies use only one accounts payable trade account. Only the general ledger accounts classified as Accounts Payable will be available.
-
The Vendor Down Payment account records any down payments or deposits paid to a vendor. This should be an asset general ledger account. Only the general ledger accounts classified as Vendor Down Payments will be available.
Auto Send Tab
-
Enable the Exclude vendor from all AutoSend batch modes, except Direct Payments setting if the entire group of vendors should be excluded from the Auto Send process. Review Auto Send Overview for details on the Auto Send feature.
Messages Tab
-
If you wish to enter messages that appear to all vendors, enter them into the Messages tab. Review Custom Messages for instructions to create messages.
Copying Default Values
-
To copy the default values from the root folder into the subfolders, filter down each default value for each entry field within each tab. Review Edit Defaults, Filter Down Data, and Globally Change Data for detailed instructions on this copy process.
-
Click the OK button to return to the options window.
Repeat the steps above if you wish to set different default settings for subfolders than the ones set for the root vendor folder.
For more details on individual fields go to Adding and Deleting Vendor Folders.