Direct vendor payments in EBMS are electronic payments made through the Automated Clearing House (ACH) network, a secure system for clearing electronic payments between banks. Managed by NACHA (formerly the National Automated Clearing House Association), the network is much quicker than paper checks.
Direct debit via ACH transactions are simple, safe, convenient, and cost-effective electronic payments options that businesses of all sizes can utilize to make and receive payments. Visit www.electronicpayments.org to learn more.
Using EBMS direct payments tool helps reduce errors, may save postage and labor, and provides much greater security than with paper checks.

EBMS uses a NACHA file to upload vendor payment details to the EBMS user's bank. Review www.nacha.org for more information on NACHA.
Video: Direct Payments ERP Support Training
Complete the following steps to configure EBMS to process direct payments:
-
Complete the following steps to configure each vendor record that will be paid using the direct payment method:
-
Open a billing vendor record by selecting Expenses > Vendors from the EBMS menu and select a Vendor.
-
Click on the Terms tab in the vendor record as shown below:
-
The Payment Vendor ID identifies the vendor of the that will be receiving the payment for any expense invoices entered under the current billing vendor. If the Payment Vendor and the Billing Vendor are equal, keep this setting blank. For example, if Parts America requires that payments be sent to John's Check Services, then the main Vendor ID would identify Parts America and the Payment Vendor would identify John's Check Services.
-
Complete the following steps only when the Payment Vendor differs from the billing vendor:
-
Create a new Payment Vendor record within a payment vendor only folder. Review the Adding a New Vendor section for more information on creating a new vendor.
-
Set the Pay-From Account and Direct Payment Information at the bottom of the Terms tab within the new payment vendor record. IMPORTANT: The Direct Payment Information must be set within the payment vendor record rather than the billing vendor record. See steps 2 through 4 below for entry details the Direct Payment Information settings.
-
-
-
Enter the optional Pay-From Account: Keep this setting blank unless the vendor is going to be paid from a specific checking or cash account. This setting is required to make a direct ACH payment to the Vendor.
-
Complete the following Direct Payment Information settings to enable the ability to directly pay a vendor using an ACH payment:
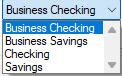
b. The bank Account Type should be set to the vendor's recipient bank account type. It is important to identify business bank accounts since they use a CCD file type which is different than individual accounts which use PPD ACH files.
c. Enter the Routing Number/ODFI of the originating bank of the vendor into the Routing field. As the origin of funds for the direct deposit transactions, this should be the bank’s unique identifying number within the Federal Reserve System. The routing number is part of the line of numbers that is printed along the bottom of pre-printed checks and pre-printed deposit slips. It typically 9 digits long and the first set of numbers on the left-hand side.
d. Enter a direct payment Description such as the bank name.
-
Configure the company bank account to send direct payments. Review Configuring ACH and EFT Direct Payments for instructions to configure the sending bank account if this bank account has not been configured to send payments directly.
-
Test the vendor’s bank information by uploading a Prenote file for each vendor to your bank. A Prenote file is a zero-dollar transaction that is created and sent through the ACH network to test the validity of both banks' information. Review Create Prenote and Submit NACHA to Bank Web Portal for step-by-step instructions.
-
Repeat the steps listed above for each vendor that you wish to pay using the EBMS direct pay feature.
Review Processing Direct Payments ACH for instructions on processing direct payments to vendors.
Review Viewing or Voiding Direct Payments for steps to view or void a direct payment batch.
Direct payment setup for Canada: Electronic Fund Transfer (EFT) is the backbone of the Canadian payment industry including debit and fund transfers. Contact Eagle Software Canada for assistance to configure EFT transactions.