Adding and Deleting Customer Categories
How to organize customers into folder groups
The customer category folders in EBMS allow users to organize customers into groups for pricing or mailing purposes. Common settings can be configured for all customers within a folder group. Review the Setting Customer Defaults section for more details.
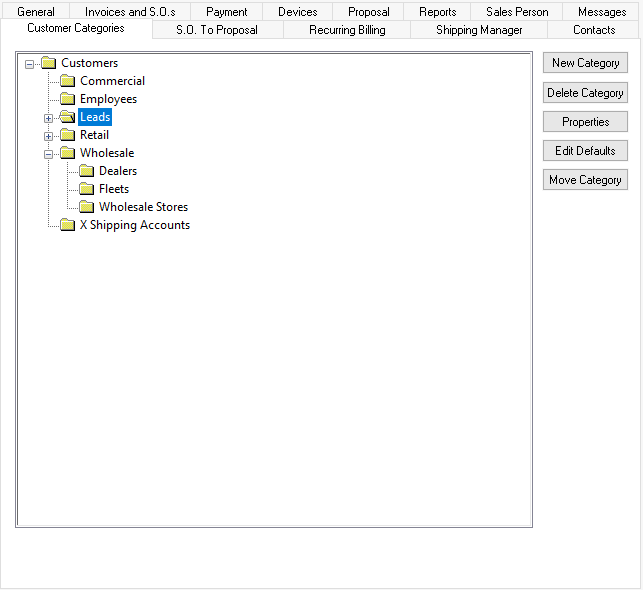
Customer folders are created by selecting Sales > Options from the main EBMS menu and then clicking on the Customer Categories tab. For further explanation of how to create folders for customers, review the Categories and Folder Groups section of the Main Documentation for more details in creating folders.

EBMS is equipped with a standard Customers folder. Additional active folders can be added as needed. Folders will be most helpful if designed in a manner that will facilitate ease of selection for a specific group of customers. For example, a company may create different customer categories for Retail Customers, Wholesale Customers, or Mail Order Customers. Additional subfolders may be created to identify different price groups within the Wholesale folder.
All inactive customers should have the Inactive switch enabled. Doing this preserves customer history but may be removed from the customer list.
Adding a Category Folder
-
Go to Sales > Options > Customer Categories tab. To add a category folder, highlight the folder that it will be a subfolder of, click the New Category button, and the following dialog will appear:

-
Enter the new Category Name describing the contents of the folder.
-
Turn the Allow Only Subfolders switch ON if you do not want any customers placed into this folder but only wish to allow other subfolders.
-
The Tree ID value is used to query or identify the folder. Review Set Query Options for instructions to query records based on category or folder.
Review the Categories and Folder Groups section for more details on folder settings.
Click on the Naming tab to configure EBMS to automatically create a Customer ID when a new customer record is created. Review the Creating IDs section for more details on these settings.
Special pricing can also be configured per customer category. Review the Special Pricing section within the inventory documentation for more details on the Special Pricing tab.
Deleting a Category Folder
Click the Delete Category button and a message verifying the delete action will appear. A folder cannot be deleted if there are customers in the folder. To delete the folder, the customers will need to be moved to another folder before deletion is possible. To move customers, review the section on Adding a New Customer
Changing Folder Names
To change the name of a category folder, highlight the category and click the Properties button. Change the folder name or edit the subfolders button of the highlighted folder as necessary.