Custom Attributes and Optional Components
Custom Attributes can be associated with optional components to combine the process of selecting custom attributes and optional components. This powerful combination gives the user maximum flexibility with items with attributes and components. Complete the following steps to associate custom attributes with optional components:
-
Open a product record for an inventory item with optional components. Review the Optional Components or Accessories section for instructions on creating optional components within an inventory item.
-
Set the product attributes within the main inventory item by clicking on the Product Attributes tab of the main item's product record. Review the Entering Product Attributes section for more details.
-
Set the product attributes within each of the optional components' inventory items to match the settings on the main item explained in step #2.
-
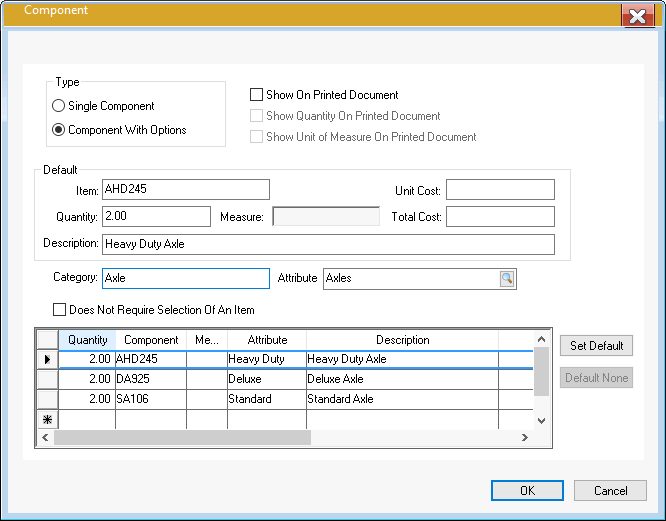
From the product record's Components tab, click the Properties button to open the optional components dialog as shown below:

-
Set the Type setting to Component With Options.
-
Set the Category description. This label will be shown on the component list and also on the option dialog within the sales order.
-
Set the Attribute setting that is associated with the current inventory component. This associates the specific component record with the attribute label.
-
Add the component options and set the associated Attribute value as entered in the custom attribute value list for the selected value set. Review the Attribute Value Sets and Options section for details on creating custom attribute value sets.
-
Review the Optional Components or Accessories section for details on the many other settings with the component dialog. Click OK to save the optional component settings.
-
Repeat each of the steps listed above for each component.
Test the setup by entering the main item within a sales order or proposal and selecting the specific attributes. Review the Using Attributes within a Sales Order or Quote section for more details.