The Auto Send tool can be used to send a notice or general file to a group of customers, vendors, or workers. This method should not be used for general marketing purposes to a large number of accounts because of the possibility of blacklisting the company's E-mail account. Because of the risk of blacklisting, it is best practice to use a marketing solution for all marketing or mass account emailing.
EBMS will send a group of customers or vendors an email note, a document, or another type of message based on the account criteria. Some scenarios include emailing a pricing document, a sales or purchase matrix, a worker's W2, or a general notice.
The Auto Send process for an account can be launched using one of the following methods:
-
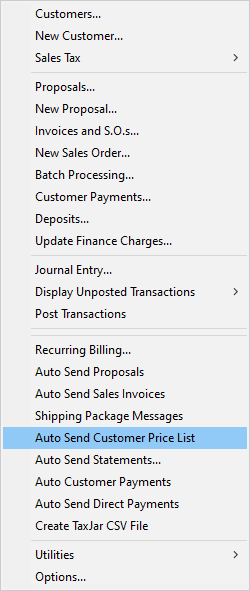
Batch Send Email: This option is launched from the Sales, Expense, or Labor menu by enabling the Show on Menu option on the Send Mode Properties page. For more information on settings, keep reading this article.
-
Scheduled Event: Automatically schedule and send Auto Send documents from the File > System Options > Timed Events tab. Review Timed Events for setup instructions.
Complete the following steps to configure the Auto Send mode for a customer, vendor, or worker. Use the document-based Auto Send modes to send invoices, receipts, tax forms, and other forms.
Creating or Changing an Auto Send Mode
Complete the following steps to set up a send mail mode. Skip to Step 6 to view or edit an existing Auto Send Mode.
-
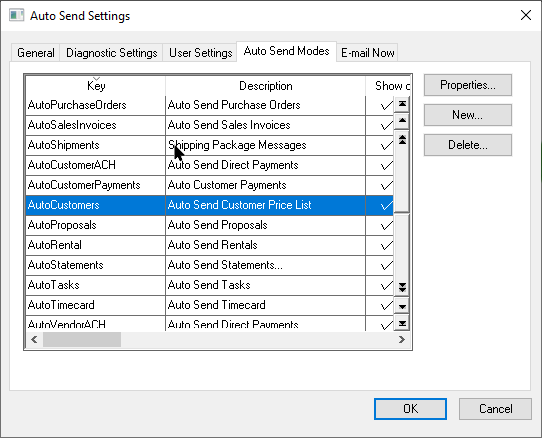
Select File > Auto Send Options > Auto Send Modes tab from the main EBMS menu to open the following list:
-
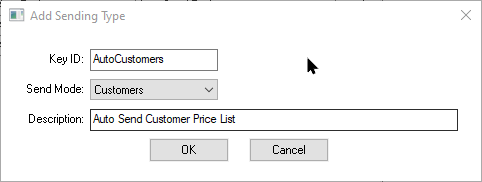
Click the New button to create a new Auto Send Mode and open the following dialog or select an Auto Send Mode and click the Properties button. Continue on to step 6 if the mode has already been created. Clicking New will open an Add Sending Type page:
-
Each Auto Send Mode requires a unique Key Id. This Key ID should be a simple descriptive code that does not include spaces or symbols.
-
Select the Customers, Vendors, or Workers Send Mode as the Send Mode option.
-
Enter a short Description of the Auto Send Mode type. (In the example above, the description is Auto Send Customer Price List.) This description should clearly describe the send mode process. Note that this text is used as the EBMS menu label. Click OK to continue.
-
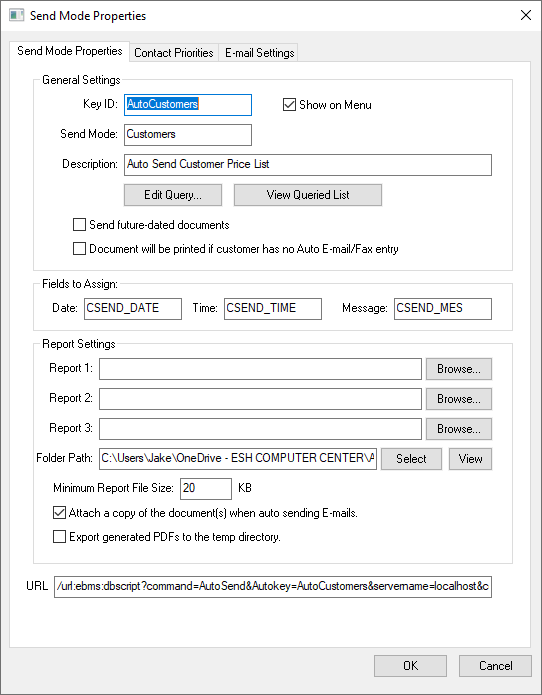
Configure the Send Mode Properties as shown below. You can get to this page by highlighting a send mode line and clicking Properties or by double-clicking a send mode line in the File > Auto Send Options > Auto Send Modes table.
-
Enable the Show on Menu option to display the Auto Send mode on the EBMS Sales or Expenses menu. Disable this option if Auto Send is launched using Timed Events.
-
Click on the Edit Query button to select the group of accounts that will receive emails.
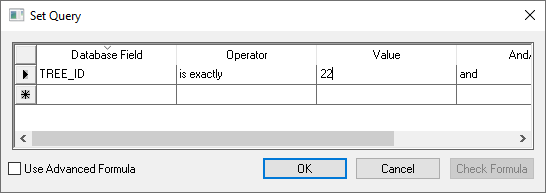
Right-click on a customer or vendor folder to identify the category's Tree ID number.
Review Set Query Options for more details on creating query expressions. Click the OK button to save query information. -
Click the View Queried List to view a list of all accounts that will be emailed based on the current query settings.
-
Enable the Send future-dated documents option to send all documents when they are created even if they are dated in the future. Otherwise Auto Send will wait to send till the document date arrives.
-
Enable the Document will be printed if customer has no Auto E-mail/Fax entry option to print documents for accounts without an email or fax contact set up. Review the following Account Configuration setting for instructions on setting these options within a customer or vendor record.
-
Keep the default values for the Fields to Assign settings since they are advanced settings.
-
Enter the desired report into Report Settings. This report must be a report that is driven from the customer. Keep this setting blank to send a generic report or to send only a message. Click on the Send Mode Properties Advanced tab to configure the exported PDF Attachment Name.
-
Review Auto Send Additional Documents to include other reports in this email by setting the Folder Path.
-
The Minimum Report File Size feature allows you to stop any send processes if export files that are below a certain file size. This value should be set at about 10K less than the average exported PDF file size to prohibit blank reports to be sent as an attachment.
-
Enable the Attach a copy of the document when auto sending E-mails option to include an easy-to-print PDF copy of the document. Disabling this option will only communicate with the customer without any attached documents.
-
Disable the Export generated PDFs to the temp directory option to record a copy of the document to the shared Export Folder identified in the File > Auto Send Options > General tab. Enable this option only if the documents should be copied to the computer's temporary directory.
-
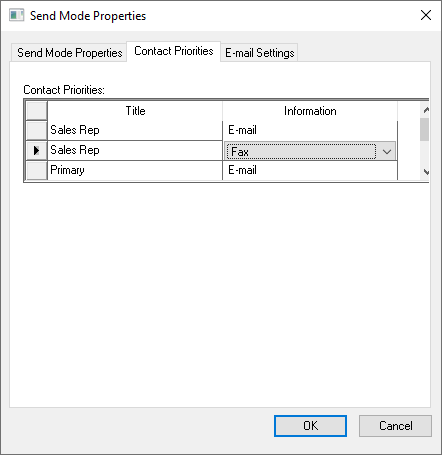
Click on the Send Mode Properties Contact Priorities tab as shown below:
-
Select the Auto Send recipient (which can be derived from the customer or vendor).
-
Enter the contact Title and Information for each recipient option. Review Contact Priorities for configuration details on these important recipient settings.
-
Select the Send Mode Properties Advanced tab to set the PDF Attachment Name created by the reports configured in the Send Mode Properties tab. User-defined file names can be set for each of the corresponding reports set in the Send Mode Properties tab described previously in this section (Report 1, Report 2, etc.).
Set the optional Encryption Password to encrypt the attached sales document. You can use the same data format as the tags in the E-mail Settings tab.

-
Click on the Send Mode Properties E-mail Settings tab as shown below:
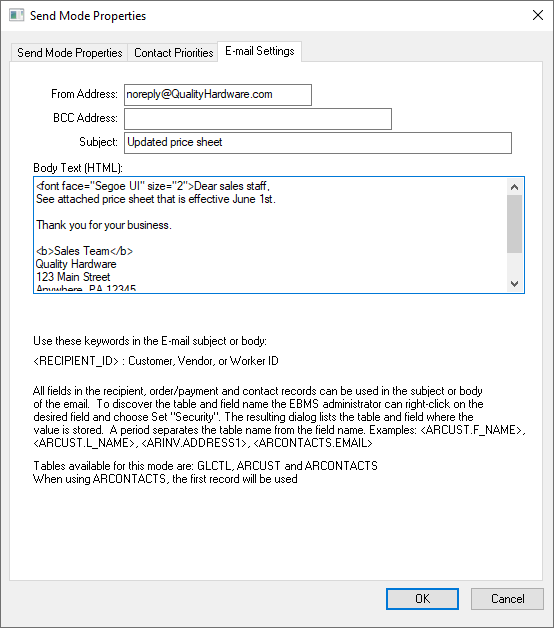
The E-mail Settings determine the details of the e-mail document that will be automatically sent. -
The recommended From Address matches the From Address entered in the File > Auto Send Options > General tab. This address can be a noreply address if no response is desired from the Auto Send e-mails.
-
Use the BCC Address to send a copy of all emails to a sales manager or a department, so they can verify that emails were successfully sent
-
Enter an appropriate Subject line for the email broadcast.
-
Enter the appropriate Body Text using HTML or plain text syntax. The keywords list located at the bottom of the dialog can be used within the email body. Note that line break tags (<br>) may cause extra lines in the email.