The web editor is used to edit static website pages such as the home page, about us, and policies pages. E-commerce product information is edited in the EBMS software. Review the Listing Products on the Website section for information on editing inventory items.
Complete the following steps to edit a web page:
-
Log into the EBMS E-commerce Administration page. Review the Site Administration Overview section for more information on logging in.
-
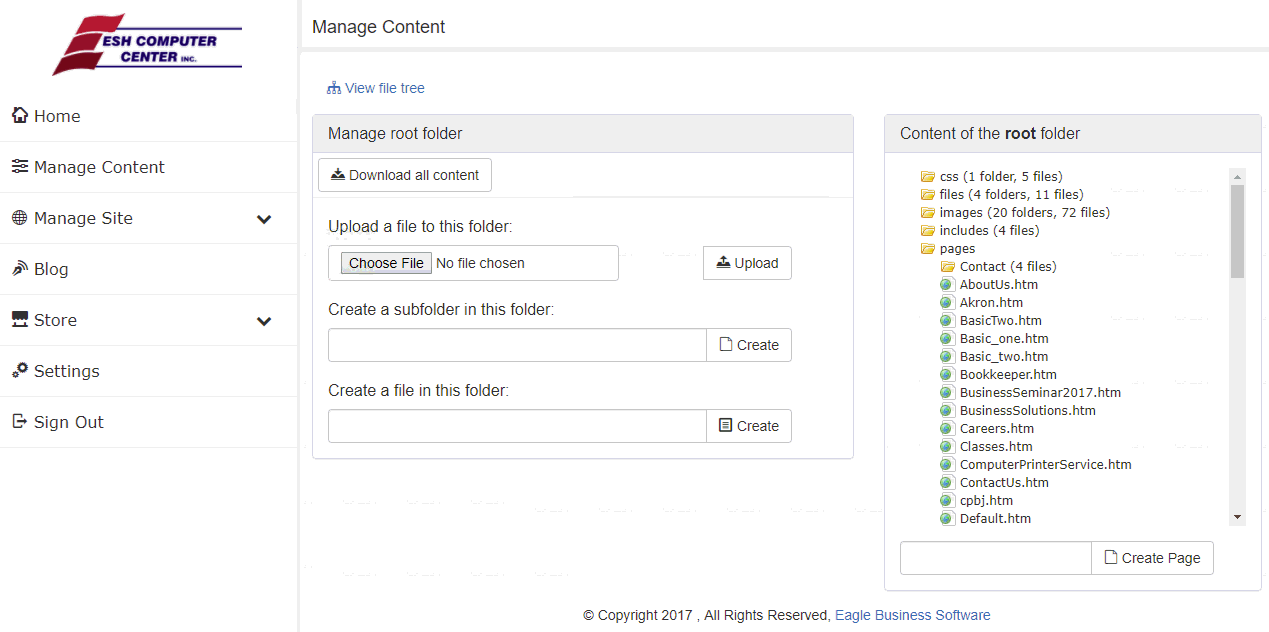
Click on the Manage Content icon.
-
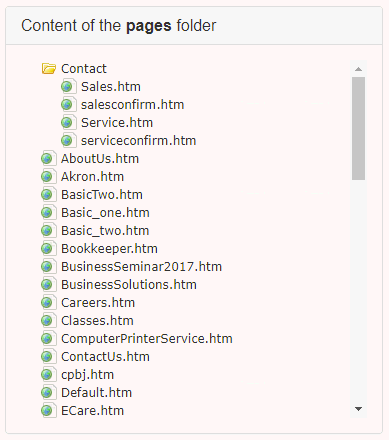
Select the Pages folder as shown below:
-
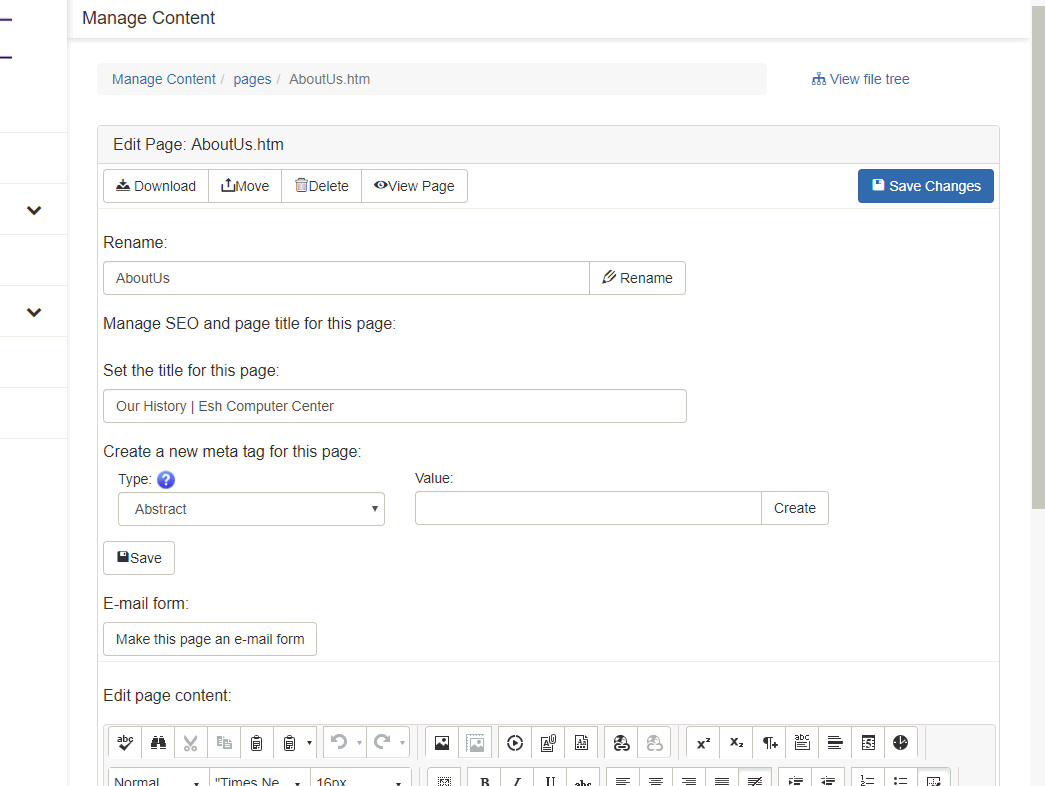
Select a content page to open the web editor and edit the web page. The top of the page is where the file name, page title, and SEO for the page can be managed. Review the Search Engine Optimization section for details on entering SEO.
-
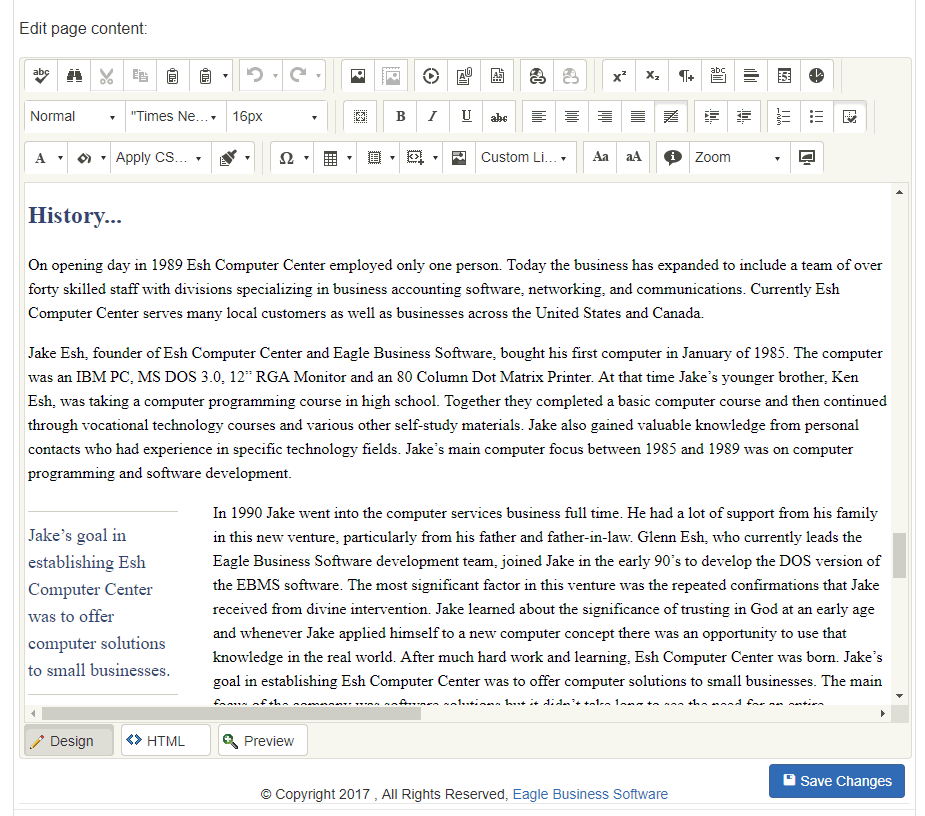
Scroll to the bottom to edit the content of the page. The complete content of the page can be edited using the web editor including links and images as shown below:
-
Select the Save button to save changes on the website page.
Standard Formatting
The RAD editor (the editor used on the web) includes the standard text editing tools.

Adding Hyperlinks
Complete the following steps to add a hyperlink to a page within the website:
-
Highlight the text you wish to appear as a hyperlink and select the Custom Links drop down as shown below.
-
Select the page to be linked.
To add any other hyperlinks:
-
Select the text you wish to appear as a hyperlink and click on the Hyperlink Manager icon as shown below.
-
In the dialog that appears, type in the URL you wish the text to link to. To link to a document on the website, select the Document Manager Icon
 and select a Document.
 -
Choose whether the new page opens in a new tab, a new browser window, or simply navigates directly to the selected URL. In the drop down menu label ‘Target’ choose:
· New Window: for the link to open a new tab
· New Browser: for the link to open a new browser window
Remove an existing link by highlighting the link and then clicking the Remove Link icon as shown below:

The same process can be used to add a hyperlink to a static image. Simply select the image, and follow the steps above.
Style Formatting
Change or add styles to the web page using the icons listed and shown below:

-
Foreground Color (Font Color): Change the color in which your text appears by selecting the text you want to color, click on the Foreground Color icon and choose your color.
-
Background Color (Text Highlighting): Highlight the text by selecting the text and then click on the Background Color icon (indicated by the paint bucket with a drop down arrow on the right hand side) and choose your color.
-
Apply CSS Class: Set for the formatting of different elements within your site using the drop down menu that applies the chosen style to the selected element. This enables the user to apply an existing css style for uniformity without dealing directly with the HTML code.
-
Format Stripper: Remove any style formatting that is applied to any element. Select the element you wish to remove the styling from, and click the Format Stripper icon (indicated by the paint brush icon with a drop down arrow on the right hand side).
Review the Adding Images and Files to the Website section for more information about adding images or files to the website.
Review the Adding a New Web Page section for more information about creating a new page for the website.
Review the Advanced Website Options section for more information about Custom Code for the website.
Select the Save Changes button in the web editor to save the changes to the website. Note that these changes will immediately show on your website. Do not save changes unless the information is ready to publish.
Select the View Page button to view the changes made to the website.