The E-commerce module within EBMS contains many powerful options that must be configured before displaying and selling items online. Each of the following configuration settings must be completed before continuing with the e-commerce setup and processing:
-
Data Synchronization: The user name and password for the Sync tool must be entered for the communication of the website with the EBMS data.
-
General Website Settings: The website settings, options, and site defaults must be set for each website. Review the General Website Settings section below for details.
-
Group Settings: Group settings are used to configure Shipping Options and messages for groups of customers. Each website requires at least one group setting. Review the Group Settings section for more details.
-
Payment Options: Credit card payment options for the e-commerce shopping cart must be configured. Review the Payment Options section below for details.
Data Synchronization
Note: E-commerce and the customer portal settings may be hidden if the EBMS data synchronization tool is not configured.
Access the synchronization Website Login by selecting Sales > Web > Data Synchronization from the main EBMS menu.
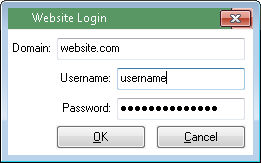
Review the Sync Web Data using the EBMS Data Synchronization Service section for more details on this utility.
General Website Settings
General website settings must be set for each website. The EBMS software allows the user to connect a single EBMS data source to multiple websites. The most common configuration is connecting individual websites to EBMS data sets.
Go to Sales > Web and click on your website URL name to open the following dialog:

Configure each of the Default Customer settings:
-
The Default website customer entry is required for customers who can purchase product online without a login name or password. The generic Customer ID is entered in the Default website customer entry and is used whenever a person submits an order without specifically identifying themselves by logging onto the site. Review the Creating a Generic E-commerce Customer section for more details on the Default website customer setting. It is important that the terms, shipping options, and other settings within this generic customer are configured before customers place e-commerce orders without a login process. Review the Customer Accounts section for more details on allowing or requiring the customer to login.
-
Enable the Switch to existing customer if a matching e-mail address is found option to compare the customer's e-mail address on an order received from a generic customer (customer that has not logged into the system with a user name)with existing customer e-mail information within EBMS. This allows the order to be entered without logging in but matched with the customer using e-mails information within EBMS. Disable this option to manually move orders to existing customer records or create new customer records.
-
Enable the Create a new customer if no matching customer is found option to create a new customer record within EBMS for all customers with no matching records.
Set the Base Inventory Folder which is the parent folder of the first level of product folders listed on the e-commerce site. The root inventory folder is selected in most situations.
Set the following Sales Order Settings:
-
Enable the Charge Credit Card Immediately option only if credit cards are to be debited (post-authorized) immediately rather than at the time the invoice is processed. Enabling this option will debit the card immediately at the time of order. If this item is not enabled pre-authorization will verify the card, validate that the amount of the sale available, and allocate the funds for the time period (normally a few days) authorized by the merchant account.
-
Enable the Verify Credit Cards with this amount option if the exact billing amount at the time of the order is unknown. Specify an amount that will be preauthorized to ensure that the card is valid. Companies typically verify with $.50 or $1.00 amounts. When the invoice is processed the actual amount will be charged.
-
Enable the Default shipped date to entry date option if the Ship Date within the sales invoice should be set with the order date rather than left blank.
-
Enable the Default the quantity shipped to equal quantity ordered option to copy ordered quantities to the shipped quantity within the sales order. This option should be disabled to properly manage inventory. Quantity shipped should be manually set when product is pulled from stock.
-
Set the desired Salesperson and Warehouse options if they apply.
-
The Invoice Prefix is prefixed to the invoice number to make the order number unique.
-
The Next Invoice value is incremented each time an online sales order is created.
-
The Custom Settings button allows the user to change custom fields on the website including contact form settings.
-
Use the View Website to quickly preview the site.
-
Use the View Website Admin to login to the online site content management system (CMS).
-
Use the HPP Settings button to enter the Verifone Hosted Payment Page credentials.
Customer Groups Settings
Review the E-commerce Customer Groups section for information on the group settings. There must be at last one Group created before the shopping cart can be used.
New Accounts Website Settings
The following settings involve the options regarding customer created accounts within the website.
-
Enable the Allow web users to create new account option to allow the user to create an EBMS customer account from the website. If this setting is not checked, the customer information will be sent as an email request rather than creating a customer account within EBMS.
-
Enable the Auto-approve new accounts option to allow the user to create a new account and place an order online immediately. This option should be enabled for most retail websites. Normally this option is disabled for wholesale sites or sites that require an approval step for all new accounts.
-
Select the Default Customer Folder. This folder setting is important if the Allow web users to create new account option is enabled.
Review the Web Users Create Customer Accounts section for more details on each of these settings.
Check the required contact fields for the new customer account form on the web.
Inventory Settings
The default Templates settings should equal the common folder and item templates. Review the Product Group Website Templates section for details on template settings.
The Display accessories horizontally in item template when there are more than ___ accessories option determines the way accessories are displayed on the inventory item template. Review the Associate Accessories with an E-commerce Item section for more details on this option.
The Hide manufacturer and Hide manufacturer part number will remove the manufacturing information from the website.
Enable the Show available inventory count on the web to show the individual counts for each item. The available quantity is found on the product record Count tab > Summary > Available. Review Displaying Product Count for more details on this option.
The Show New Icon for ___ days after entry date entry identifies the amount of time a new item is listed on a new items page of the site, or shows a new item star-burst by the new item. Review the Highlight New Products on the Website section for more details on this option.
The Search options is used to determine the number of search result items displayed for both the standard and advanced search pages. Go to Smart Search Website Feature section for details.
Reports Settings
The optional details view within Customer Portal > Payment and Order History allows the customer to view details using the standard invoice or statement form in a PDF format.
Complete the following steps to configure Reports settings:
-
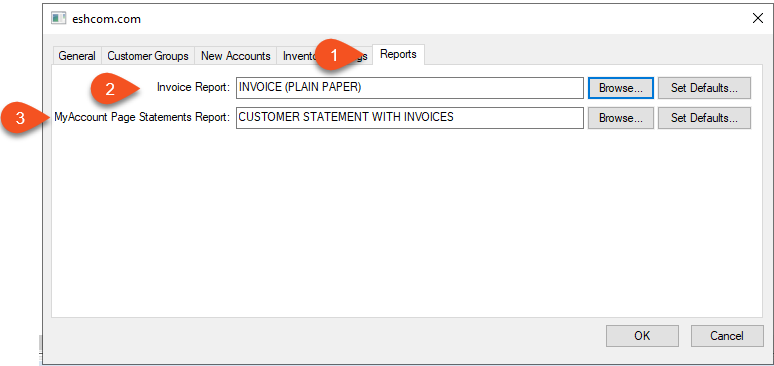
Select Reports tab from the general website settings dialog.
-
The Invoice Report is used to view invoice details. Keep this option blank to view details in a typical HTML web page to view information quickly. Click Set Defaults to preset standard prompt settings.
-
The MyAccount Page Statement Report is used to view or print an outstanding invoice statement.
- Select the optional Proposal Report if the website contains an option to create a quote.
- Click Set Defaults to configure default prompt settings for any of these reports.
- Click OK to save settings for the selected website.
Review Customer Portal Payment and Order History for information on viewing invoice details from the website.
Payment Option:
Select Sales > Options from the main EBMS menu and click on the Payments tab. Each payment method that is available online must be configured for the website. Review the Processing Customer Payments section within the sales documentation for more details.
Click on each payment method that is offered on the E-commerce site and set the appropriate General Ledger account as shown below:
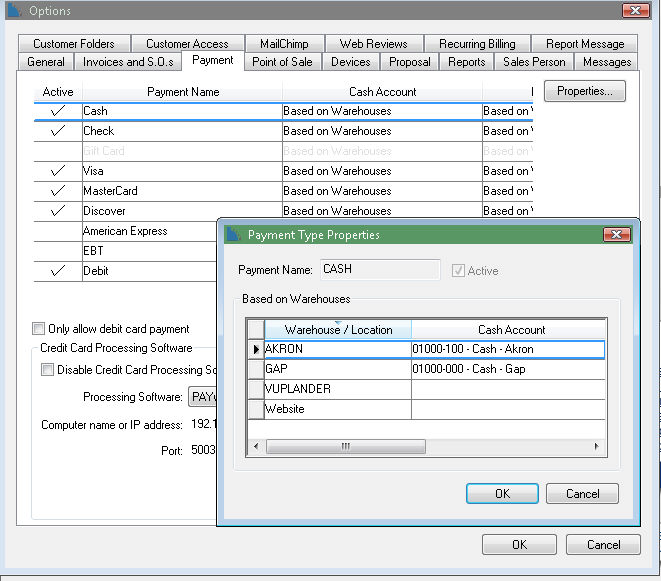
The Company and Website General Ledger accounts should be identical if the same merchant account is used. Create separate G/L accounts if separate credit card merchant accounts are being used.
Review the Undeposited Funds, Deposits, and Reconciling Cash Accounts section of the sales manual for more details on configuring the general ledger accounts for the online payments.