Planning the type of tasks that will be used within the EBMS system and creating these types will greatly simplify the task creation process. Task defaults and standard settings are created within the task type in a similar manner as setting defaults within a worker or inventory folder.
Task Types
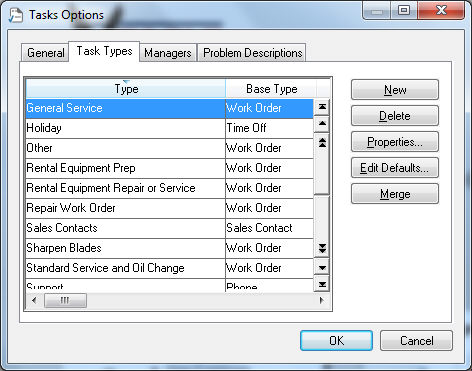
To view, change, or create task types go to and click on the Task Types tab as shown below: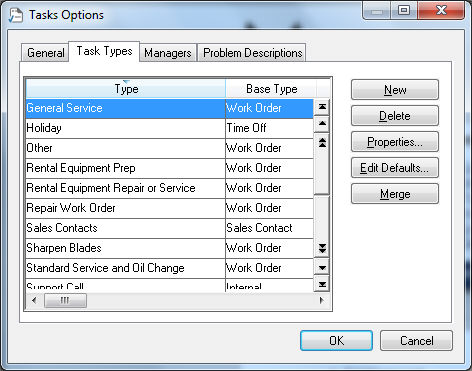
A separate task type should be created if the base type is different (see base type explanation below) or if the default settings of the task (such as labor work codes, service codes, approval processing) are different.
Select a task Type and click the Properties button.
-
Set the appropriate task Type ID.
-
The Base Type is a setting that identifies the format of the new task wizard and some billing processes. The available Base Types are as follows:
-
The Phone type is used to log phone contacts such as support calls. A task with a base type of Phone tracks the time immediately when the task wizard is launched. The phone task is marked completed when the wizard is completed. The Phone task should not be used for sales calls or phone tasks that are ongoing. Review the Using Phone Tasks section for an example of the new task wizard with a base type of Phone.
-
The Sales Contact base type allows the user to utilize the task module as a contact manager. Review the Using Tasks as a Contact Manager section for more details.
-
The Work Order type should be used for any repair order, installation work order, or other general work order task. Review the Time and Materials (T&M) Tasks vs. Contract Tasks for more details.
-
Use the Time Off type to schedule holidays, vacation, and other reasons to reduce the available time. Review the Scheduling Vacation or Other Time Off with Task Types section for more details.
-
-
The Task View setting gives the user the ability to change the appearance of the task. The header of the task can be configured to contain user defined information. Each variation of task layout is identified as a different Task View. Review the Customizing the Task Header section for more details.
-
Individual tabs can be hidden by disabling the tab options. For example, if the task type contains no billing requirements, then disable the Show Billing option. Note that tabs can also be disabled if the information on the tab is located within the customized heading. Review Associated Tasks to show associated task tabs.
-
Click OK to return to the task type list. For example, a small engine repair and rental center could use the list of task types shown below:
The following table lists the probable Base Type Setting as well as the default settings for each task type.
-
The Other task type was created to be used when no other task types are applicable. This type will require the user to enter all the information for a task since the default settings of the other types do not apply. The base type for this setting should be Contract Service unless the miscellaneous task involves billing. Review the Billing a Project or Task section for billing details.
-
Rental Equipment Prep, Rental Equipment Repair, or Service types have a base type of Work Order.
-
The Repair Work Order type was created for general repair tasks. This task type should have a base type of Work Order as well but requires different billing options since the repair labor is billed based on the amount of time that was spent by the repair technician. Review the Time and Materials (T&M) Tasks vs. Contract Tasks section for more details.
-
The Sales Contact type was created for tasks created by the salesperson to track sales contacts. This type is configured with a base type of Sales since a sales contact type is not billed to the worker. Review the Using Tasks as a Contact Manager section for more details on using the Task module as a contact manager.
-
The Sharpen Blades, Standard Service, and Oil Change types were created for common tasks that are billed using a standard fee. A task with a set fee should have the base type set to Work Order. This allows the user to set the time and cost allocated to a standard task such as sharpening blades or changing oil. Review the Attaching a Task to a Service Item section for more details about setting a fixed cost and time to a task.
-
The Support Call task was configured to be used for support calls that are tracked for history. The base type was set to Phone. Review the Using Phone Tasks for more details.
-
The Time Off task was created to schedule vacation time, holiday time, and other time off.
These types are only examples. A company’s task types will vary drastically based on the way the Task module is used within the company.
Task Defaults
The default values should be set for each task type in a similar manner as the default worker settings within the worker folder list in Sales > Options. Complete the following steps to set the default values:
Select from the main EBMS menu. Click on the Task Type tab. Select a task type and click on the Edit Defaults button to open the following window: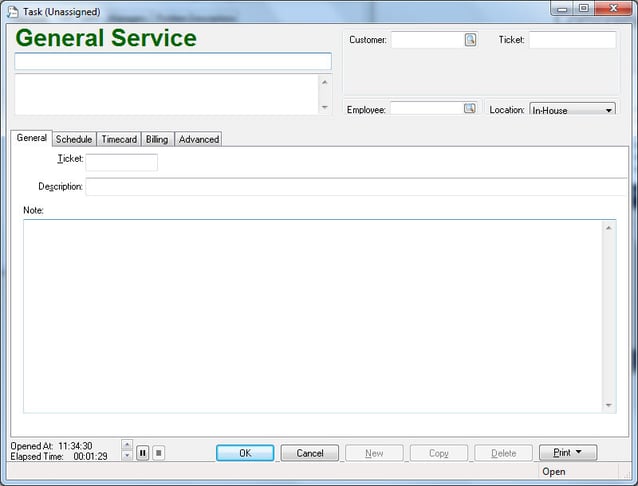
The Task window appears very similar to the task entry window but is used only to enter default values. Any data you enter into any of the entry fields will be defaults the next time you create a new task.
Review the Creating an Open Task section for more details on individual fields. The task heading (top part of task above the tabs) may differ based on the Task Type.
Review the Customizing the Task Header section for more details on customizing this area.
Suggested Task Default Settings
General Tab
Most of the General tab entries should be kept blank. A set of instructions or a memo template can be entered into the Note area.
Schedule Tab
Set the default Location option to either In-House or On-Site based on the standard location for this type of task.
Set the standard Priority level. Set to Normal if there is no standard Priority level.
Enable the Estimate option and enter the Estimated hours if the estimated amount of time spent on this type task is consistent. Review the Estimated, Billable, and Actual Time section for details on the Hours settings and the Estimate option.
Enable the Confirmed option only if every new task is confirmed immediately and the user does not want to manually set this option.
Enable the Flexible Schedule option if this task type is not scheduled with exact appointments but is given a range of time.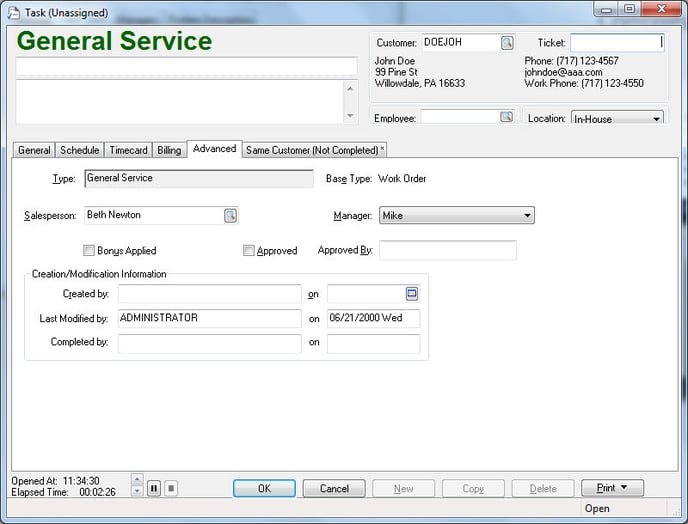
Most of the other entries within the Schedule tab can be kept blank.
Timecard Tab
The Work Code setting should contain the default work code used by the employee when entering time into the task. This setting should be populated since the work code should be consistently associated with the task type.
The Job and Stage settings should only be populated if the task always relates to the same Job. These entries will only appear if the job costing module is installed. Review the Job Costing documentation for more details on these settings. These entries are blank within the default settings under normal situations.
The remainder of the settings on the Timecard tab should remain blank.
Billing Tab
Enter a Worker ID in the Worker field. If the task does not relate directly to a worker, leave the field blank or enter a generic worker ID. For example, if the Rental Equipment Prep tasks are not billed to a worker, the Worker ID could be set to a generic worker or company name (example: QUAHAR – Quality Hardware). This allows the user to bypass the required Worker ID entry when creating a new task.
Enter a Service Inventory ID if the task is billed using a common inventory code.
The Update document quantity from billable time option and the Update billable time from actual time options are important to streamline task and work order billing. Review the Time and Materials (T&M) Tasks vs. Contract Tasks section for details on these options.
Advanced Tab
The task Type will be set from the task properties.
The Manager setting should be set to the appropriate manager to approve or manage the task. Review Approving Tasks and Assigning a Manager for more details on approving tasks before billing.
The Approved switch should be disabled unless this task type does not have an approval step. Review Approving Tasks and Assigning a Manager for more details on approving tasks.
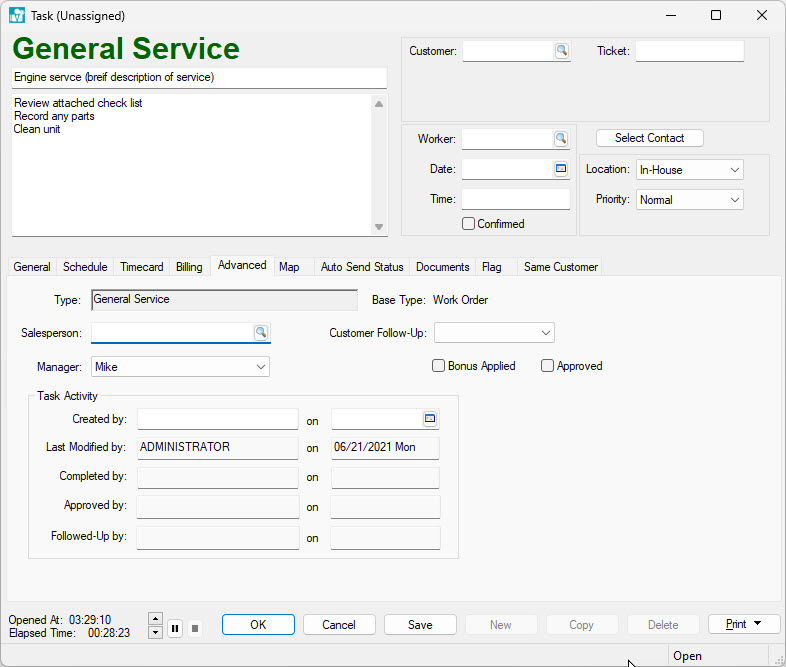
The remainder of the fields on the Advanced tab should be kept blank or unchanged.
Documents
A template document can be added on the task type. Any file placed into the documents tab of the Edit Default record will be copied to each new task that is created with the same task type. Files such as checklists that need to be filled out for each task can be added to this tab. Review Document Storage for more default document details.