The most common method used to process a customer's payment toward an outstanding invoice is the Customer Payments window. Review Invoice Aging to list outstanding customer invoices for a list of customers.
Complete the following steps to process a customer payment for one or more outstanding invoices or credits.
-
Select from the main EBMS menu to open the following dialog:
-
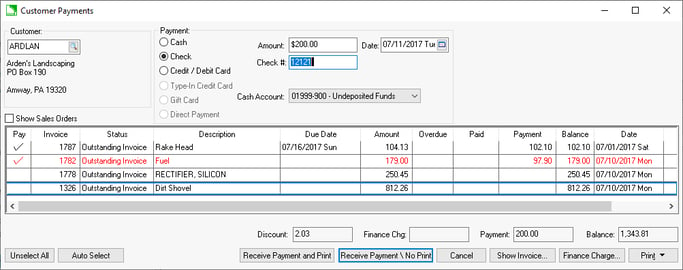
Enter a Customer ID to list all the outstanding invoices for a specific customer. The Customer ID field will default to the current customer highlighted within the customer list. The Discount, Overdue, and Balance due amounts for the customer are displayed below the invoice list.
-
Select the Payment method used by the customer. Additional information is required based on the Payment option.
-
Cash: Enter the Amount of the payment into the Amount entry. Enter the amount Received to calculate the amount of the Change.
-
Check: Enter the Amount of the check and Check # as shown below:
-
Credit / Debit Card: Enter the Amount of the payment and click on the Receive Payment button. The payment card entry will appear. Review the Payment Entry Dialog section for more details on the payment card entry screen.
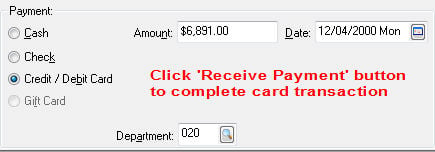
Review the Point-of-Sale > Payment Card Processing section for more details on processing credit cards. -
Type-In Credit Card: This option is used with the web-based payment portal instead of a hardware device.
-
Gift Card: This option requires the integrated Payment Card module. Review the Gift Cards section for more details. If the Gift Card option is enabled, Enter the Amount of the payment and click the Receive Payment button. The payment card entry will appear. Review the Gift Cards > Paying Using Gift Cards section for details on the payment card entry screen.
-
-
The amount can be identified using one of the following methods:
-
Enter the payment Amount and allocate the payment automatically to the oldest invoices: Open to set the Customer Payments: Automatically distribute option. This automated distribution method is only possible if the Customer payments: Automatically distribute option to be enabled. The Auto Select button can be used to activate allocation of the payment amount to the oldest invoices.
-
Select invoices and the system will populate the Amount with the total of the invoices selected.
-
Manually select the invoices: The > Customer Payments: Automatically distribute option should be disabled or click on the Unselect All option after the Amount is entered.
-
-
Enter the Date the customer payment was made. This date defaults to the present date but can be changed by clicking on the down arrow button and selecting a new date from the calendar.
-
The Cash Account will default based on the Payment option. Review the Cash Accounts, Deposits, and Reconciling Cash section for more details on the cash account.
-
Enable the Show Sales Orders option to list sales orders. This option can be found under the customer field on the Customer Payments window. Only outstanding processed invoices will be listed if this option is disabled.
-
Payments can be manually applied to the oldest invoices. Customer payments are always associated with individual invoices. If a customer is making a general payment that is not directly associated with an invoice, apply the payment to the oldest invoice. This process can be done by the software or manually selected by the user. Disable the Customer Payment: Automatically Distribute option in Sales > Options > Payment tab to disable the feature within EBMS to automatically distribute the payment amounts to each invoice. Review the Payment Options section for setting details. Note that credits will be selected first and then the invoices if the software automatically distributes the payment. Sales orders will be selected last if the Show Sales Orders option is enabled.
-
Invoice selection can be changed by clicking on the Pay column with the mouse or pressing the space bar on the keyboard. Use the Unselect All button to clear all selected invoices.
-
The Payment amount will default to the balance of the invoice, unless the payment amount does not cover the balance of the invoice. The Payment amount can be changed by the user.
-
The Discount and Overdue amounts can be changed at will before the invoice is marked paid. The discount amount will be calculated automatically based on the customer's discount terms unless the discount was entered manually by the user. The discount is calculated based on the payment Date entered on the upper part of the Customer Payments window. The Overdue amount is calculated when finance charges are processed. Review the Customer Finance Charges section for more details.
The Payment Amount entered within the payment entry section of the Customer Payments window and the Payment total shown on the bottom of the window must match before the payment can be processed. In other words, the payment amount of each invoice (Payment column) must equal the amount of the customer's payment. If a customer is making a partial payment of an invoice, change the payment amount to match the customer's payment. If this amount is less than the balance due, a partial payment will be processed, and the invoice will continue to be listed with a balance due.
If the invoice line is listed with the color red, the Payment amount does not equal the Balance total. This may happen if the total amount of the invoices selected is greater than the customer Payment total.
After the selected invoice payment total matches the customer payment total, click one of the Receive Payment buttons to complete the customer payment process. Select the Receive Payment and Print button to print a payment receipt. Select Receive Payment \ No Print to receive payment without printing a receipt.
All invoices with a zero balance will be removed from the payment window. If an overpayment has been made (the total Paid is greater than the invoice total Amount), a credit balance will show, and the invoice will continue to be listed as outstanding.
After a customer payment has been processed, it will be listed in the deposit window associated with the selected Cash Account. Go to Cash Accounts, Deposits, and Reconciling Cash to get more details on this.
The invoice detail can be viewed by clicking on the Show Invoice button after highlighting the desired invoice.
- Review Printing Customer Statements for more details on calculating customer finance charges.
- Review Partial Payments for more details on processing partial payments for a customer invoice.
- Review Auto Send Customer Payment Receipts to send or print receipts.
- Review Overpayments on Sales Invoices to return or credit an overpayment from a customer.
- Review Processing Customer Credits for more details on dealing with customer credits.
- Review Penny Rounding Cash Payments to round all cash payments to the nearest nickel.
Configuring the Payment Receipt Report
Go to Sales > Options and click on the Reports tab to set the payment receipt report.
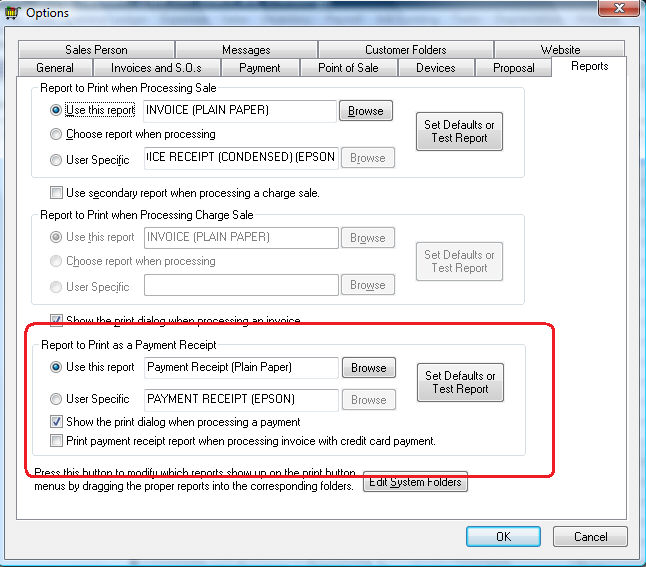
Select the appropriate report option:
-
Select the Use this report option to use a standard company-wide payment receipt report. Click on the Browse button to select the specific invoice report form. The most commonly used form option is Payment Receipt (Plain Paper). Contact your Koble Systems consultant for custom report options. Review the Report Customization section of the main documentation for more details on customizing forms and reports within EBMS.
-
The User Specific report selects the report form based on the user profile of a computer. This option is useful when a specific form is to be printed based on a specific location, computer, or workstation. The MS Windows login user will affect this setting since the report selection is stored within the Windows registry like other user settings. The User Specific report option is often used when a local receipt printer is used in a POS environment.
Enable the Show the print dialog when processing a payment only if multiple forms are used. Enabling this option allows the user to select one of the multiple forms.
Enable the Print payment receipt report when processing invoice with credit card payment options to print a receipt whenever a credit card payment is processed.